Installation
20 Hardware Installation
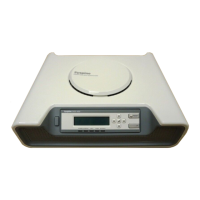
5. Press the panel inward until a click is heard. Apply steady pressure until a
further click is heard.
N
OTE: When located correctly, the LCD panel does not move within the bay.
6. Grip the top ventilation panel (see Front View on page 5) and twist counter-
clockwise to remove it.
7. Invert the ventilation panel so that the Syspine name is readable and
replace the panel.
8. Twist clockwise to secure the panel in place.
2.1.4.3
WALL MOUNTED INSTALLATION
The DOS-A50 wall mounting solution is designed to reduce clutter by locating
the DOS-A50 in an otherwise unused area.
There are two wall mounting slots on the underside of the DOS-A50 (see Bot-
tom View on page 7) for mounting purposes.
At the back of this user’s manual is a wall mounting template to assist in the
positioning of the DOS-A50. To wall mount the DOS-A50, perform the following
steps:
1. Press the LCD panel release button (see Front View on page 5) and lift the
panel clear.
2. Invert the panel and insert it, right-hand side first into the panel bay.
3. Press the panel inward until a click is heard. Apply steady pressure until a
further click is heard.
N
OTE: When located correctly, the panel does not move in the bay.
4. Grip the top ventilation panel (see Front View on page 5) and twist counter-
clockwise to remove it.
5. Invert the ventilation panel so that the Syspine name is readable and
replace the panel.
6. Twist clockwise to secure the panel in place.
7. Locate a clean, even wall space with adequate room for cabling.
8. Print out the template at the back of this manual and place it on the wall
(see DOS-A50 Wall Mounting Template on page 175).
IMPORTANT!
Ensure that the template is printed on A4 paper (or larger) and that the
distance between the drill guides is 100 mm.