Maintenance5556−1/A1
Winterthur Gas & Diesel Ltd.
10/ 18
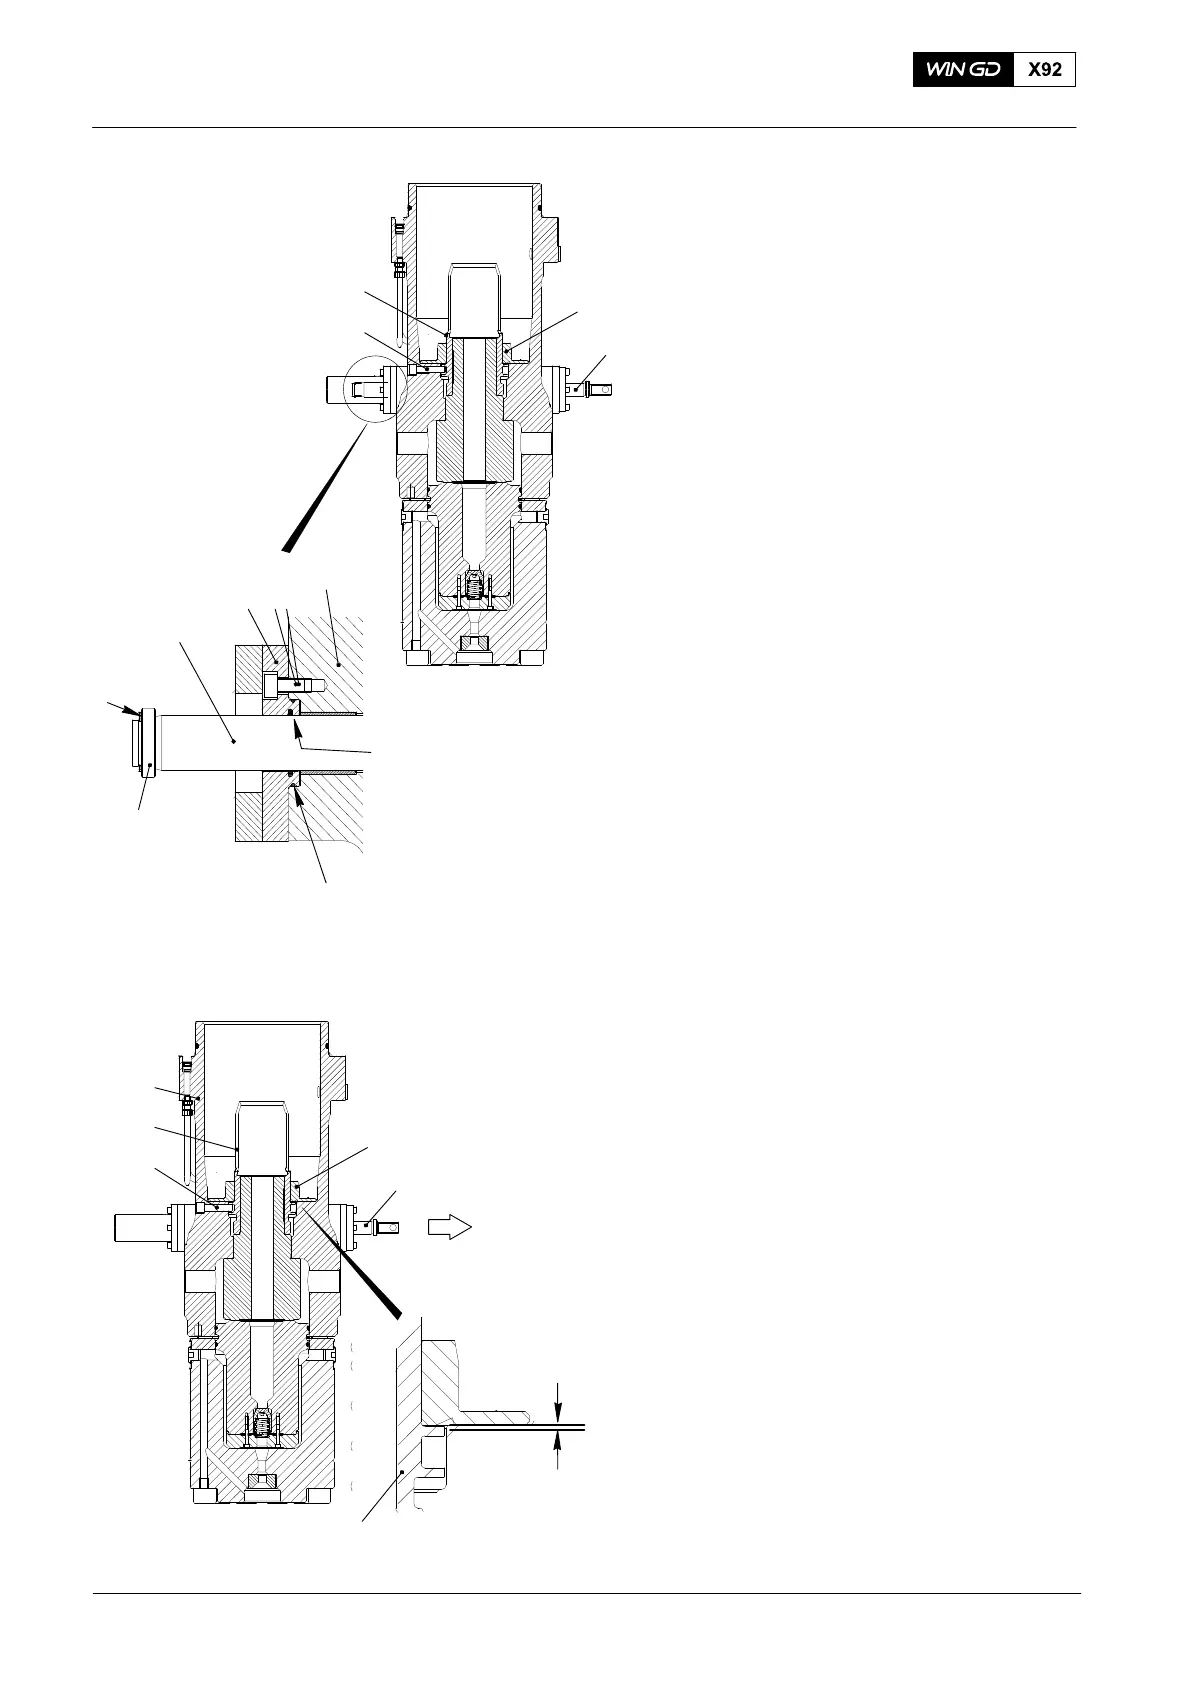
4.4 Upper Housing − Assemble
1) Turn the fuel pump into the position
shown in Fig. 15.
2) Put the toothed rack (2) in position.
Note: Make sure that the toothed rack (2)
moves easily.
3) Put oil on the rod seal ring (5).
4) Put the rod seal ring (5) into the
intermediate flange (8).
5) Put the intermediate flange (8) together
with the O-ring (11) into the upper
housing (10).
6) Install the three screws (9).
7) Attach the rings (6) and the circlips (7).
8) Move the toothed rack (2, Fig. 16) fully
out.
9) Put the regulating sleeve (5) in position
in the upper housing.
10) Turn the regulating sleeve (5) until the
guide pin (4) is in line with the cut-out.
11) Move the toothed rack through the full
range of movement.
12) Put the upper spring carrier (1) in
position in the upper housing.
13) Push the upper spring carrier (1)
against the upper housing, then moving
the regulating sleeve (5) up and down.
14) Use a dial gauge to measure the axial
clearance between the regulating
sleeve (5) and the upper spring carrier
(1).
15) Make sure that the axial clearance is
between 0.5 mm and 0.7 mm.
Fuel Pump: Disassemble, Assemble
2015
Fig. 15
1
2
3
5
8
2
7
6
4
9
10
WCH03053
Fig. 16
1
2
4
5
WCH03053
Min 0.5 mm
Max. 0.7 mm
3
3
11