Scan
Xerox
®
DocuCentre
®
SC2020
User Guide
137
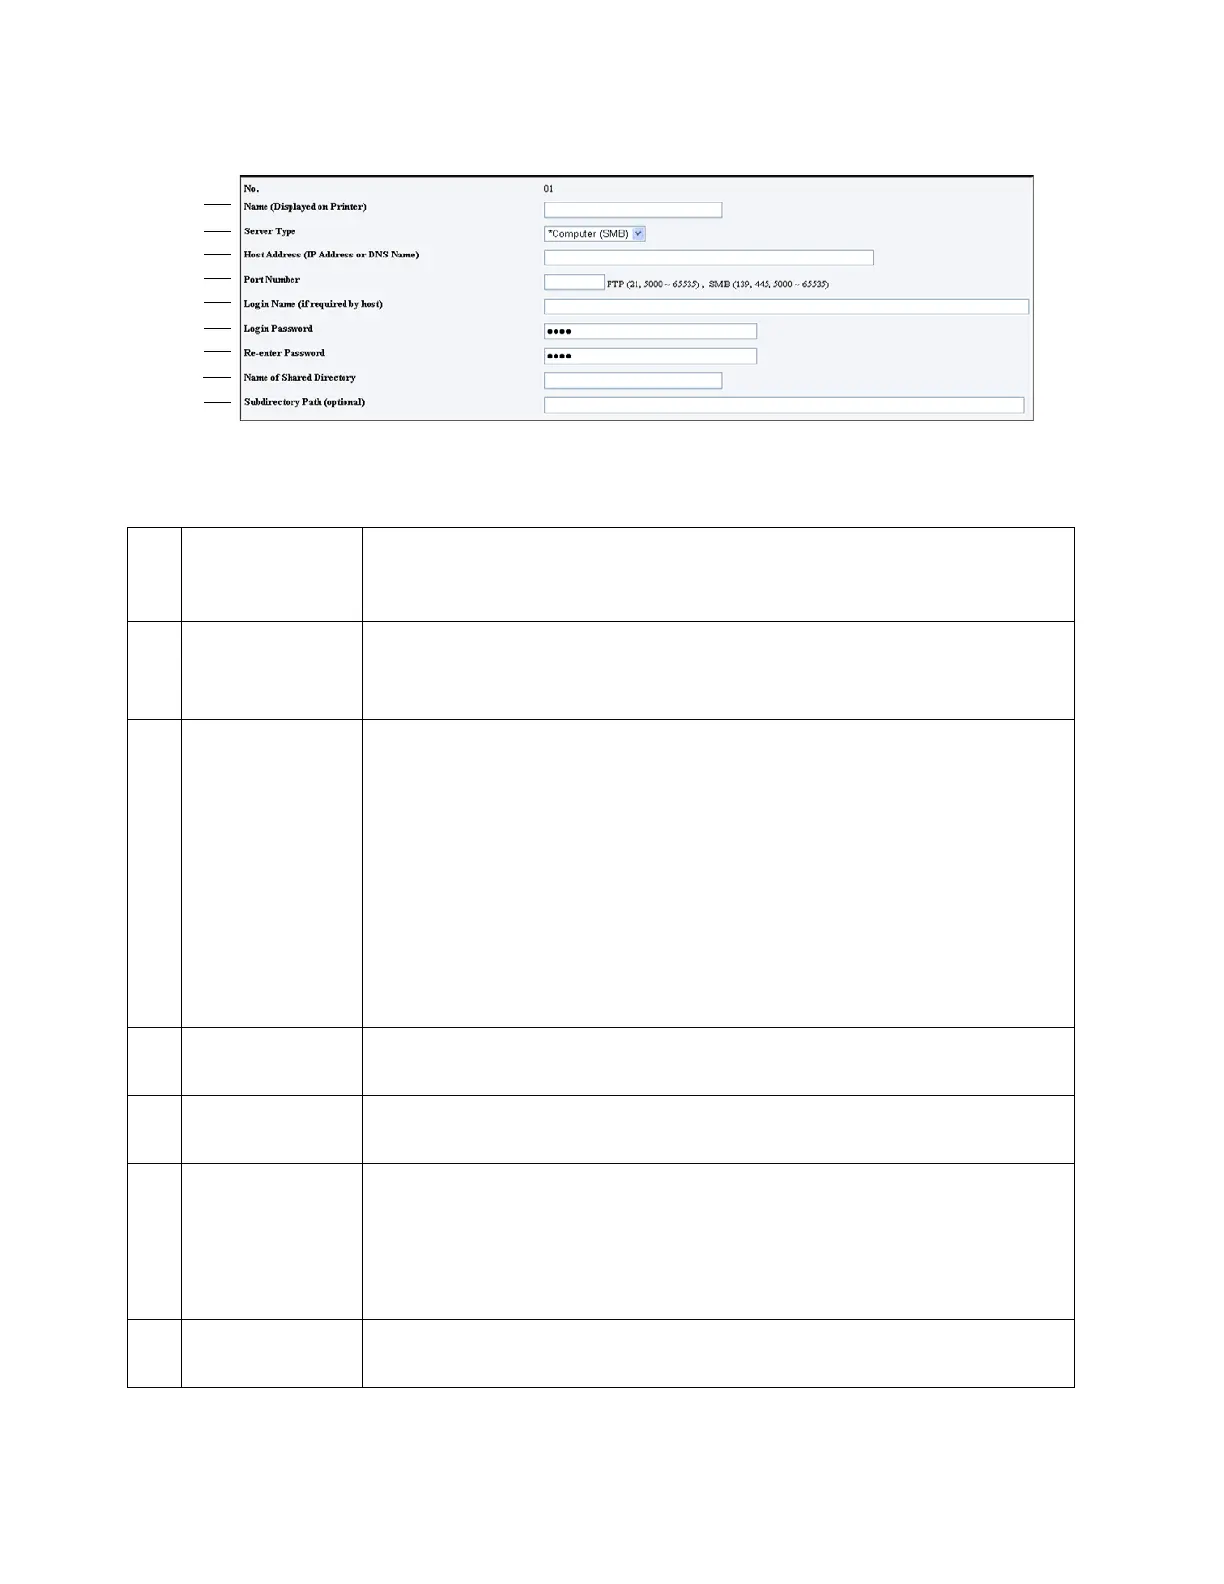
The [Add Network Scan Address] page appears.
To fill in the fields, enter the information as follows:
1Name
(Displayed on
Printer)
Enter a friendly name that you want it to appear on the [Computer/Server
Address Book].
2 Server Type Select [Computer (SMB)] if you store the document in a shared folder of
your computer.
Select [Server (FTP)] if you use an FTP server.
3Host Address (IP
Address or DNS
Name)
Enter a server name or IP address of your computer or the FTP server that
you have shared out.
The following are examples:
• For [Computer (SMB)]:
• Server name: myhost
• IP address: 192.168.1.100
• For [Server (FTP)]:
• Server name: myhost.example.com
• (myhost: host name, example.com: domain name)
• IP address: 192.168.1.100
4 Port Number Enter the port number. If you are unsure, you can enter the default value of
139 for SMB and 21 for FTP.
5Login Name (if
required by host)
Enter the user account name that has access to the shared folder on your
computer or FTP server.
6 Login Password Enter the password corresponding to the above login name.
Note: Empty password is not valid in the Scan to Computer feature. Ensure
that you have a valid password for the user login account. (Refer to
Setting
a Login Name and a Password (SMB Only)
on page 133 for details on how
to add a password in your user login account.)
7 Re-enter
Password
Re-enter your password.

 Loading...


