January 2010
3-14
Phaser 7760 Color Laser Printer
Initial Actions Before Troubleshooting
Revised
Image Quality
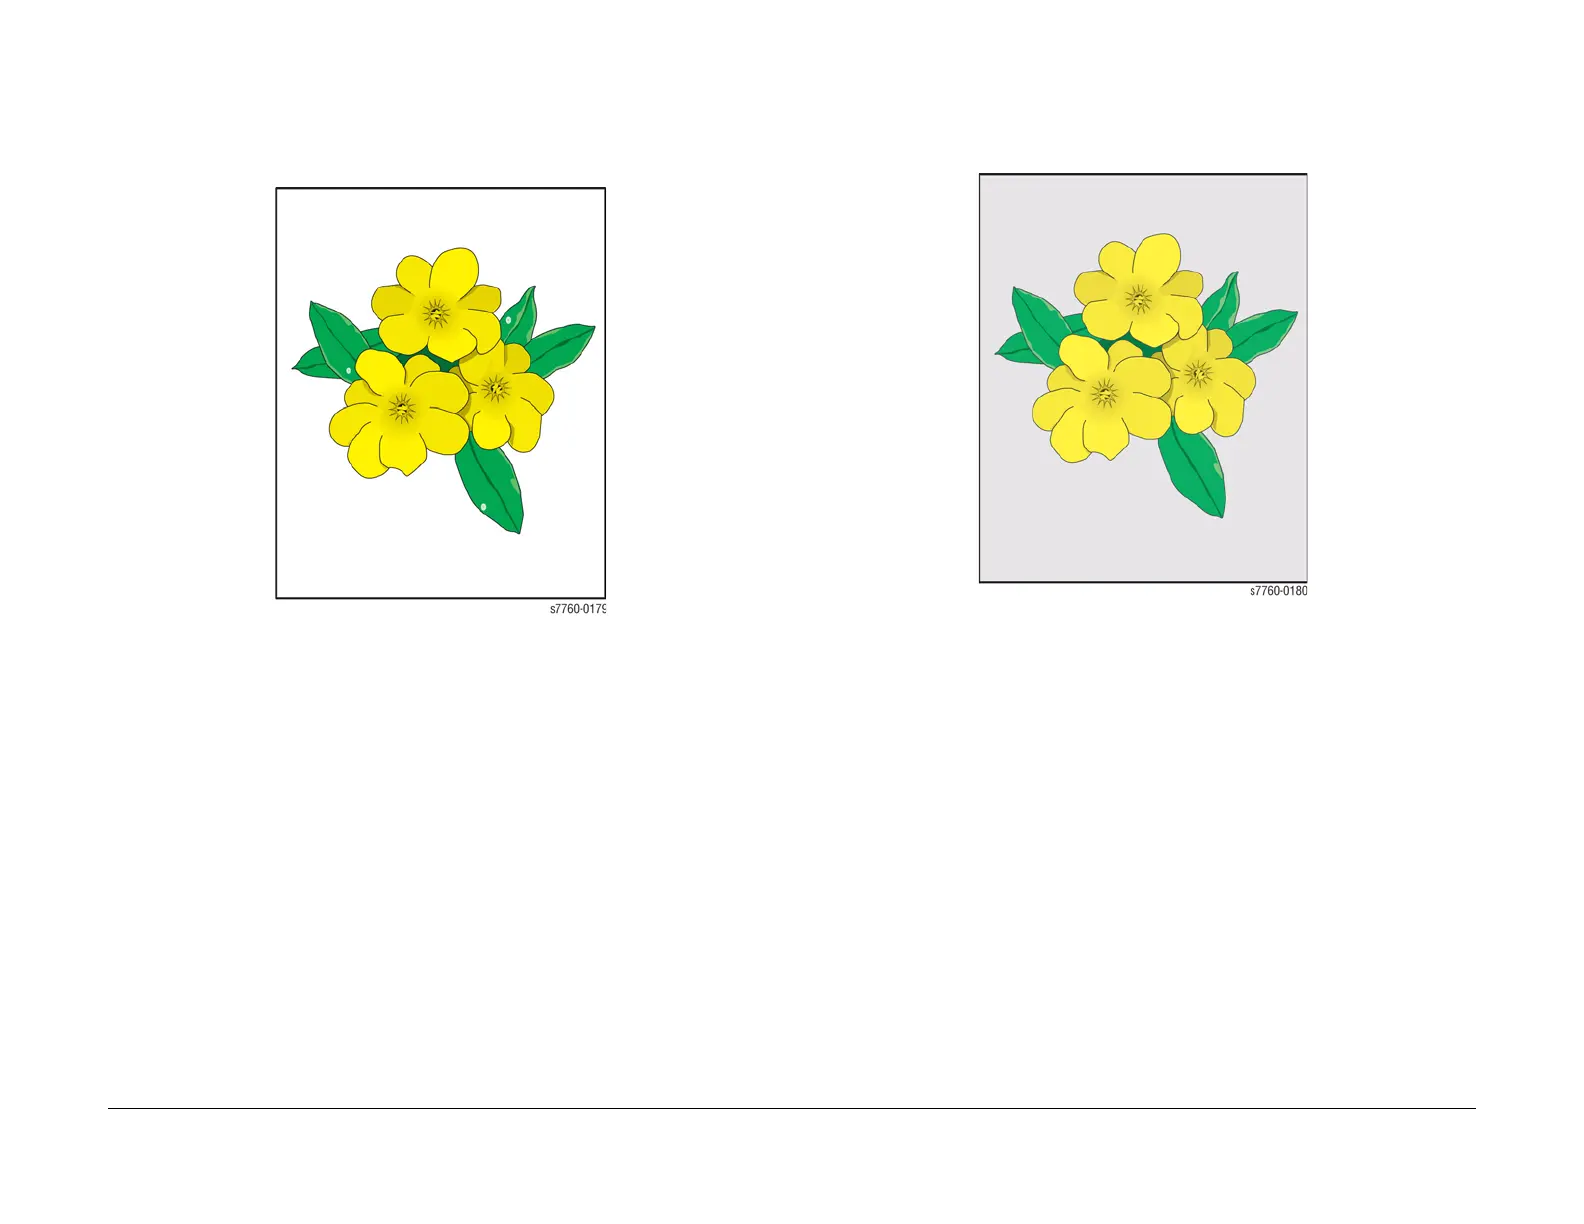
Random Missing Spots
There are small areas of the image that are extremely light or are missing entirely. These miss-
ing areas form spots that are localized to small areas of the page. The printer displays no error
code. A small number of occasional missing spots is normal.
Figure 10 Random Missing Spots
1. If a Toner Low message is displayed, replace the Toner Cartridge in question.
2. Ensure that the loaded media matches the Control Panel settings.
3. Try to use an approved media to see if the spots still appear.
4. Perform Calibrate for Paper procedure (ADJ 9.16) (Printer Menu > Troubleshooting >
Print Quality Problems > Calibrate for Paper > Calibrate for Paper Pages). The printer
prints 9 pages of the Calibrate for Paper process. Follow the instructions on the Calibrate
for Paper to perform the procedure.
5. This could be cold offset. Change the paper type to one type heavier. (from the Control
Panel).
6. Perform Solid Fill Pages procedure (Printer Menu > Troubleshooting > Print Quality
Problems > Solid Fill Pages). The printer prints 6 Solid Fill pages.
7. If the missing spots only occur in a single primary color, replace the Developer Housing
Assembly.
Background Contamination
There is toner contamination on all or most the page. The contamination appears as a very
light grey dusting. The printer displays no error code.
Figure 11 Background Contamination
1. Ensure that the loaded media matches the Control Panel settings. In some cases, switch-
ing the paper type setting, for example from Heavy Laser Paper to Thin Cover/Index,
may improve the print-quality.
2. Perform Calibrate for Paper procedure (ADJ 9.16) (Printer Menu > Troubleshooting >
Print Quality Problems > Calibrate for Paper > Calibrate for Paper Pages). The printer
prints 9 pages of the Calibrate for Paper process. Follow the instructions on the Calibrate
for Paper to perform the procedure
NOTE: Printing on some specialty papers, such as some glossy finish papers may show
some background contamination.
3. Inspect the Imaging Units for contamination. Replace the Imaging Units if necessary.
4. If the Transfer Roller or Belt Cleaner Assembly is near the end of its life, replace that part.
5. If the background contamination is a primary color (and that primary color is missing from
the print), the high-voltage wire leading to that color’s Developer Housing is grounded.
Inspect the high-voltage wiring harnesses.