January 2010
2-22
Phaser 7760 Color Laser Printer
003-949, 003-950
Revised
Status Indicator RAP’s
003-949 Tray 5 Out of Place
Tray 5 not in position.
Initial Actions
• Check that the paper size setting is correct.
• Check the Tray 5 Paper Size Sensor for damage or incorrect mounting. Repair or replace
as required.
• Check the Switch Actuators on Tray 5 for wear or damage. Repair or replace as required.
Procedure
Ensure Tray 5 is closed. Turn the printer power Off, then On. The problem continues.
YN
Return to the Service Call Procedures.
The machine is equipped with a 3TM.
YN
Go to RAP 007-277, Tray 5 Paper Size Sensor (TTM).
Go to RAP 007-273, Tray 5 Paper Size Sensor (3TM).
003-950 Tray 2 No Paper Sensor
Tray 2 No Paper Sensor failure.
Procedure
Remove Tray 2. Enter Service Diagnostics Menu: Printer Menu > Troubleshooting > Service
Tools > Printer Status Page > hold the Up and Down buttons simultaneously > Run Service
Diagnostics > OK. Actuate Tray 2 No Paper Sensor (PL 2.4). The display changes.
YN
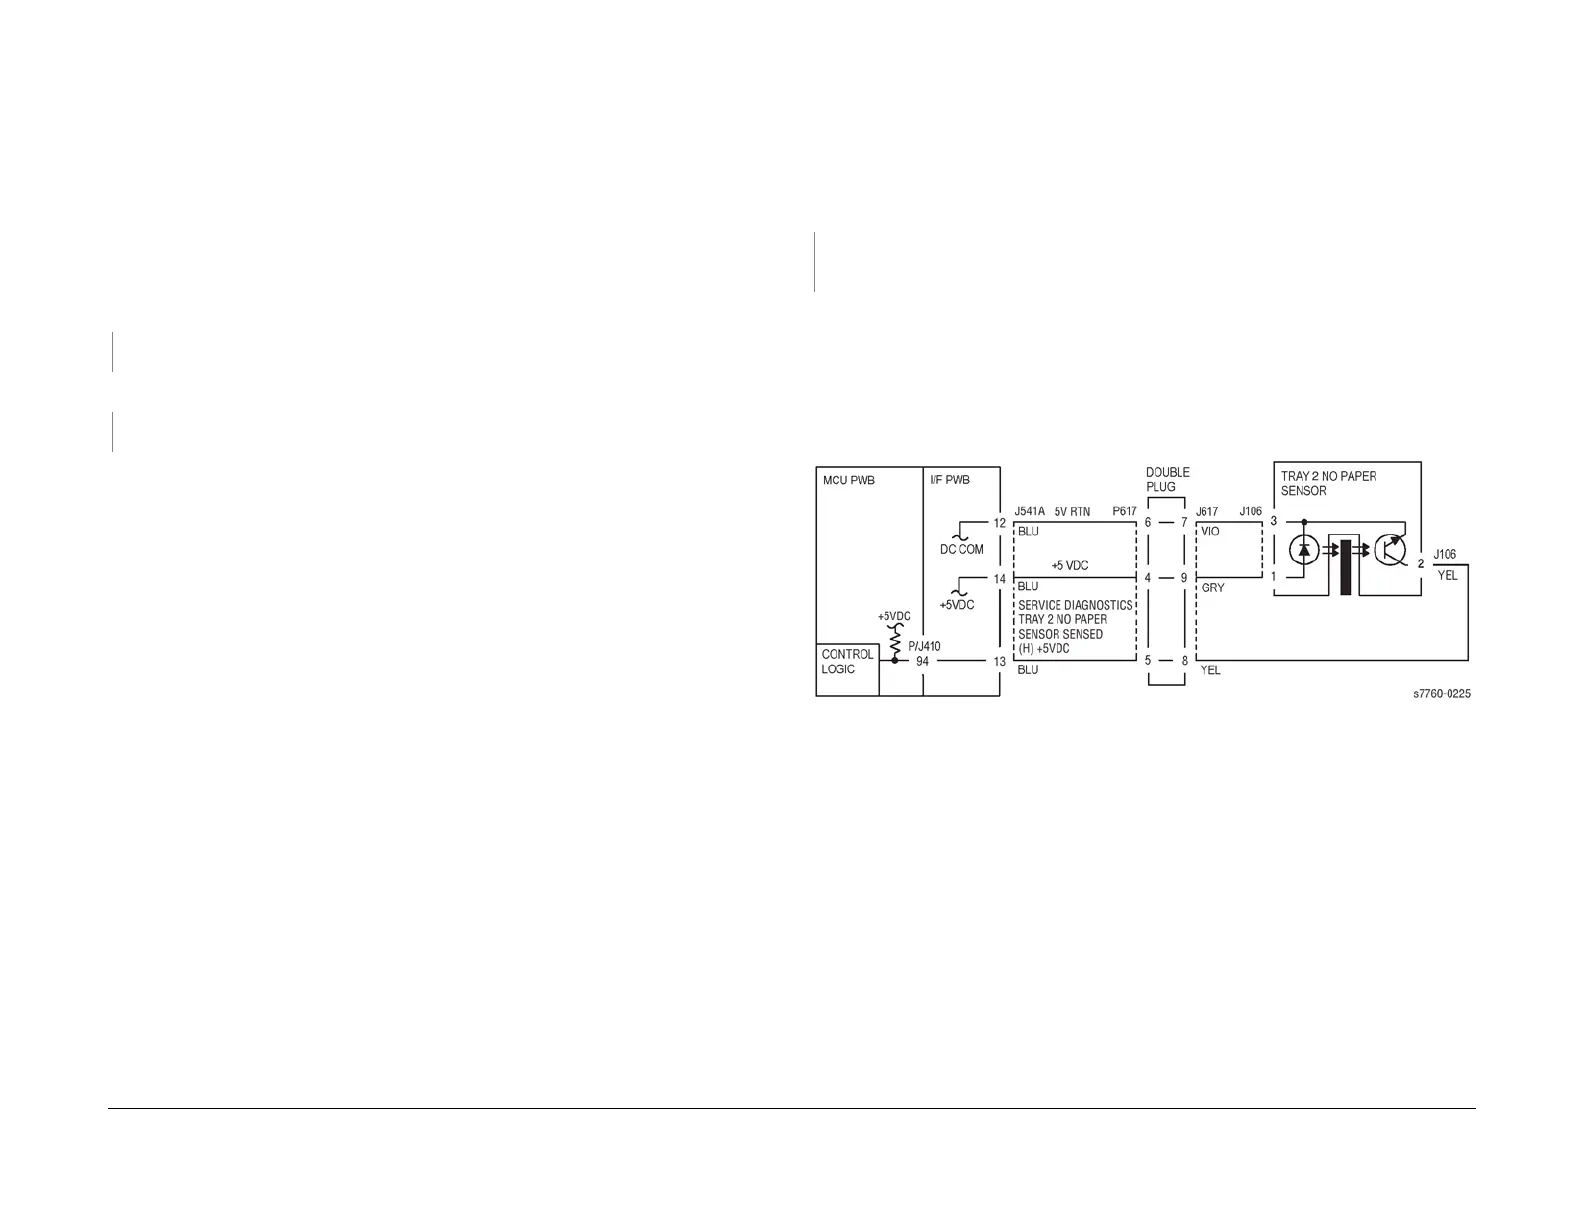
Check the circuit of the Tray 2 No Paper Sensor (Figure 1). Refer to Section 6, Transmis-
sive Sensor Procedure for troubleshooting procedure.
•Go to RAP 007-281 (Tray 2, 3, 4, 5) Lift Failure) and check the circuit of the Tray 2 Level
Sensor.
• Ensure that the connectors shown in the circuit diagram (Figure 1) are securely con-
nected and that the wires are not damaged.
• Replace the Tray 2 No Paper Sensor (PL 2.4).
• If the problem persists, replace the Engine Control Board (MCU PWB) (PL 13.1).
Figure 1 003-950 Tray 2 No Paper Sensor