06/2014
9-3
WC 5022/5024
9.1.1 Installation of Main Unit
Installation/Removal
Version 1.0
9.1.1 Installation of Main Unit
Before Installation
When servicing the installed options at the same time, refer to the following for more effi-
cient servicing.
– 9.1.5 One Tray Module (Product Code: )
– 9.1.6 Stand (Product Code: )
– 9.1.7 Two Tray Module (Product Code: )
Installation Procedures
WARNING
As the Main Unit is very heavy, make sure you have 3 or more persons (2 at the left and
1 at the right) to perform any moving.
1. Open the package and check the bundled items.
a. Main Unit
b. Toner Cartridge
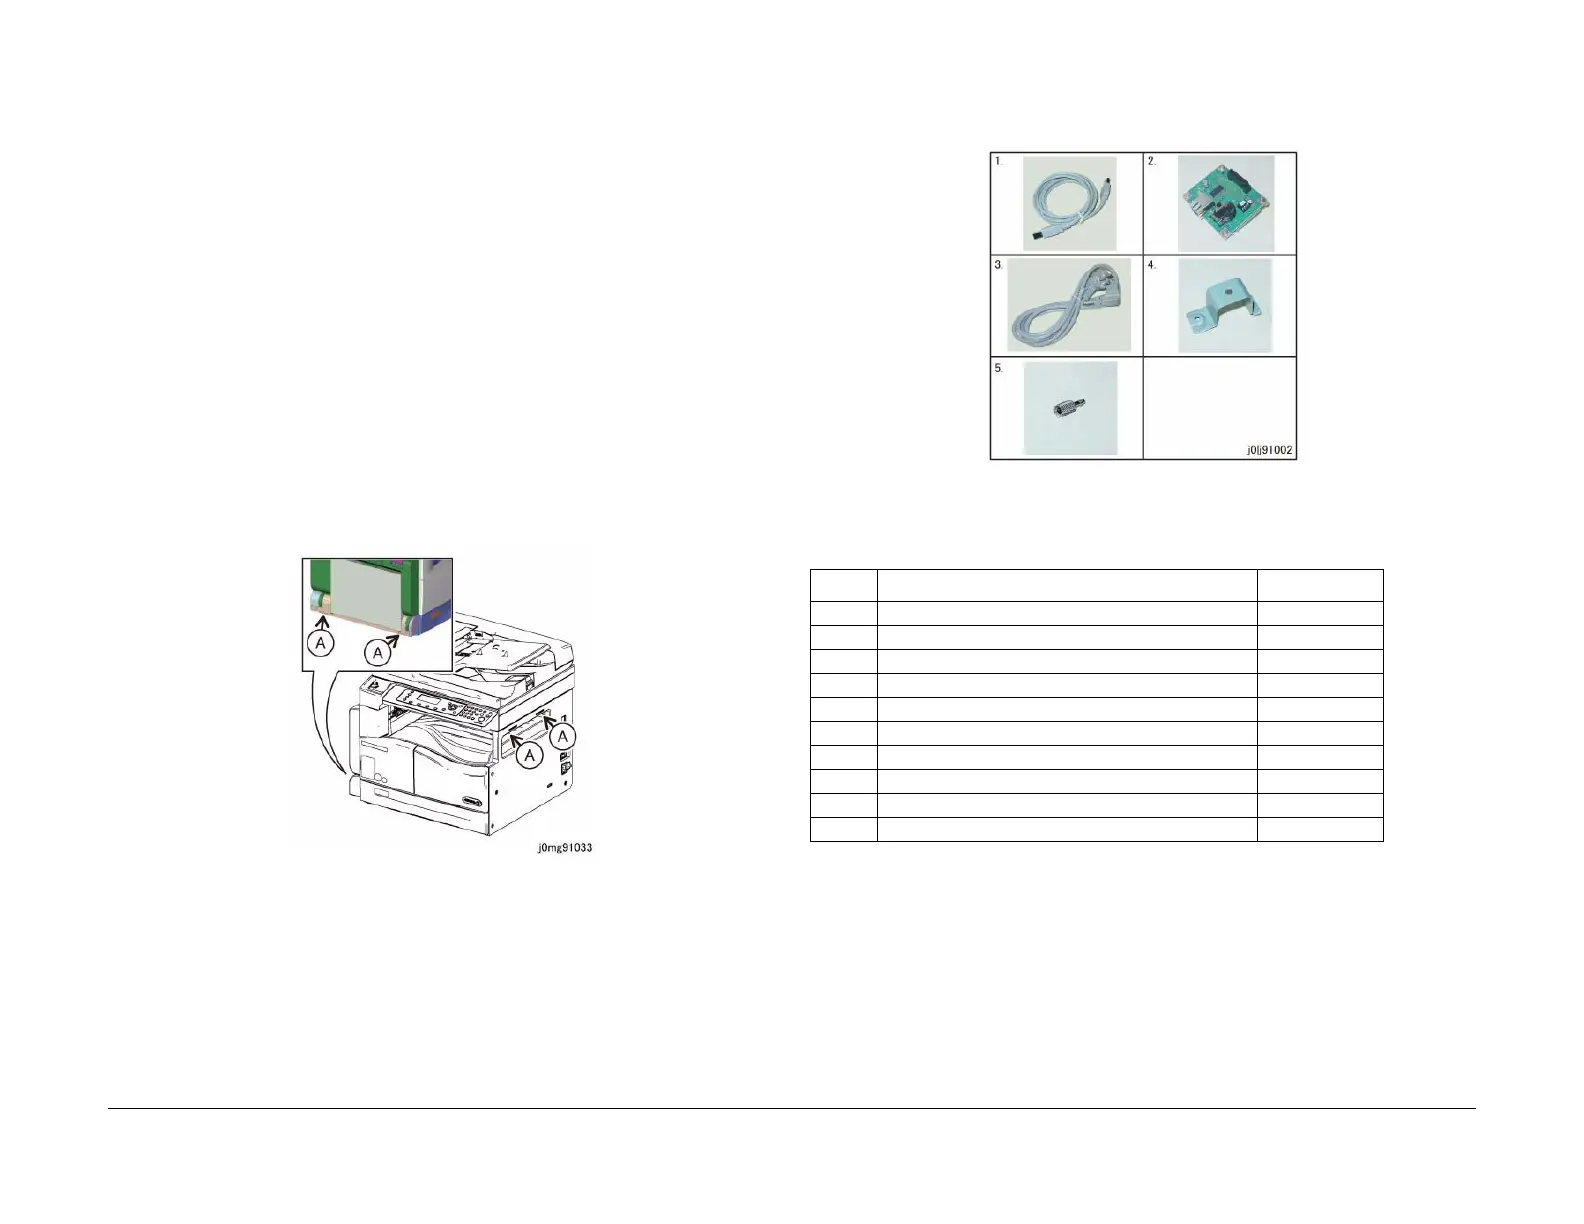
2. Hold onto the Main Unit at the indicated positions (A: x4) and place it at the installation
location. (Figure 1)
Figure 1 j0mg91033
3. Remove the packaging tapes and packaging materials, and then visually check the exte-
rior appearance.
4. Check the bundled items in Tray 1. (Figure 2)
a. USB Cable: 1
b. Power Cord: 1
c. Stopper Bracket: 1
d. Thumbscrew: 1
e. Power Cord Bracket Install Guide: 1
• There is no illustration for Item 6
Figure 2 j0lj91002
• Types of Manual
5. Open the Platen Cover or the DADF, and then remove the Platen Sheet. (Figure 3)
a. Remove the Platen Sheet.
b. Peel off the UI Label protective sheet.
Table 1
No Name Qty
1 Basic Operation Guide 1
2 Driver and User Manual (CD) 1
3 Setup Guide 1
4 NVM List 1
5 Instruction Label 1
6 Check List 1
7 Packaging List 1
8 Warranty Card 1
9 A Letter to Customer 1
10 Engineers History List 1

 Loading...


