1-6
Configuring a History Entry
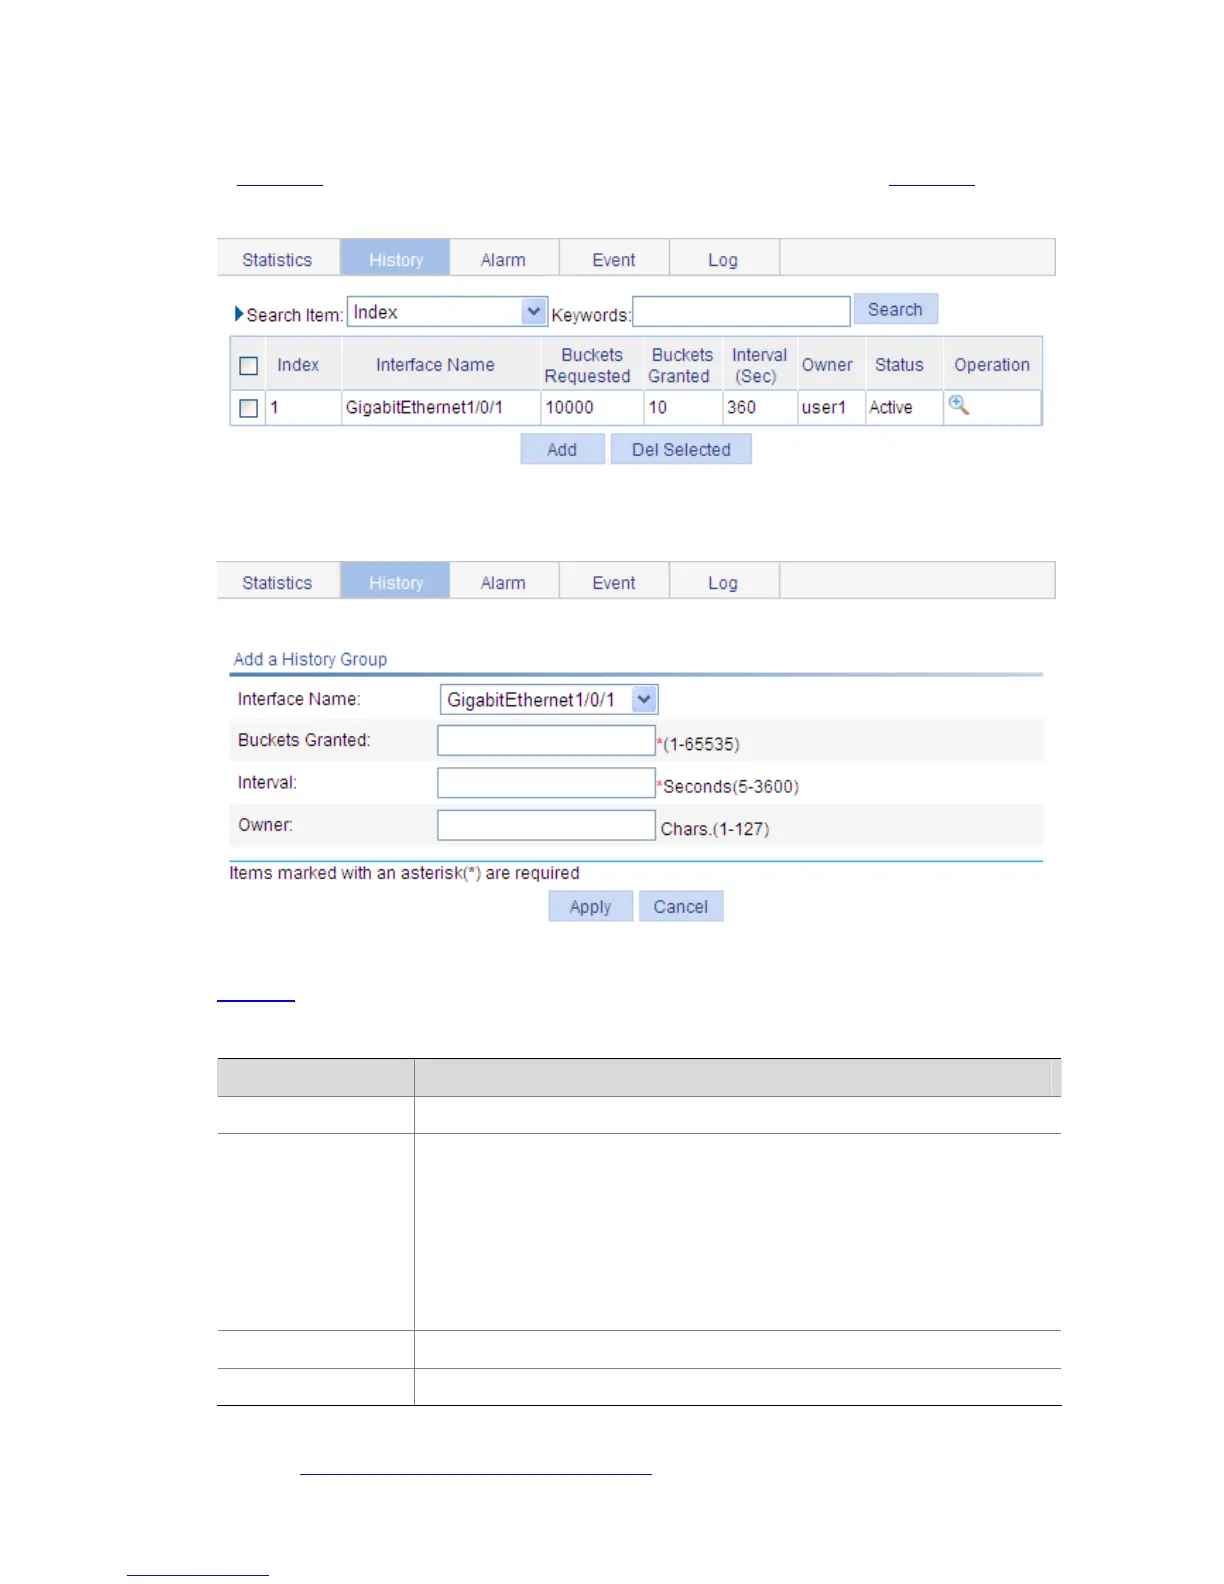
Select Device > RMON from the navigation tree and click the History tab to enter the page, as shown
in
Figure 1-3. Click Add to enter the page for adding a history entry, as shown in Figure 1-4.
Figure 1-3 History entry
Figure 1-4 Add a history entry
Table 1-6 describes the items for configuring a history entry.
Table 1-6 History entry configuration items
Item Description
Interface Name Select the name of the interface on which the history entry is created.
Buckets Granted
Set the capacity of the history record list corresponding to this history entry,
namely, the maximum number of records that can be saved in the history
record list.
If the current number of the entries in the table has reached the maximum
number, the system will delete the earliest entry to save the latest one. The
statistics include total number of received packets on the current interface,
total number of broadcast packets, total number of multicast packets in a
sampling period, and so on.
Interval Set the sampling period.
Owner Set the owner of the entry.
Return to
RMON history group configuration task list.