1
Chapter 1: Fusion Hardware
14
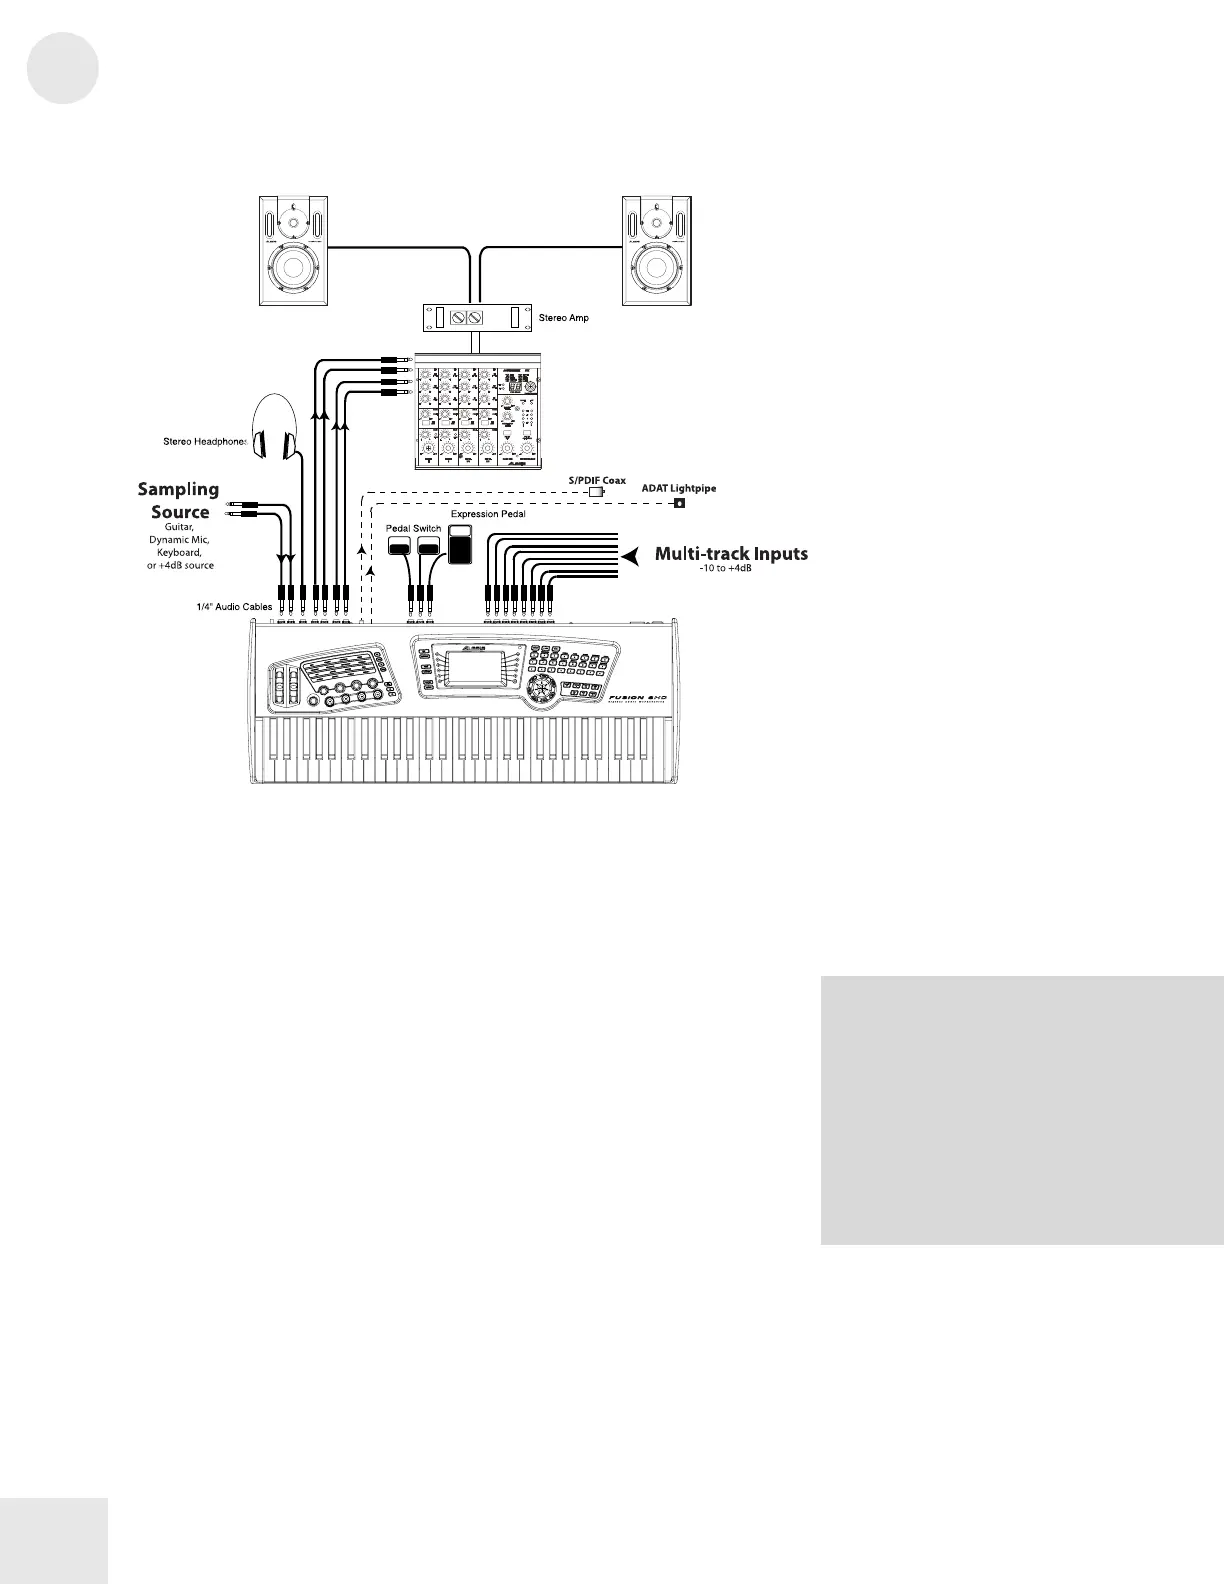
Audio Hookup Diagram:
This diagram will show you how you can hook up your Fusion to the rest
of your studio. Let’s go through and discuss the inputs and outputs.
We’ll start from the left side of the diagram above and work our way to
the right:
Sampling inputs: These inputs—labeled “Left/Mono” and “Right”—
feed the Fusion’s internal sampler. You can use these inputs to capture
sounds to convert into a custom program. The workstation lets you
sample in stereo or mono, and the Gain trim knob lets you to set input
level.
Note that you can use these inputs to route a microphone (or other
external device) through the Fusion’s synthesis or effects engines. This
effectively turns the Fusion into an extremely powerful effects processor.
Headphone outputs: Connect your headphones to this output. This
output mirrors whatever is coming out of the Main Outputs of the
Fusion. In other words, if you’ve routed any sounds out of the Aux
Outputs, you will not hear them in the headphones.
About the Inputs and Outputs:
All audio inputs and outputs use balanced
¼” TRS connectors. You can use
unbalanced ¼” TS cables for these
connections, but you should consider using
balanced cabling for maximum clarity and
lowest noise. This is especially important if
you have long cables in your studio since
audio quality quickly degrades as
unbalanced cabling increases in length.

 Loading...