Chapter 8 — Vector Voltmeter, Option 15 8-6 Vector Voltmeter Measurements Using Table Display
MS20xxA VNA Master UG 10580-00166 Rev. C 8-7
8-6 Vector Voltmeter Measurements Using Table Display
The Vector Voltmeter includes a convenient table display for comparing up to five cables.
With this feature, the user can save the first cable measurement as a reference, can view the
differences among the other cables, and can output a final report showing both absolute and
relative values of all the cables. The following steps describe an overview of the procedure for
using this feature.
1. Press the
Table function hard key.
2. The setup procedure, including calibration, is the same as 4. through 9. in the procedure
described in section “Simple Measurement Using CW Display” on page 8-2. Specify CW
Frequency and perform the appropriate 1-port or 2-port calibration.
3. After calibration, press the
Table function hard key.
4. Preset the Vector Voltmeter Mode for relative measurements by pressing the
Clear
Reference
soft key.
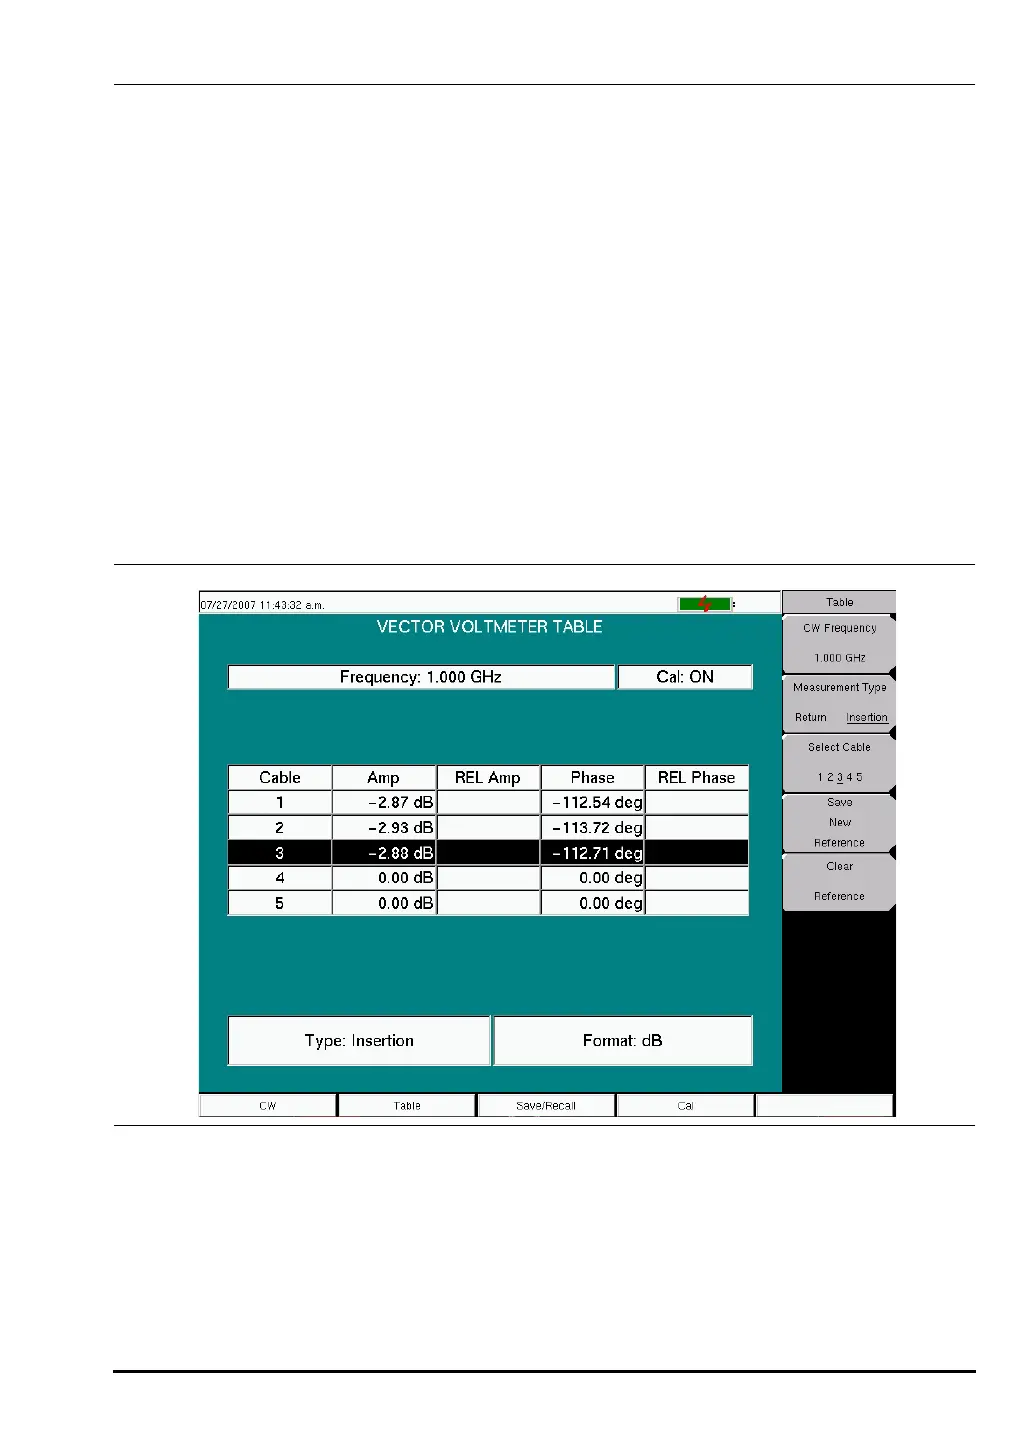
5. Connect the DUT for measurement. The display appears similar to that shown in
Figure 8-6.
6. Save the measurement result of the first DUT by pressing the
Save New Reference soft
key.
7. As shown in Figure 8-7, the VNA Master saves the current measurement in a new
reference window above the table and updates the REL Amp and REL Phase columns
Figure 8-6. Vector Voltmeter Measurement Table
10580-00166C.book Page 7 Thursday, February 21, 2008 12:52 PM






 To Next Page