CHAPTER 3, FLYING THE EFD1000 PRO PFD
EFD1000 PFD Pilot’s Guide
Page 3-16 A-01-184-00 REV B
EFD1000 PFD Pilot’s Guide
EFD1000 PFD Pilot’s Guide
ag ashing, our altitude at 10,200 and climbing, and our Flight Director V-bars
commanding pitch down. We quickly stop the climb, correct back down to our
assigned altitude of 10,000 and engage the autopilot before calling to check in with
Center.
3.2.3. En Route
Albuquerque Center gives us a new altimeter setting of 30.11. We set 30.11 on the
standby mechanical altimeter, and then on the EFD1000.
Press the Right Knob three times to select BARO, shown in magenta above •
the knob, and turn the knob left four clicks to set 30.11 on the meter.
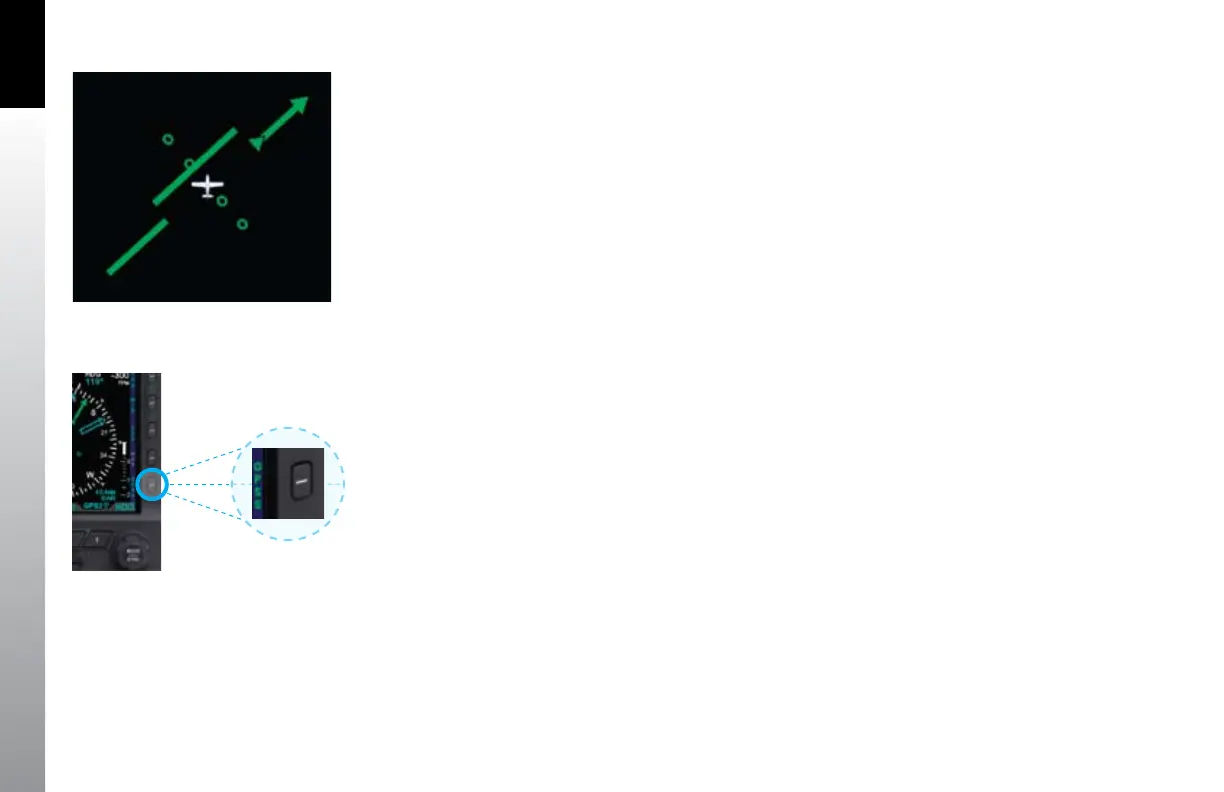
Soon, the CDI comes alive and attracts our attention as it changes from hollowed out
to solid and begins to move in towards the Course Pointer as we intercept our course.
We enable GPS Steering to complete the intercept and steer us along the airways all the
way to Reno (Figure 3-27).
1. Conrm the AP/FD mode selector is still in HDG mode.
2. Press the GPSS Hot Key, and verify its legend turns from gray to GREEN
(Figure 3-28).
3. Verify that the Flight Director is giving proper steering cues to intercept and
track the course.
With GPS Steering (GPSS), a compatible GPS navigator (in this case, a Garmin 430W)
drives the autopilot directly, telling it how to bank to stay centered on course. GPSS
drives the autopilot far more accurately than the AP NAV mode, because the GPS always
knows the ground track and how to adjust to maintain that track, implicitly accounting
for changing wind conditions. The GPS also includes turn anticipation, enabling it to
roll out centered on the new course without overshooting. As we’ll soon see when
ying an instrument approach, GPSS with a WAAS GPS can even y procedure turns and
holding patterns hands-o.
Figure 3-27
CDI Alive and Shown Solid
Figure 3-28
GPSS Enabled (legend in Green)