Version 3.0.1 237 July 2010
MP-20x Telephone Adapter 14. Advanced Settings
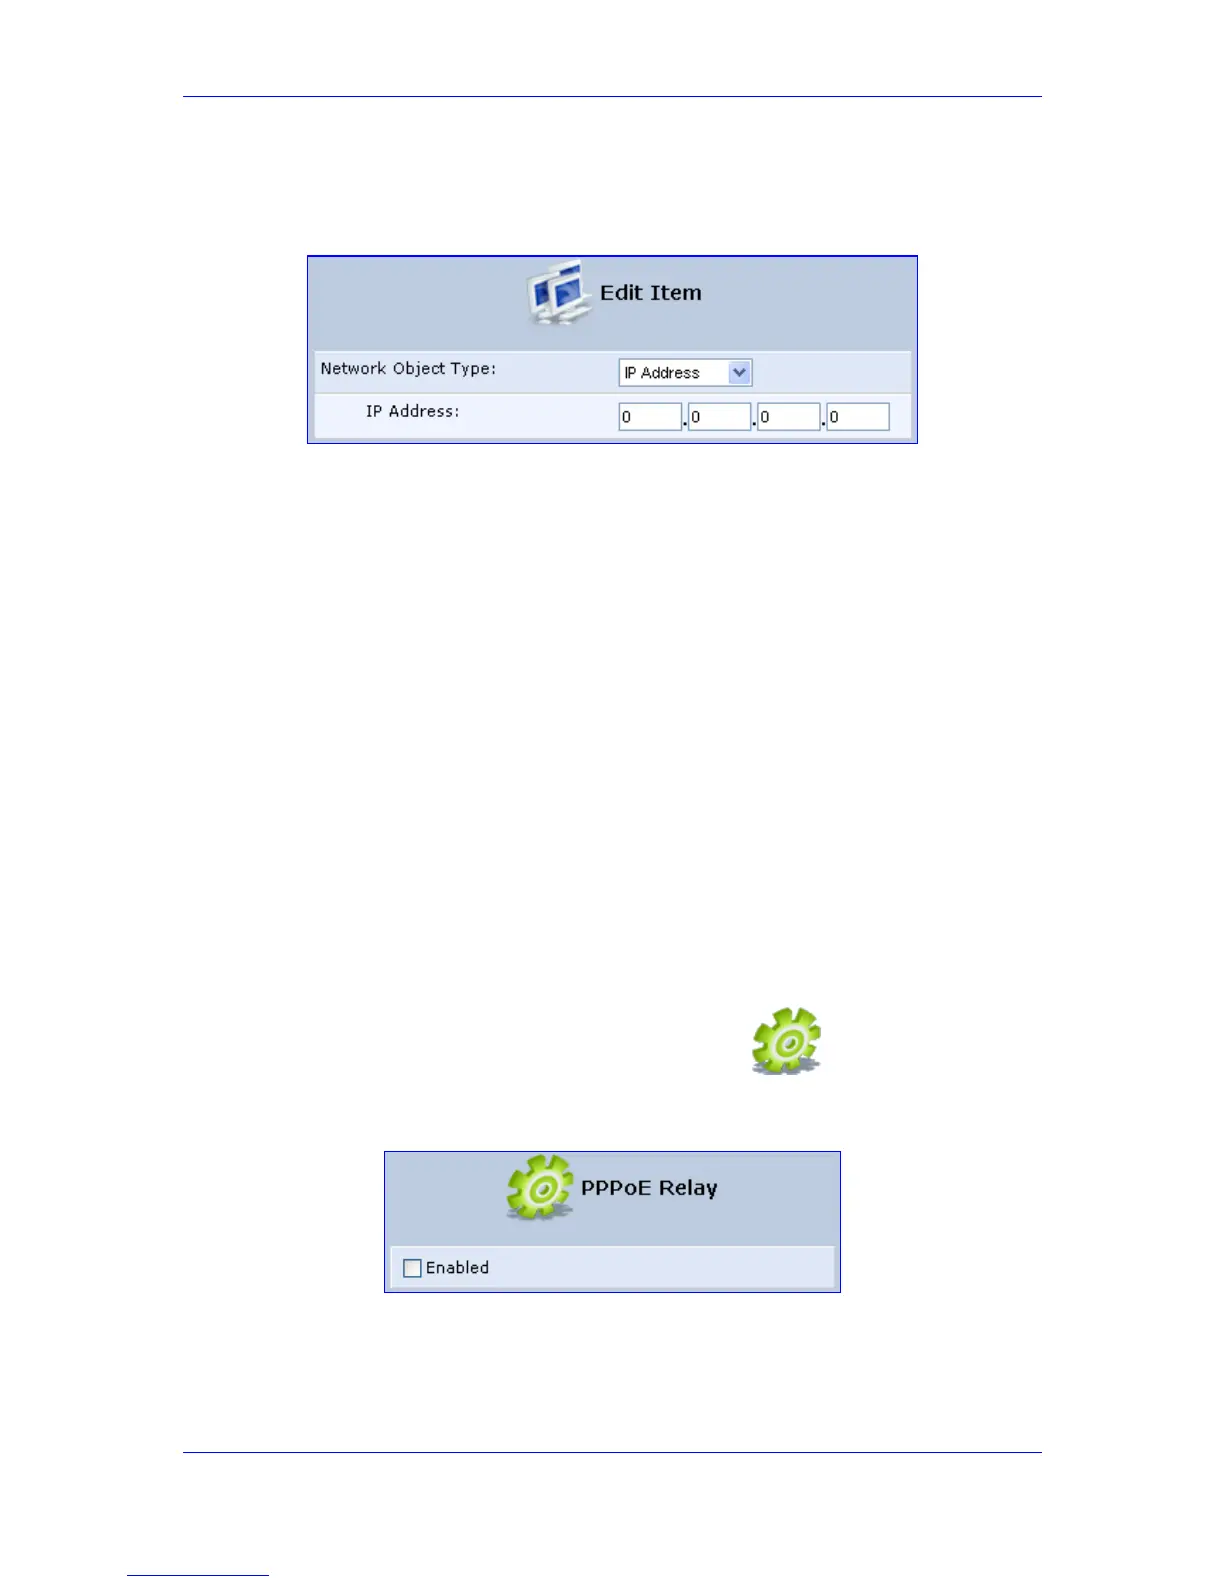
3. In the 'Description' field, enter a name for the network object, and then click the New
Entry link to create it; the 'Edit Item' screen appears.
Figure 14-35: Edit Item Screen
4. From the 'Network Object Type' drop-down lists, select a source address type:
• IP Address
• IP Subnet
• IP Range
• MAC Address
• Host Name
• DHCP Option (supporting options 60, 61, and 77)
When selecting a method from the drop-down list, the screen refreshes, presenting
the respective fields by which to enter the relevant information.
5. Click OK to save the settings.
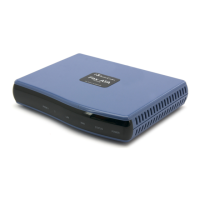
14.10 PPPoE Relay
PPPoE Relay enables MP-20x to relay packets on PPPoE connections, while keeping its
designated functionality for any additional connections. The PPPoE Relay screen displays
a check box that enables PPPoE Relay.
¾ To enable PPPoE relay:
1. In the 'Advanced' screen, click the PPPoE Relay icon; the 'PPPoE Relay'
screen is displayed.
Figure 14-36: PPPoE Relay Screen
2. Select the 'Enabled' check box.