R5906848 /04 DP2K SLP Series 389
• “Replacing Light Pipe lens No2”, page 119.
• “Replacing Light Pipe lens No3 (zoom lens)”, page 120.
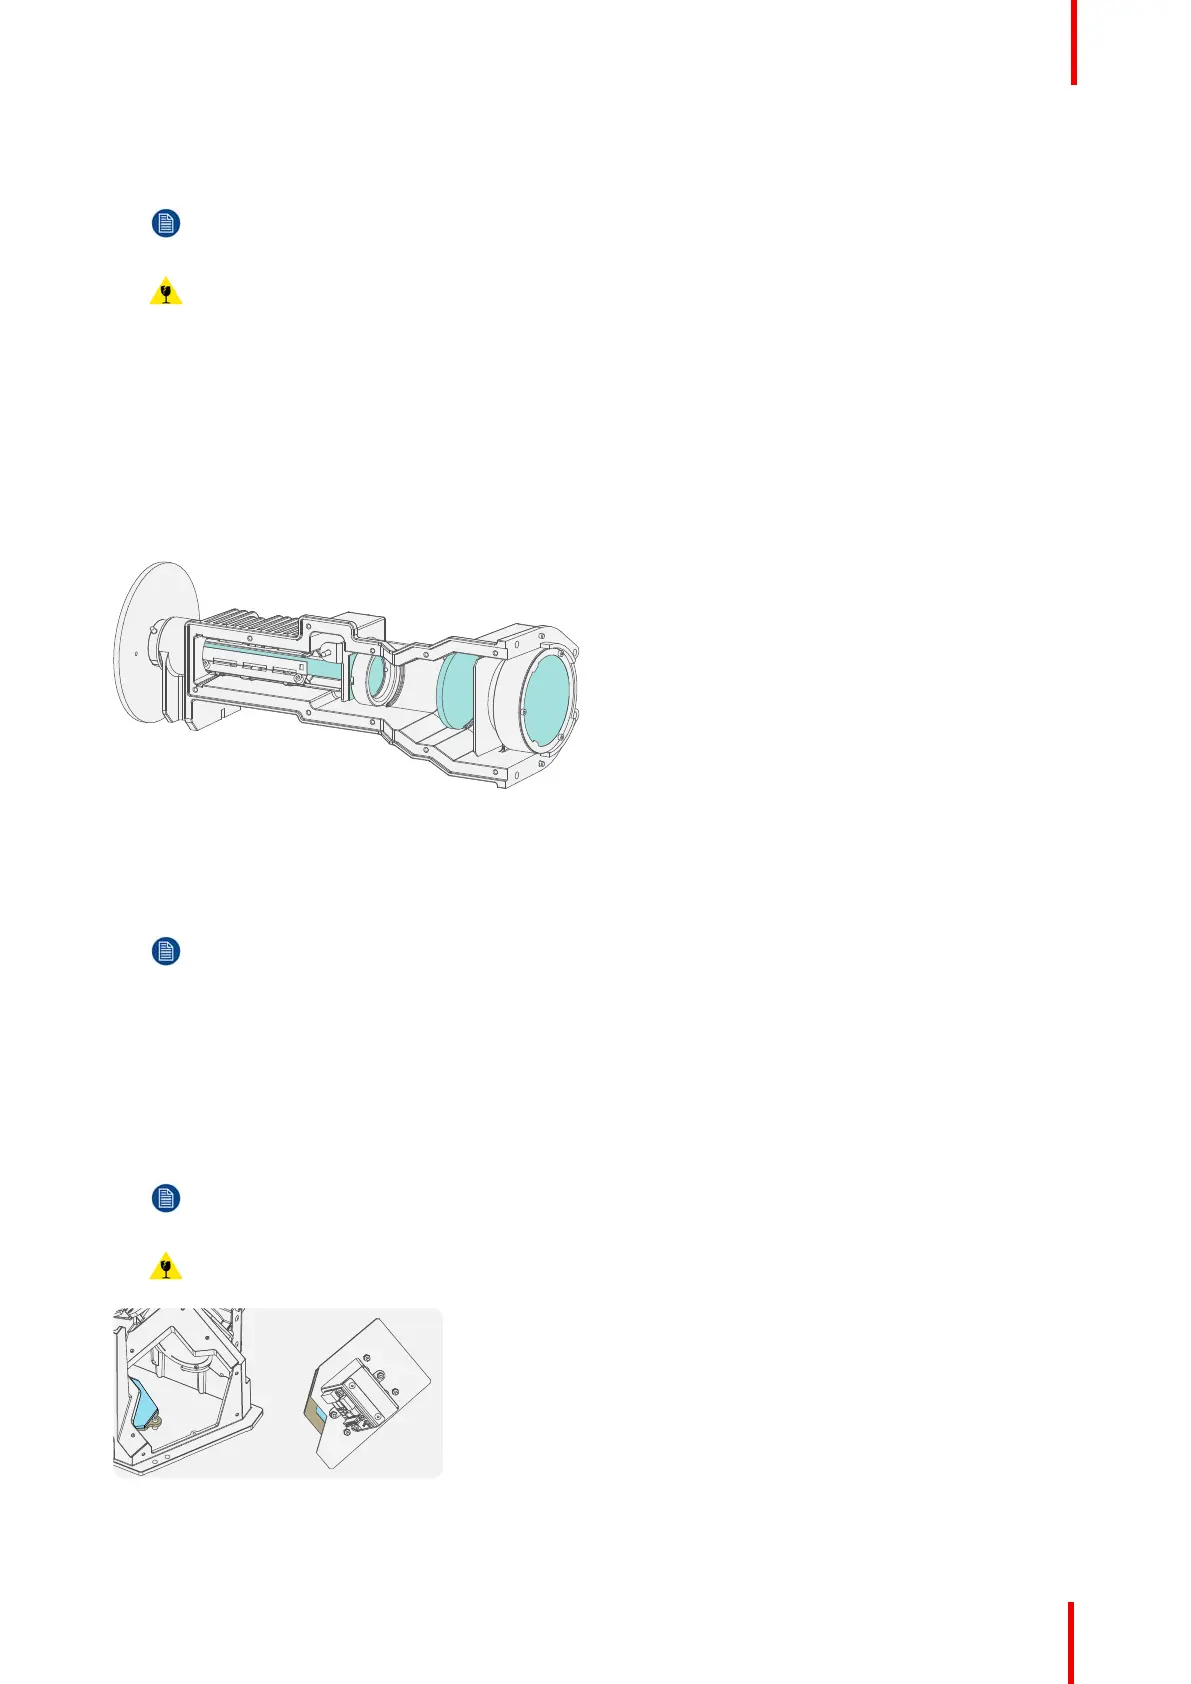
Note: No need to remove lens No1 and No3 from its container.
Caution: Do not remove the Rod. The Rod is a very sensitive part and the risk to break off small parts
is very high.
5. Blow dust off from the inner side of the Light Pipe with compressed air.
6. Clean the Light Pipe Lenses No1, No2 and No3. Follow the general cleaning procedure for optical parts, see
“General cleaning procedure for optical components”, page 384.
7. Install the Light Pipe Lenses No1, No2 and No3 into the Light Pipe. See procedures:
• “Replacing Light Pipe lens No1 (focus lens)”, page 118.
• “Replacing Light Pipe lens No2”, page 119.
• “Replacing Light Pipe lens No3 (zoom lens)”, page 120.
Image 26-9
8. Install the cover of the Light Pipe. See “Installing the Light Pipe cover plate”, page 123.
9. Install the Light Pipe. See “Installing the Light Pipe”, page 123.
Note: Take into account that the Light Pipe lens No1 and No3 needs to be realignment after finishing
the projector cleaning process. See “Adjusting the Light Pipe lens No1 (focus lens)”, page 125 and
“Adjusting the Light Pipe lens No3 (zoom lens)”, page 126.
Light Pipe Fold Mirrors
1. Remove the side cover plate and the Light Sensor assembly from the Corner Block. See “Replacing the Fold
Mirror set”, page 130.
2. Follow the general cleaning procedure for optical parts, see “General cleaning procedure for optical
components”, page 384, or see “Cleaning the Fold Mirrors”, page 134.
Note: There are two Fold Mirrors: one fixed inside the corner block and one adjustable on the rear
side of the Light Sensor assembly.
Caution: Do not push too hard to avoid a crack of the Folding Mirror.
Image 26-10
Projector cleaning

 Loading...


