R5906848 /04 DP2K SLP Series390
3. Install the Light Sensor assembly and the side cover plate onto the Corner Block. See “Replacing the Fold
Mirror set”, page 130.
CAUTION: Light Processor cleaning
Light Processor cleaning is a critical action and should only be done when really necessary. First try
to clean all other optical parts and measure the result. If the light output is not meeting the official
DC specifications at this point swap the light source. If the improvement is not enough then try to
improve the light output by cleaning the Light Processor (see next procedures). Removing and
cleaning the Light Processor may only be done by a trained service engineer and may only be done
in a clean room environment.
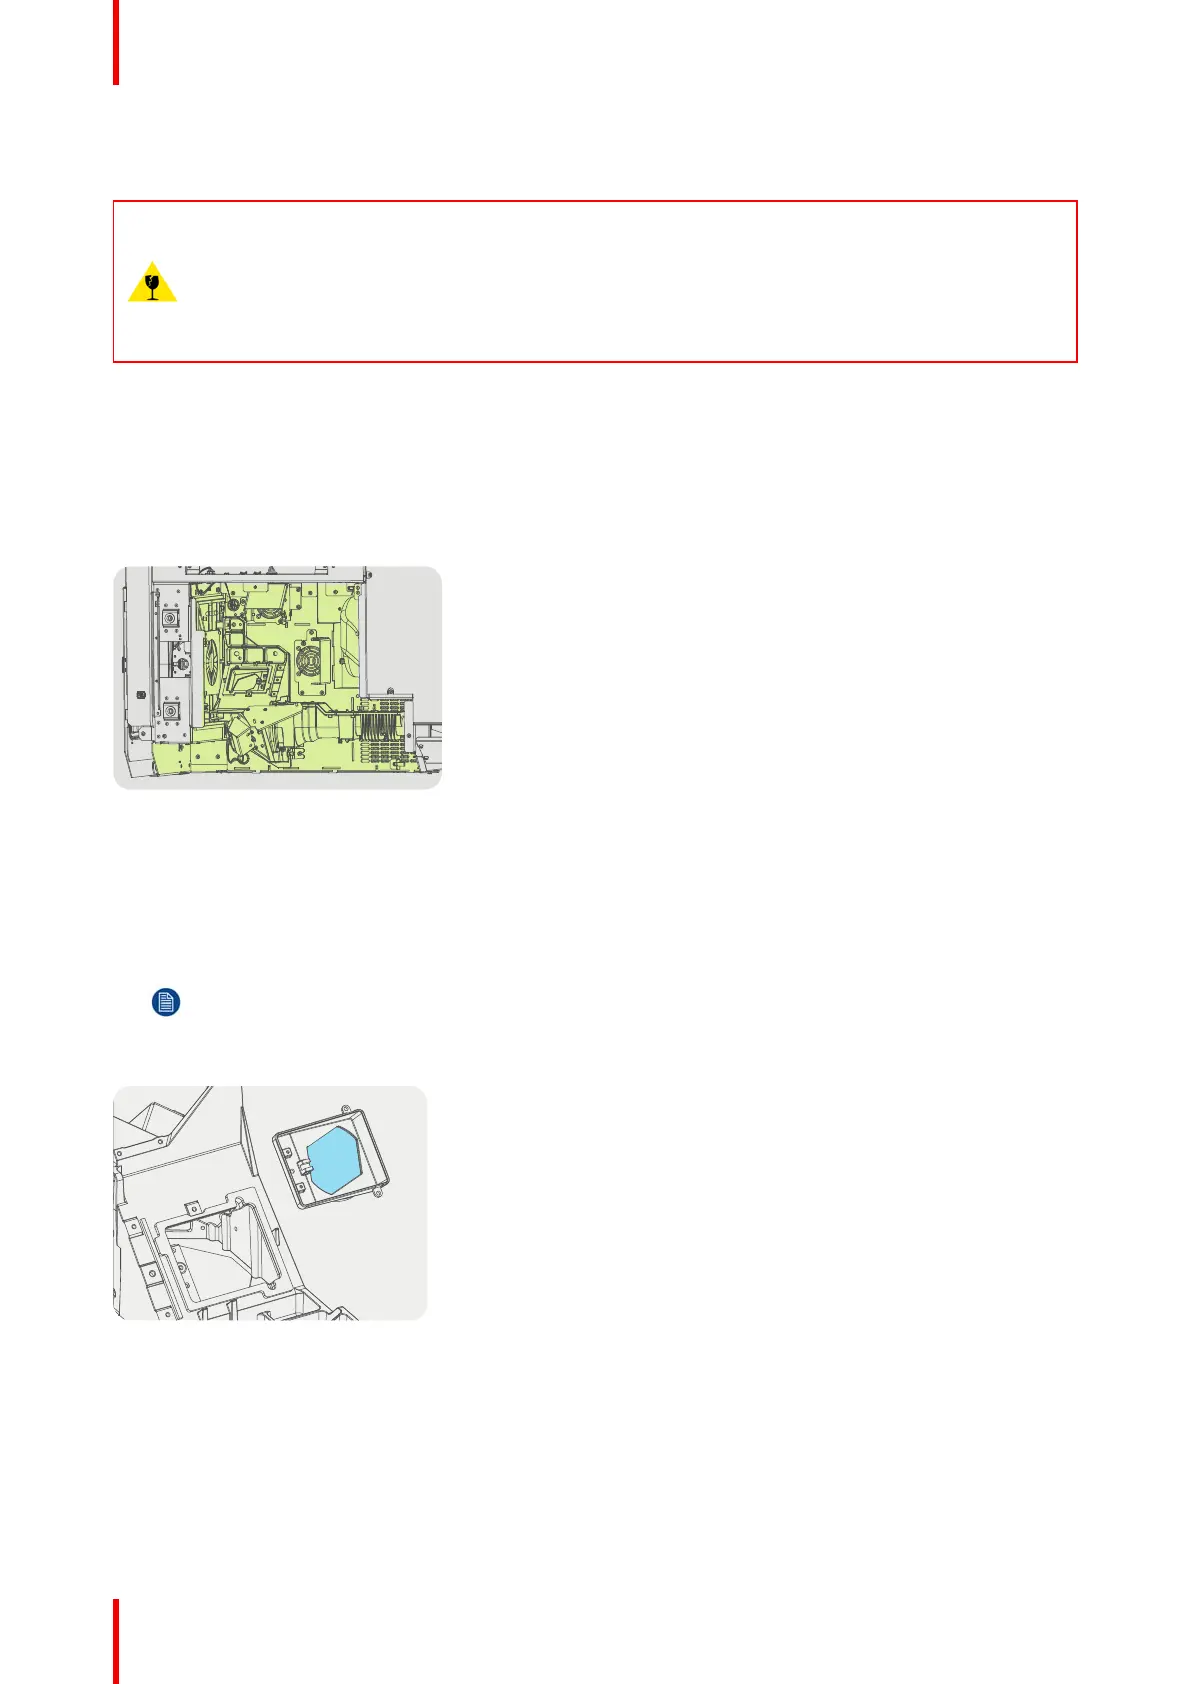
Light Processor compartment interior
1. Remove the lens from the projector. See “Lens removal”, page 178.
2. Remove the Light Processor from the projector. See “Removing the Light Processor”, page 97.
3. Remove all dust from the complete compartment with a vacuum cleaner and a brush. Ensure the lamp anode
fan grid, the Light Processor compartment fan grid, and the DMD fan grids are dust free.
Image 26-11
Light Pipe Lense No4
1. Remove the Light Pipe Lens No4 from the corner block. See “Replacing Light Pipe lens No4”, page 121.
2. Clean the Light Pipe Lens No4 according the general cleaning procedure for optical parts, see “General
cleaning procedure for optical components”, page 384.
Note: No need to remove lens No4 from its container.
3. Install the Light Pipe Lens No4. See “Replacing Light Pipe lens No4”, page 121.
Image 26-12
Light Processor Prism inlet and outlet
1. Remove overall dust from the outside of the Light Processor with compressed air.
Projector cleaning

 Loading...


