1 Refer to the user manual of the Buffalo NAS device whose settings will be saved to a USB memory device.
2 Access the “usbdisk x” shared folder while connecting the USB memory device to the Buffalo NAS device whose
settings were saved in the previous step. The “x” in the folder name represents the USB port number you
connected the drive to.
3 Copy and paste the .nas_config file to the desired location on your computer.
Transferring Settings
Follow the procedure below to transfer settings from another series Buffalo NAS device.
1 Before transferring access restrictions with Active Directory domain users, make sure the migration target
Buffalo NAS devices are joined to the same domain controller. To have the unit join the domain network, refer
to the procedure on the “Active Directory” section in chapter 2.
If you didn’t configure access restrictions with Active Directory domain users, skip to the next step.
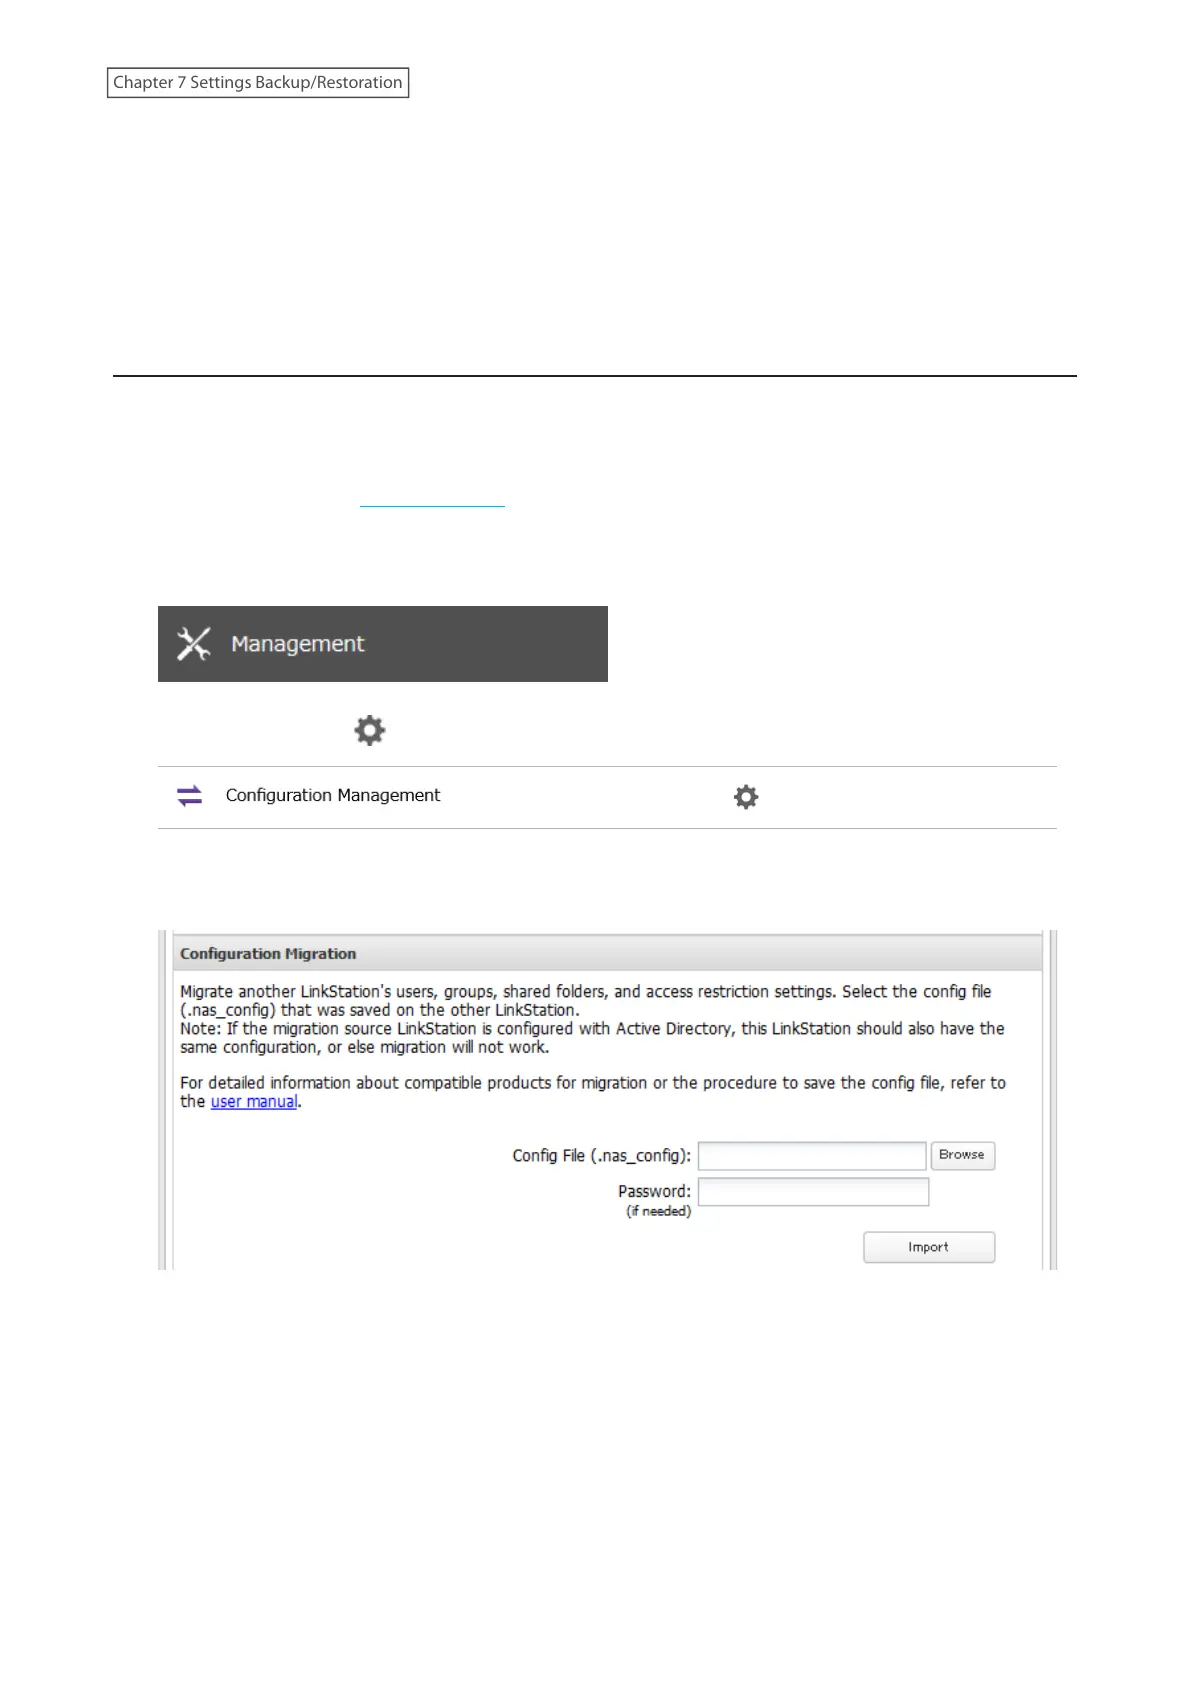
2 From Settings, click Management.
3 Click the settings icon ( ) to the right of “Configuration Management”.
4 Click Browse and choose the config file (.nas_config) that was created with the migration source Buffalo NAS
device. If the config file was created with a password, enter it into the “Password” field.
5 Click Import.
6 The “Confirm Operation” screen will open. Enter the confirmation number, then click OK.
7 The settings will be transferred. When transferring settings is finished, click OK.
Notes:
• If the migration target Buffalo NAS device contains shared folders, users, and groups that share the same name
as the transferred settings, the existing settings will be overwritten. If the users and groups meet the following
155
Chapter 7 Settings Backup/Restoration