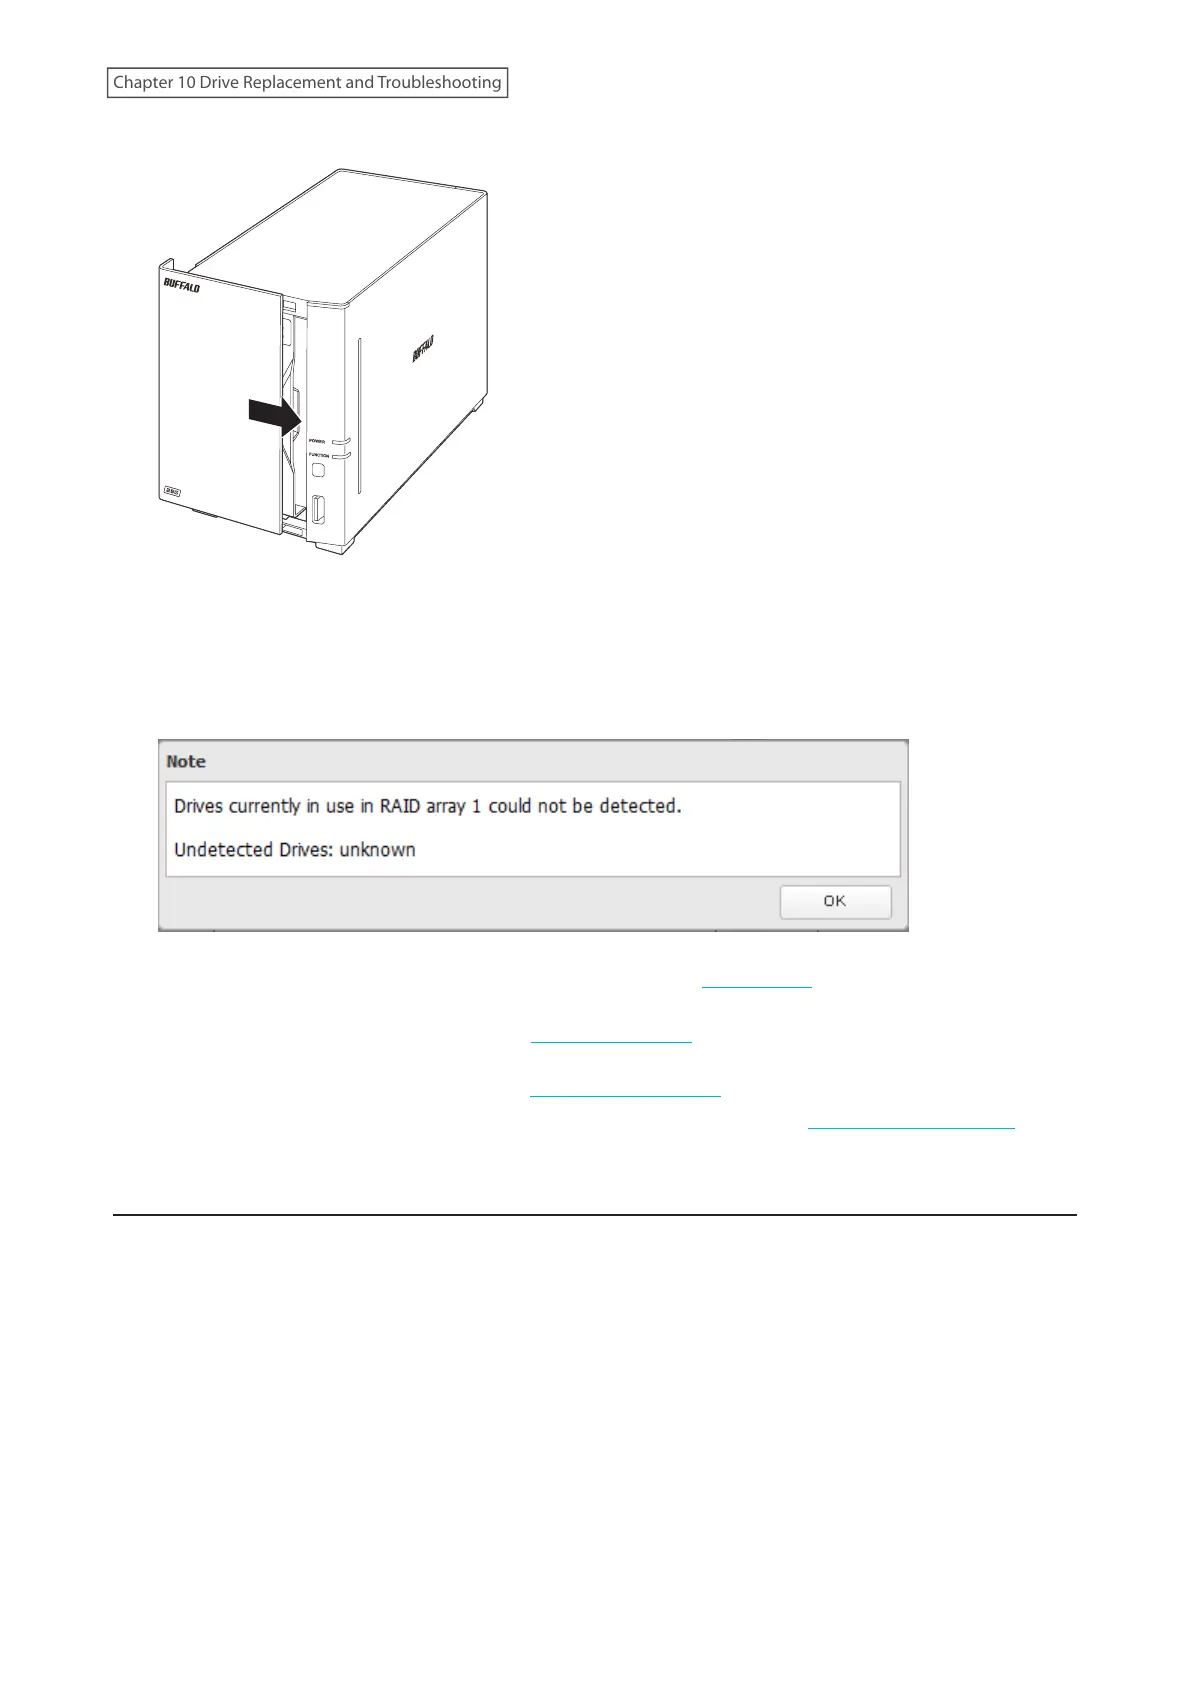
8 Return the front panel and slide it right to close.
9 Connect all cables, then turn on the LinkStation.
10 Log in to Settings using NAS Navigator2.
11 When the following window appears after logging in, click OK.
12 Delete the RAID array that held the failed drive by referring to the “Using JBOD” section in chapter 3.
13 Format the replaced drive by referring to the “Formatting Drives” section in chapter 3.
14 Create a new RAID 0 array by referring to the “Creating a RAID Array” section in chapter 3.
The new RAID 0 array will be created. Next, create a shared folder by referring to the “Adding a Shared Folder”
section in chapter 2.
Drive Replacement for a JBOD
If a drive used in a JBOD fails, you will need to format the replaced drive after replacing the defective drive with a
new drive.
Note: If a drive malfunctions in JBOD, all data on the drive will be lost.
1 Turn the LinkStation off and remove all cables.
194
Chapter 10 Drive Replacement and Troubleshooting