*You can select up to the second level of folders. However, if the folder name of a second level folder contains
symbols, that folder may not appear as the target folder.
**The folder should have the “Backup” checkbox selected under “LAN Protocol Support” on the shared folder
settings.
***The compatible file systems are ext3, XFS, and NTFS.
Note: For the destination folder, do not use a folder that has already been used as a target folder for another backup
job. If you wish to use a folder that currently contains backup data as the destination folder for another backup job,
format the folder first, or delete all data in the destination folder and change the folder attribute to read and write
before configuring the folder as the destination folder.
Preparing a Backup Destination
Configure a shared folder on a Buffalo NAS device or connected USB drive as a backup destination. The following
procedure explains using another shared folder on the LinkStation as a backup destination. The procedure may vary
depending on which Buffalo NAS device is selected as a destination. If using a USB drive as a backup destination,
make sure its attribute is set to read and write. To change a read-only USB drive’s attribute to read and write, refer to
the “Read-Only Shares” section in chapter 2.
If you would like to back up data from multiple backup sources, we recommend not using the same backup
destination, as data in the backup destination may be overwritten by subsequent backup jobs. If you must back up
data from multiple backup sources to the same backup destination, using management backup is recommended
for precise version control.
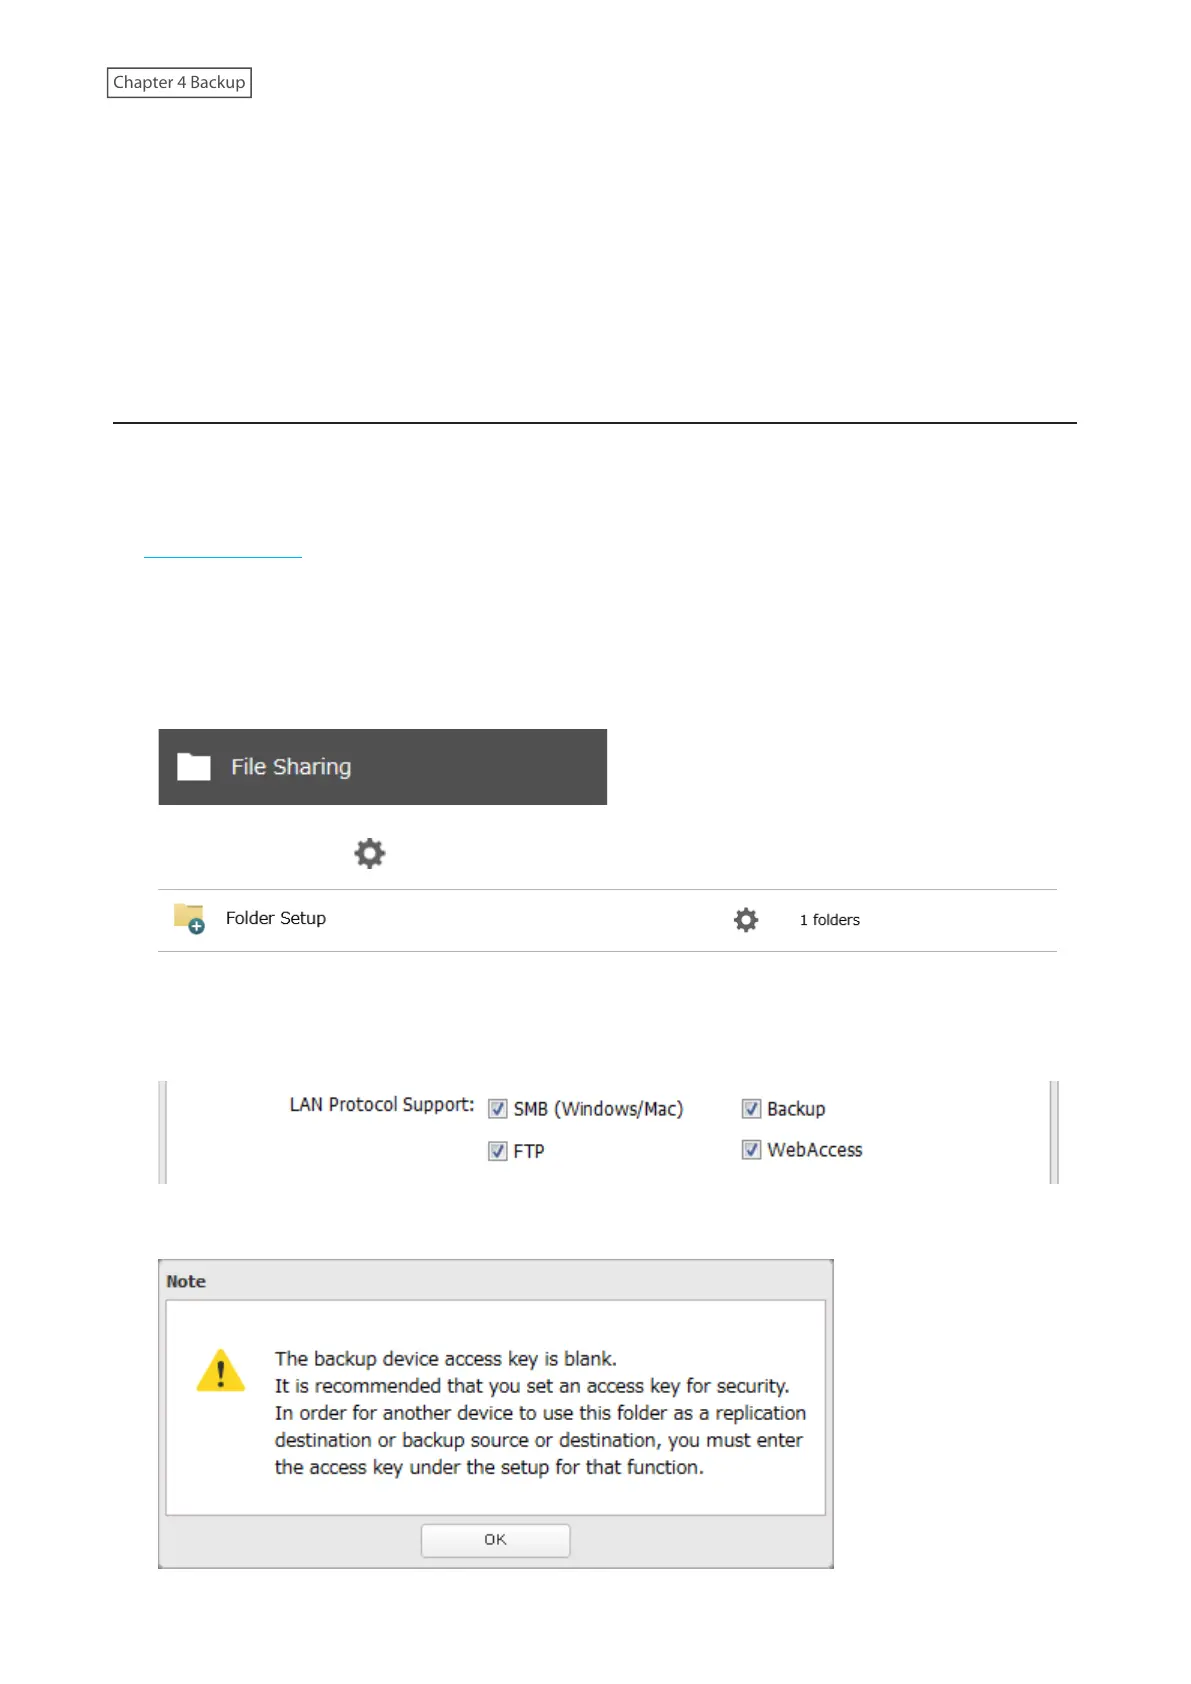
1 From Settings, click File Sharing.
2 Click the settings icon ( ) to the right of “Folder Setup”.
3 Choose the folder to be set as a backup destination.
4 Under “LAN Protocol Support”, select the “Backup” checkbox on the Basic tab.
5 Click OK and proceed to the next step to create a backup device access key.
69