Chapter 3 Disassembly and Maintenance
3-6. Disassembly, Reassembly and Lubrication
3-19 CL-E700 series
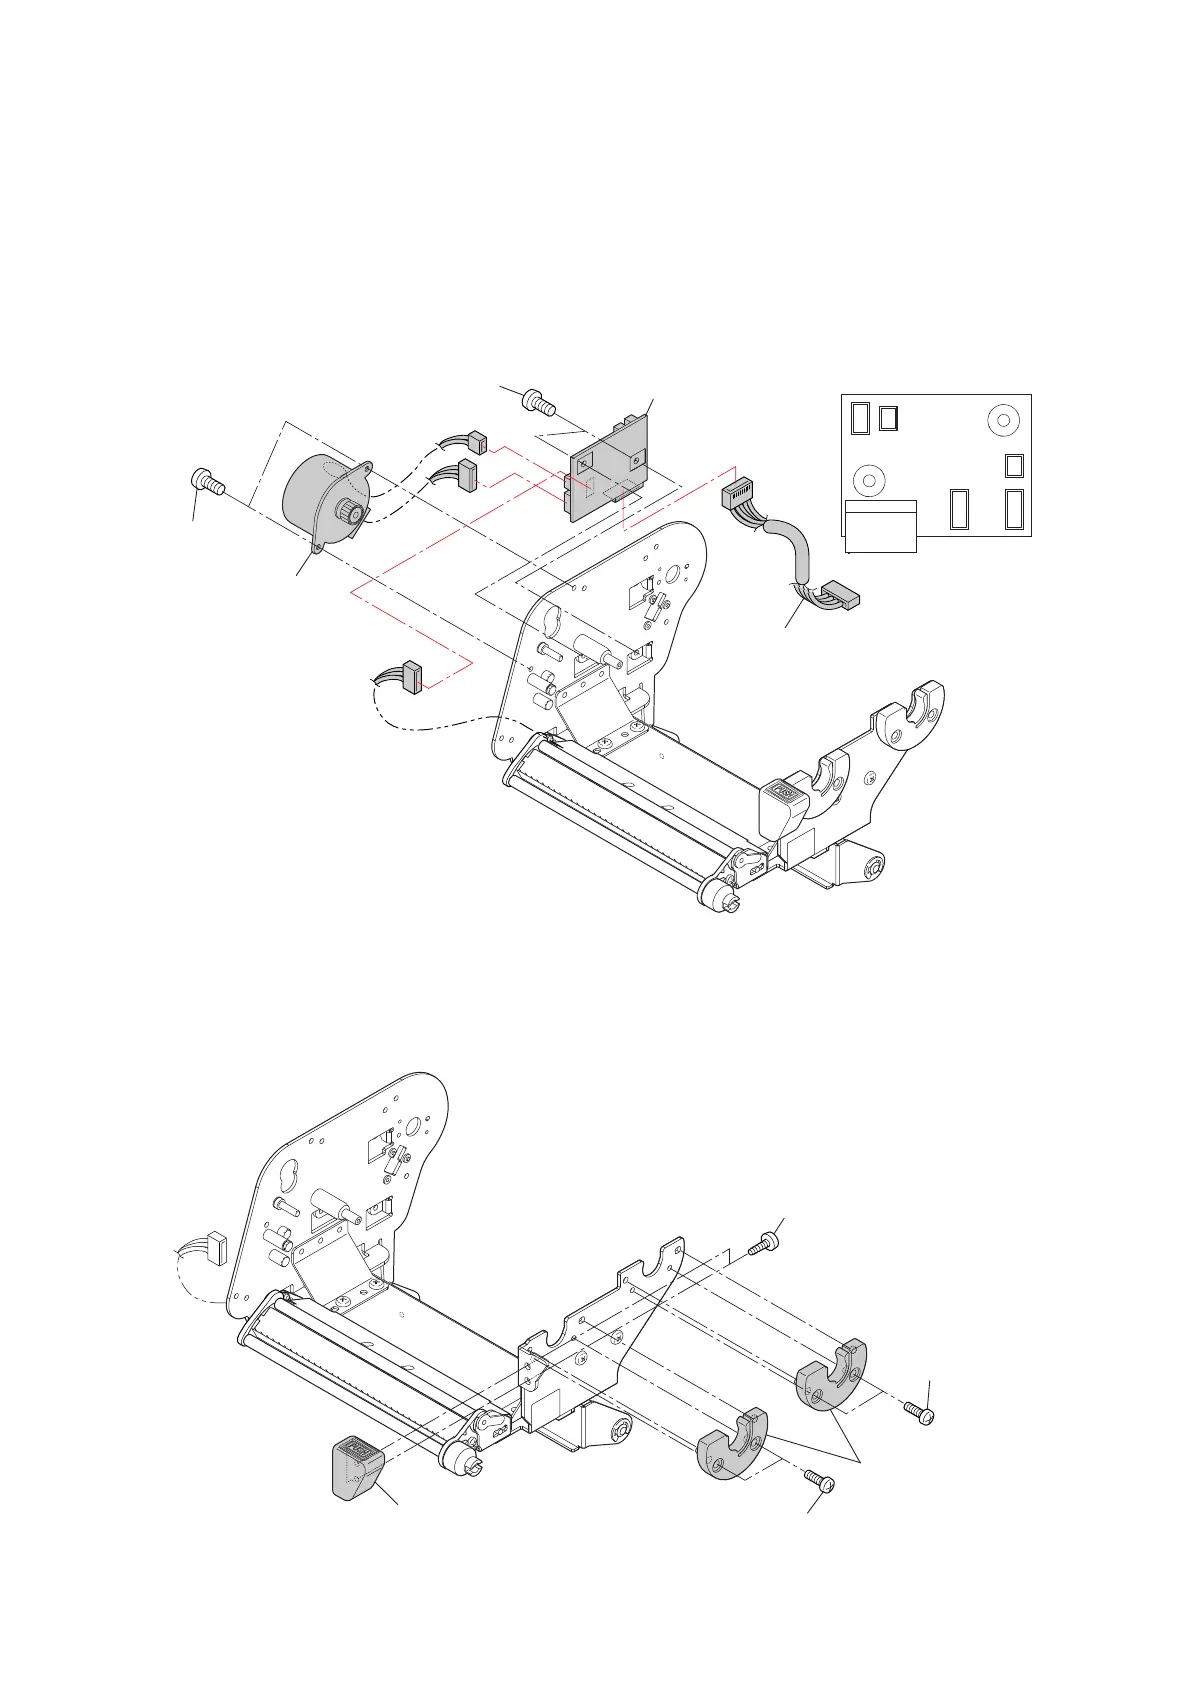
3-6-6. “SA Ribbon Motor F” and “SA Ribbon Control PCB”
1. Remove the “SA2 Ribbon Unit Fan”. Refer to “3-6-3 “Unit Ribbon” Covers”.
2. Disconnect the connectors J602 and J603 from the “SA Ribbon Control PCB”.
3. Remove the 2 screws (BH M3.0x4 (NI)) and detach the “SA Ribbon Motor F”.
4. Disconnect the connectors J606 and J601 (SA Ribbon Cable) from the “SA Ribbon Control
PCB”.
5. Remove the 2 screws (BH M3.0x4 (NI)) and detach the “SA Ribbon Control PCB”.
3-6-7. “Catch Ribbon Holder” and “Knob Ribbon Unit”
1. Remove the 4 screws (BH M3.0x3 (NI)) and detach the “Catch Ribbon Holder” (2 pcs.).
2. Remove the 2 screws (PHT(#2) M3.0x8 (NI)) and detach the “Knob Ribbon Unit”.
PHT(#2) M3.0x8 (NI)
BH M3.0x3 (NI)
Catch Ribbon Holder
BH M3.0x3 (NI)
Knob Ribbon Unit
J602
J606
J606
J605
J604
J601
J601
J603
J602
J603
[SA Ribbon Control PCB]
BH M3.0x4 (NI)
BH M3.0x4 (NI)
SA Ribbon Motor F
SA Ribbon Control PCB
J304
SA Ribbon Cable

 Loading...