Chapter 3 Disassembly and Maintenance
3-6. Disassembly, Reassembly and Lubrication
CL-E700 series 3-28
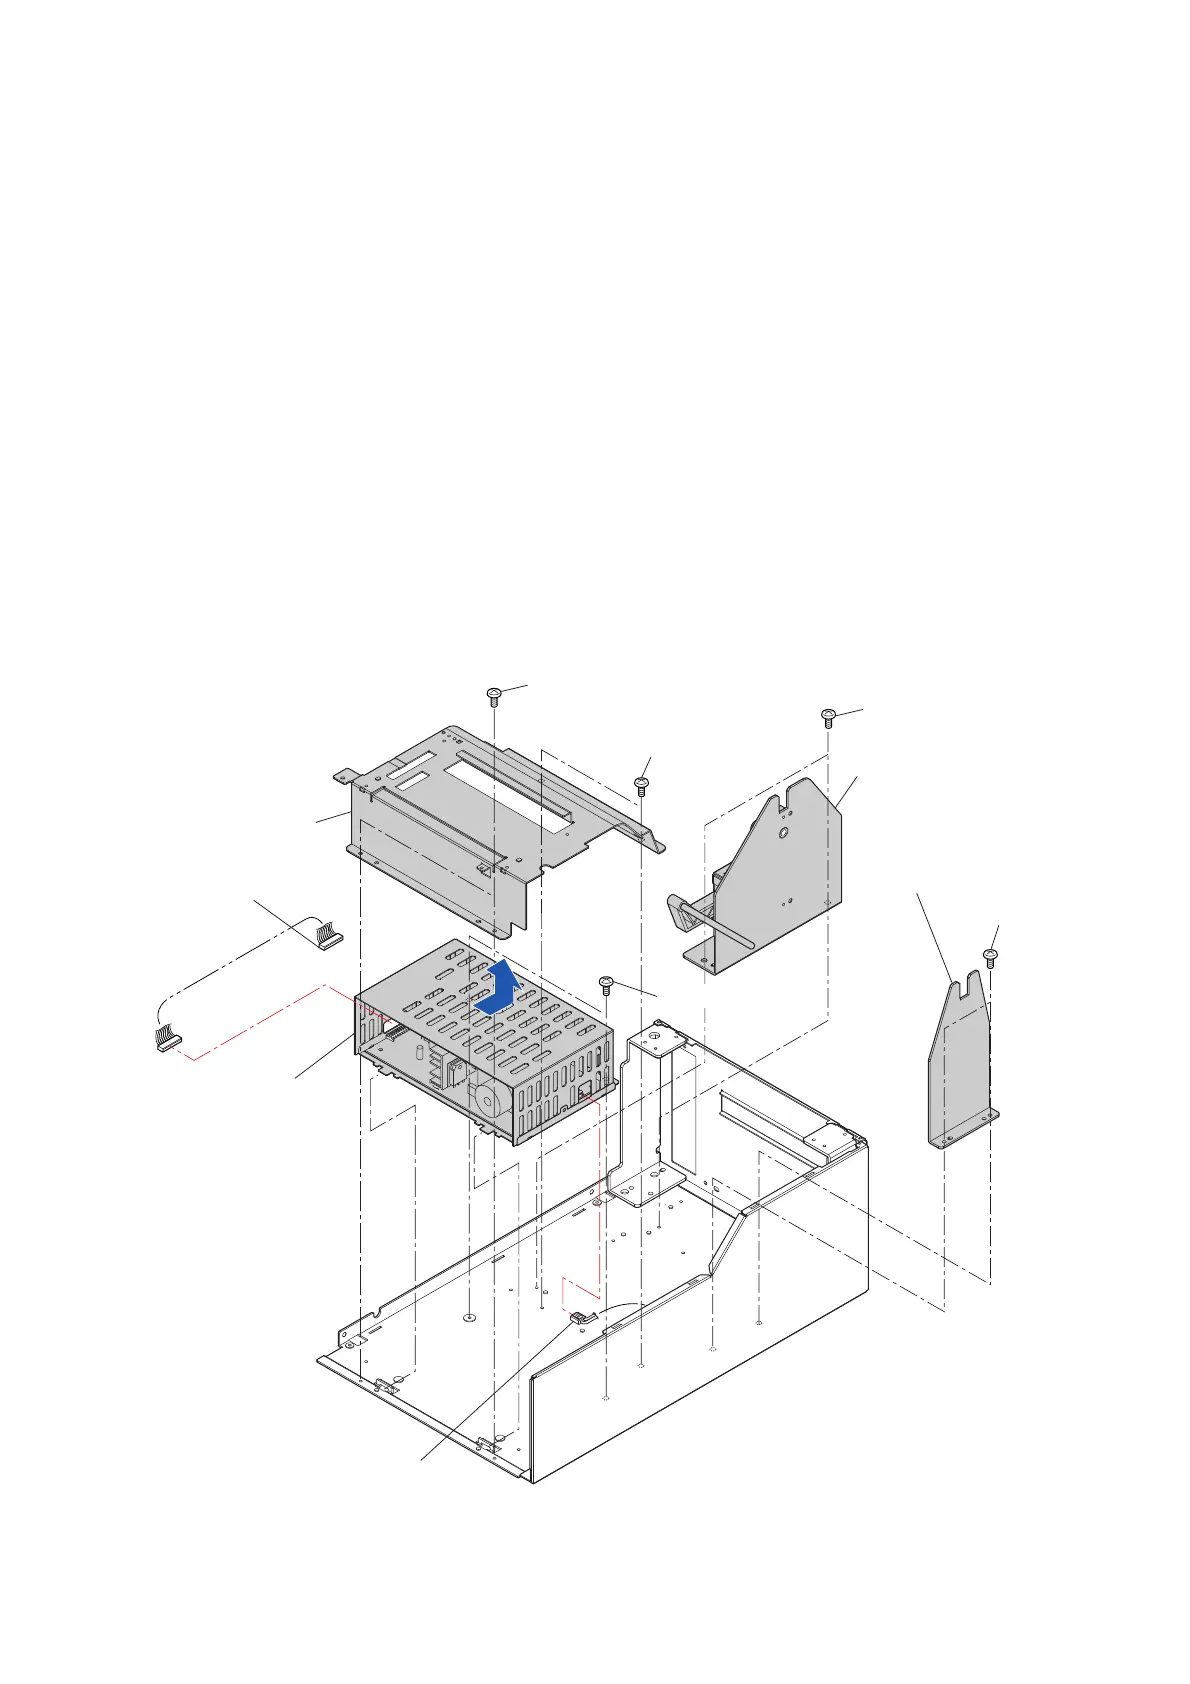
3-6-14. “Unit Power Supply” and “Paper Holder” Block
(1) “Unit Power Supply” Block and “Paper Holder” Block
1. Remove the “Unit Ribbon”. Refer to “3-6-2 Unit Ribbon”.
2. Remove the “Unit Opep
ane”. Refer to “3-6-10(1) Unit Opepane”.
3. Remove the “Case” and “Cover S
teel L”. Refer to “3-6-11 Case”.
4. Remove all connectors f
rom the “SA Main PCB”. Refer to “3-6-12(1) “SA Main PCB”
Connectors”.
5. Remo
ve the “Unit Mechanism”. Refer to “3-6-13 Unit Mechanism”.
6. Remove the 4 screws (B
H M3.0x4 (NI)) and detach the “Frame Mechanism”.
7. Remove the 2 screws (BH M3.0x4 (NI)) and detach the “Unit Power Supply” Block by
lifting it upwardly after shifting it toward the rear as shown by the arrow.
8. Disconnect the “SA Power Cable” and the AC input connector from the left side and
right side of the “Unit Power Supply” Block, respectively.
9. Remove the 2 screws (BH M3.0x4 (NI)) and detach the “Paper Holder” Block from the
bottom frame.
10. Remove the 2 screws (BH M3.0x4 (NI)) and detach the “Plate Holder Paper R” from the
bottom frame.
BH M3.0x4 (NI)
BH M3.0x4 (NI)
"Paper Holder" Block
Plate Holder Paper R
BH M3.0x4 (NI)
BH M3.0x4 (NI)
Frame Mechanism
BH M3.0x4 (NI)
SA Power Cable
"Unit Power Supply"
Block
AC Input Connector
J13

 Loading...