Chapter 4 Troubleshooting
4-2. Troubleshooting
CL-E700 series 4-8
Symptoms Checks Remedies
Poor printing
1. The “SA Head” is dirty.
2. Head offset adjustment is improper.
3. Is the printing density set to an optimal
condition?
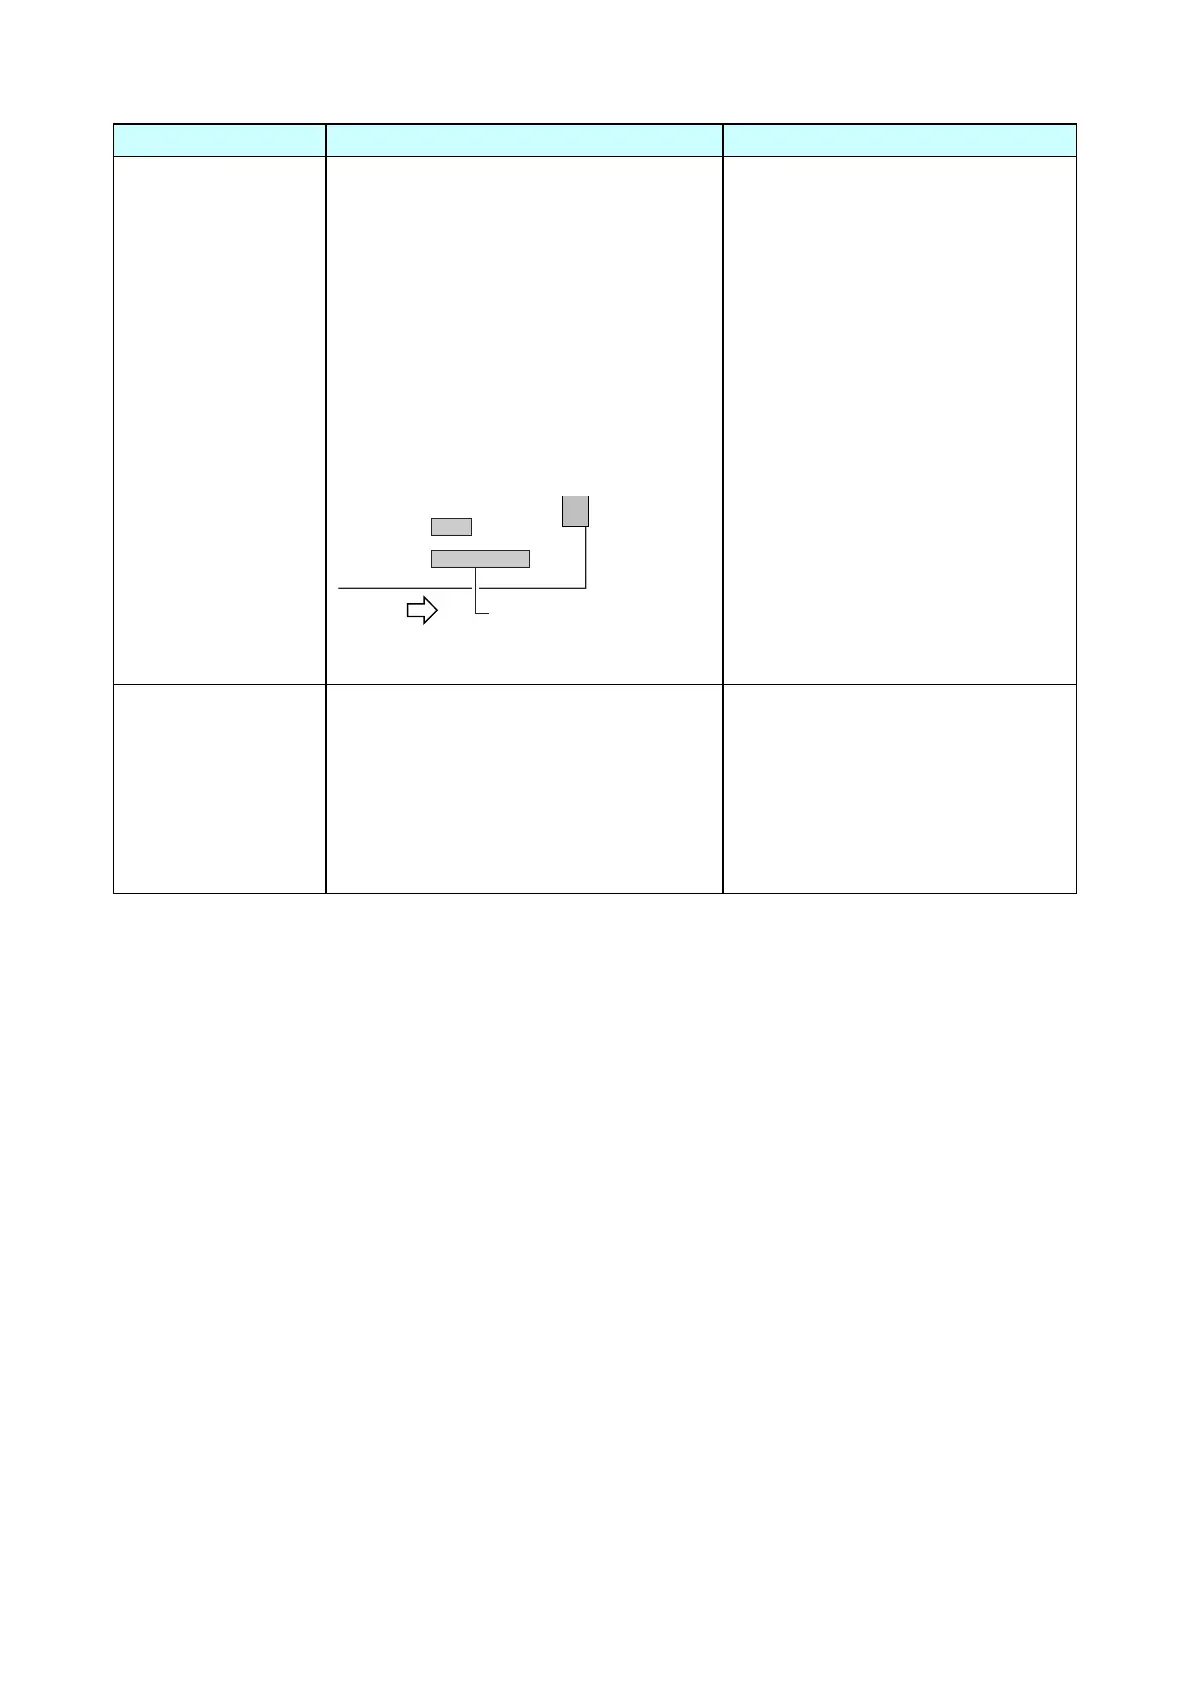
4. Is +24V DC supplied to the “SA Main
PCB” (at pins 6 to 9 of J13)?
J5
To Unit Power Supply
Front
J13
J2
1
9
[Bottom right of the “SA Main PCB”]
1. Clean the head surface with the
specified head cleaner.
2. Adjust the media thickness
adjustment dial according to media
thickness to be used.
3. Adjust the printing density.
4. Replace the “Unit Power Supply”.
Uneven print density 1. Head balance is improper.
Uneven printing density may be
observed either on the right side or the
left side.
2. Is the printing density set to an optimal
condition?
1. Adjust the media width adjustment
dial to suit to the media width to be
used.
2. Adjust the printing density.

 Loading...