3-18 Compaq ProLiant ML370 Setup and Installation Guide
Compaq Confidential – Need to Know Required
Writer: Gilbert Saldivar Project: Compaq ProLiant ML370 Setup and Installation Guide Comments:
Part Number: 120137-002 File Name: d-ch3 Installing the Rack Model Last Saved On: 12/13/99 3:43 PM
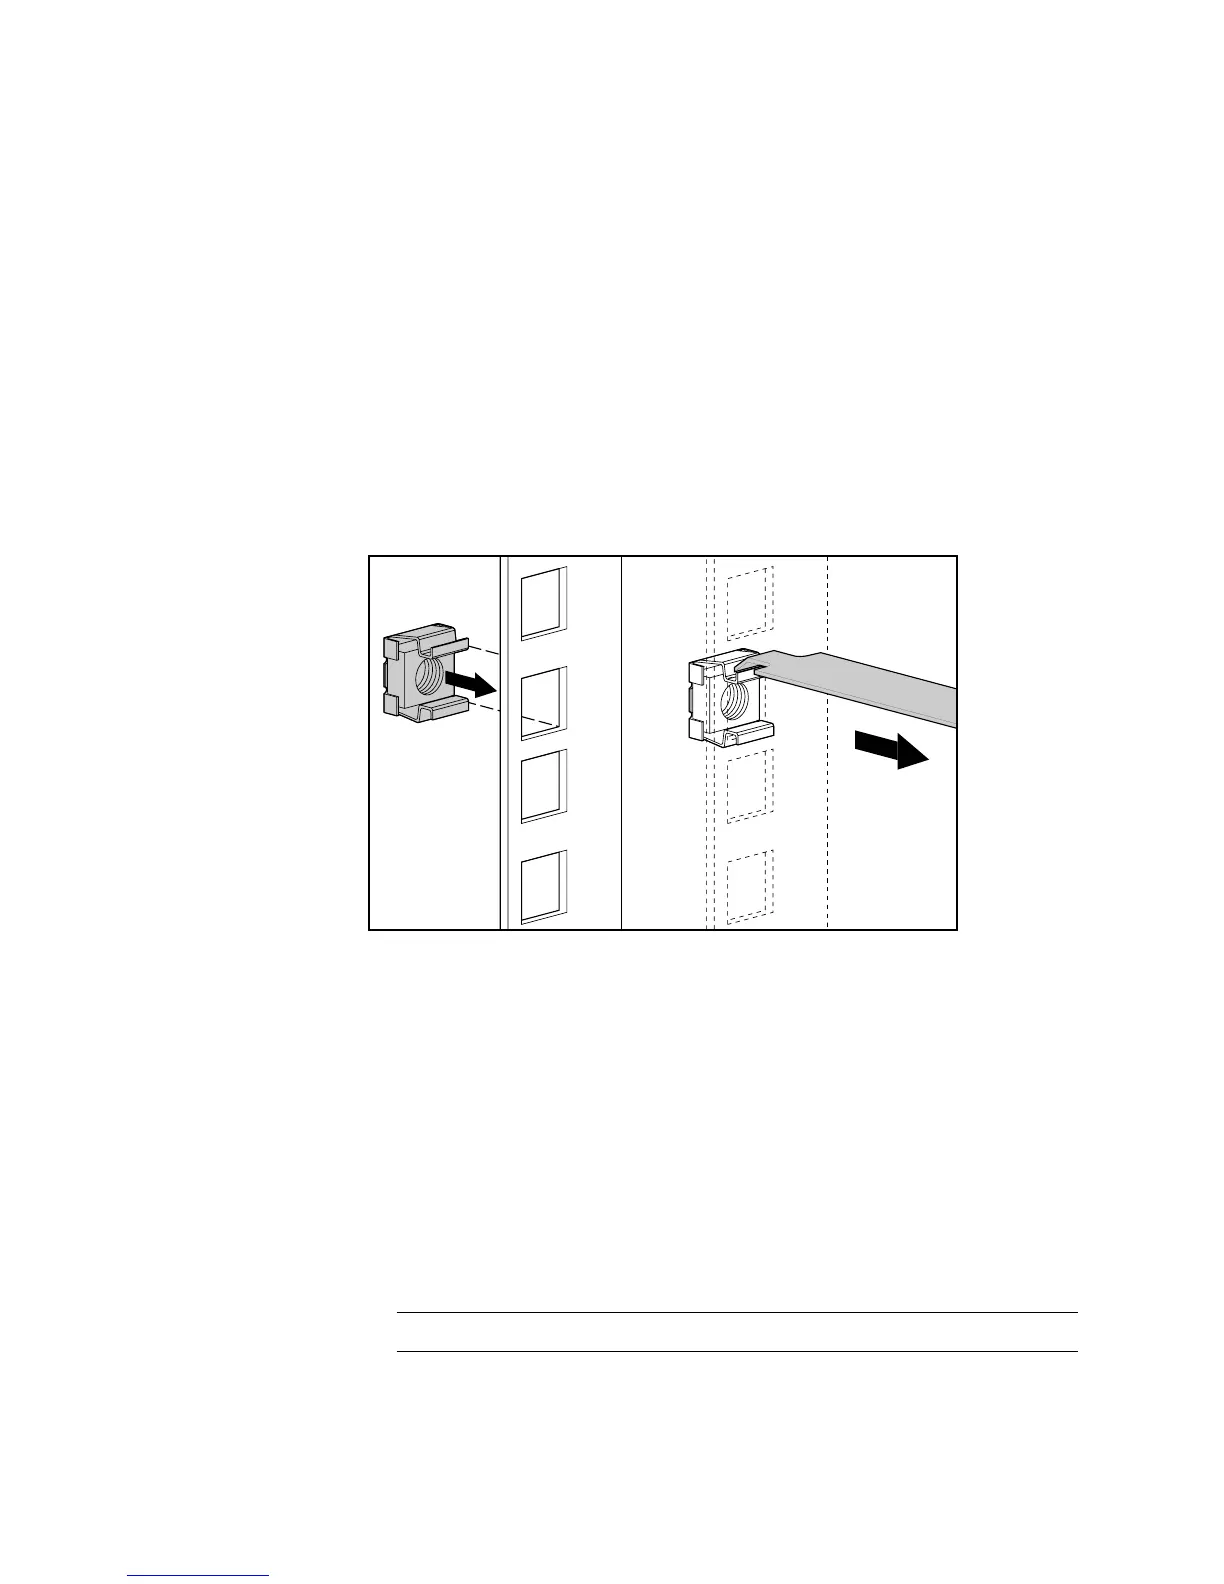
Inserting Cage Nuts into the Rack Frame
After marking the positions for the fasteners in both the front and back of the
rack, use the fitting tool to insert cage nuts on the inside of the rails at the
marked locations. The cage nuts and fitting tool are included in the hardware
kit supplied with the rack.
1. Position the cage nut on the inside of the rail.
2. Hook one of the lips of the cage nut through the square rail perforation.
3. Insert the tip of the fitting tool through the other side of the perforation
to hook the opposite lip of the cage nut.
Figure 3-10. Inserting cage nuts
4. Use the fitting tool as a lever to fit the cage nut in position.
5. Repeat Steps 1 through 4 for each cage nut.
Attaching the Bracket Assembly to the Rack
The tabs on the front of the mounting bracket help to align it with the front of
the rack frame. Cage nuts are not used for the front attachment of the mounting
bracket.
1. Attach a mounting bracket assembly to the front of the rack, using one
M6 x 1.0-12L Phillips screw in the bottom hole of the bracket.
IMPORTANT: Do not use washers with the screws in the rack assembly.