Installation – RF Path Elements P/N 709C011801 Page 100
5.2.2.5 Additional Bracket Installation Options
Note 1: A T-Bar Mounting Bracket can be used (not provided) to mount the RAU below or mid-mount an acoustic ceiling.
Note 2: A mid-mount installation option including a panel for replacing acoustic tile is available using the separately ordered
RAU mid-mount accessory kit (P/N: AK-RAU-BRCK-MM) – refer to section 5.2.2.6.
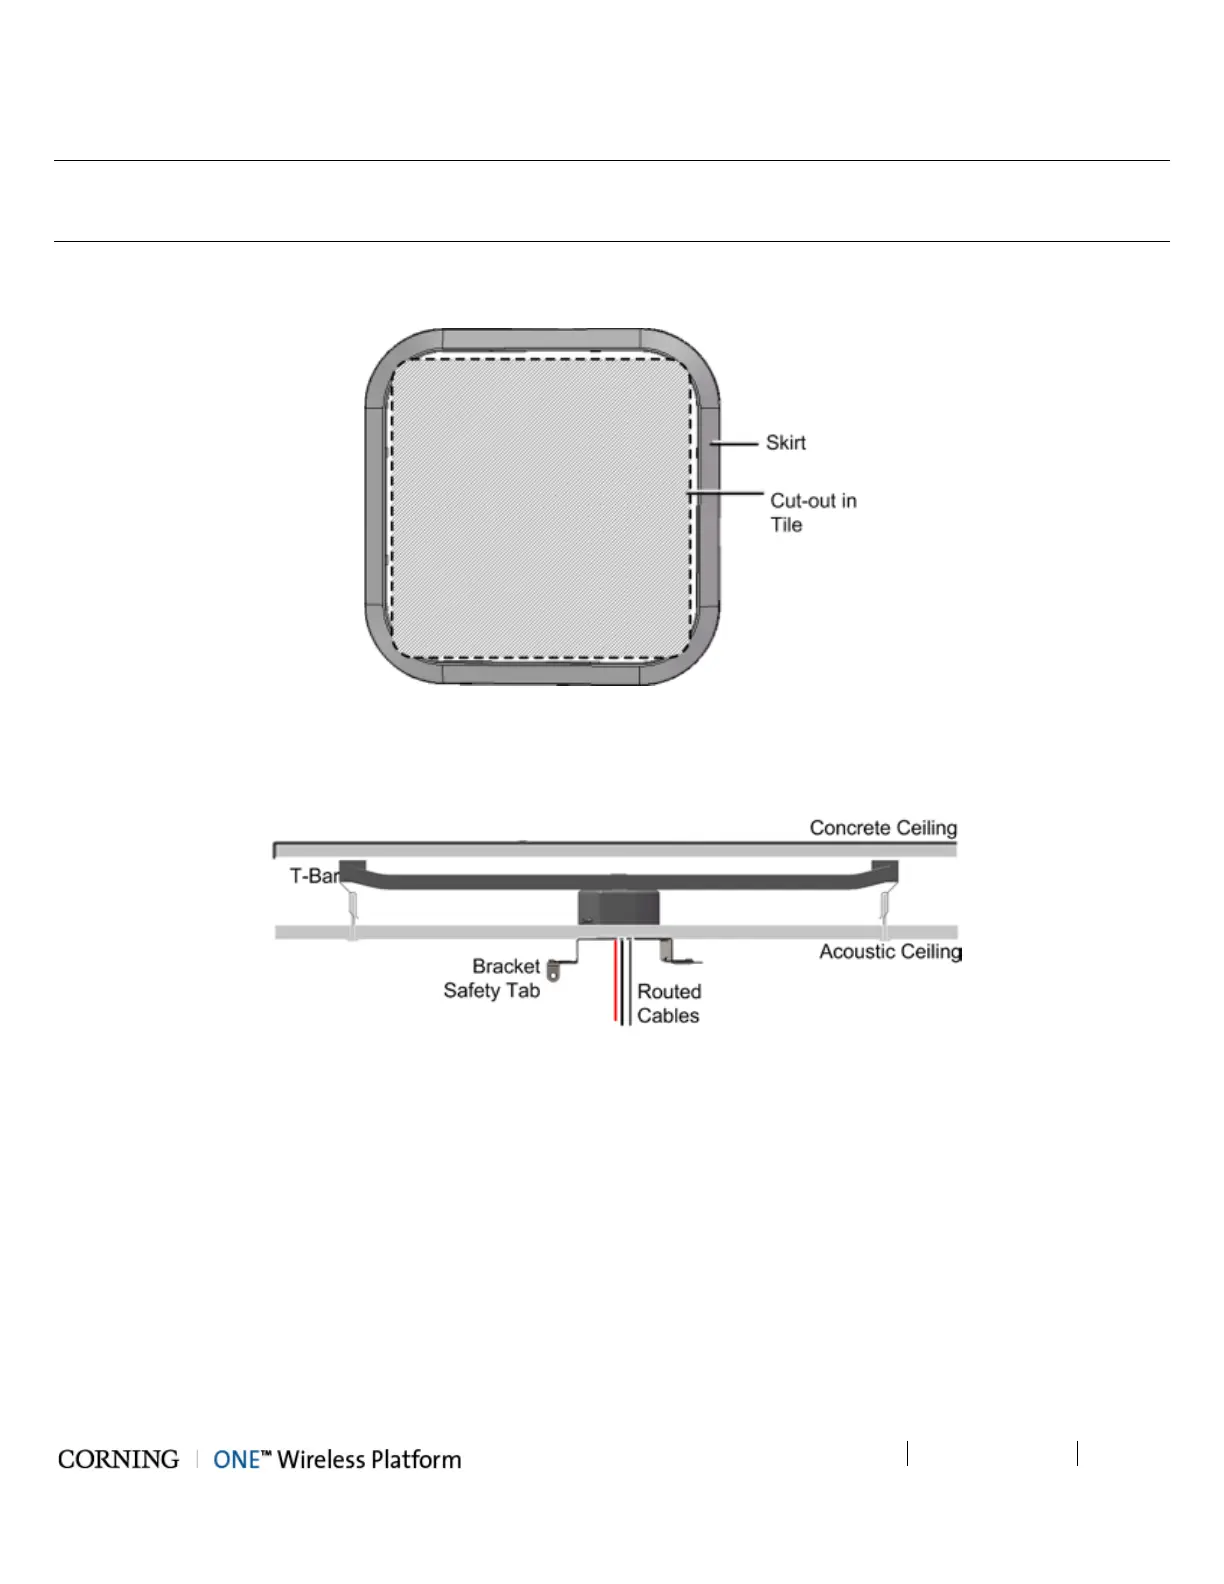
1. For mid-mount only - using the inner circumference of the RAU Skirt (provided) as a template, cut out an opening in the
acoustic ceiling tile for the RAU. See Figure 5-53.
Figure 5-53. Skirt for Mid-Mount Cut-Out
2. Install the T-Bar on the ceiling above the acoustic tiles (according to manufacturers’ instructions) and route the previously
located connections cables through the center of the RAU Mounting Bracket. See Figure 5-55.
Figure 5-54. Routed Cables and Mounting Bracket Installed on T-Bar (Below Ceiling)
3. Install RAU bracket on the T-Bar, using any of the applicable bracket installation holes.
Note the following:
• Safety tab should face the direction of the RAU connectors
• Below Ceiling – 1-in minimum between ceiling tile and RAU (shown in Figure 5-56)
• Mid-Mount – 2.5 in (63.5 mm) between ceiling and lowest part of RAU (shown in Figure 5-56)