Installation – RF Path Elements P/N 709C011801 Page 111
5.2.2.8 Mounting RAU onto Mounting Bracket
1. For Mid-Mount acoustic ceiling installations (not including installations using the Corning dedicated RAU Mid-Mount
installation option) – attach the RAU Skirt (provided) to the enclosure to cover the rigid edges of the cut-out panel.
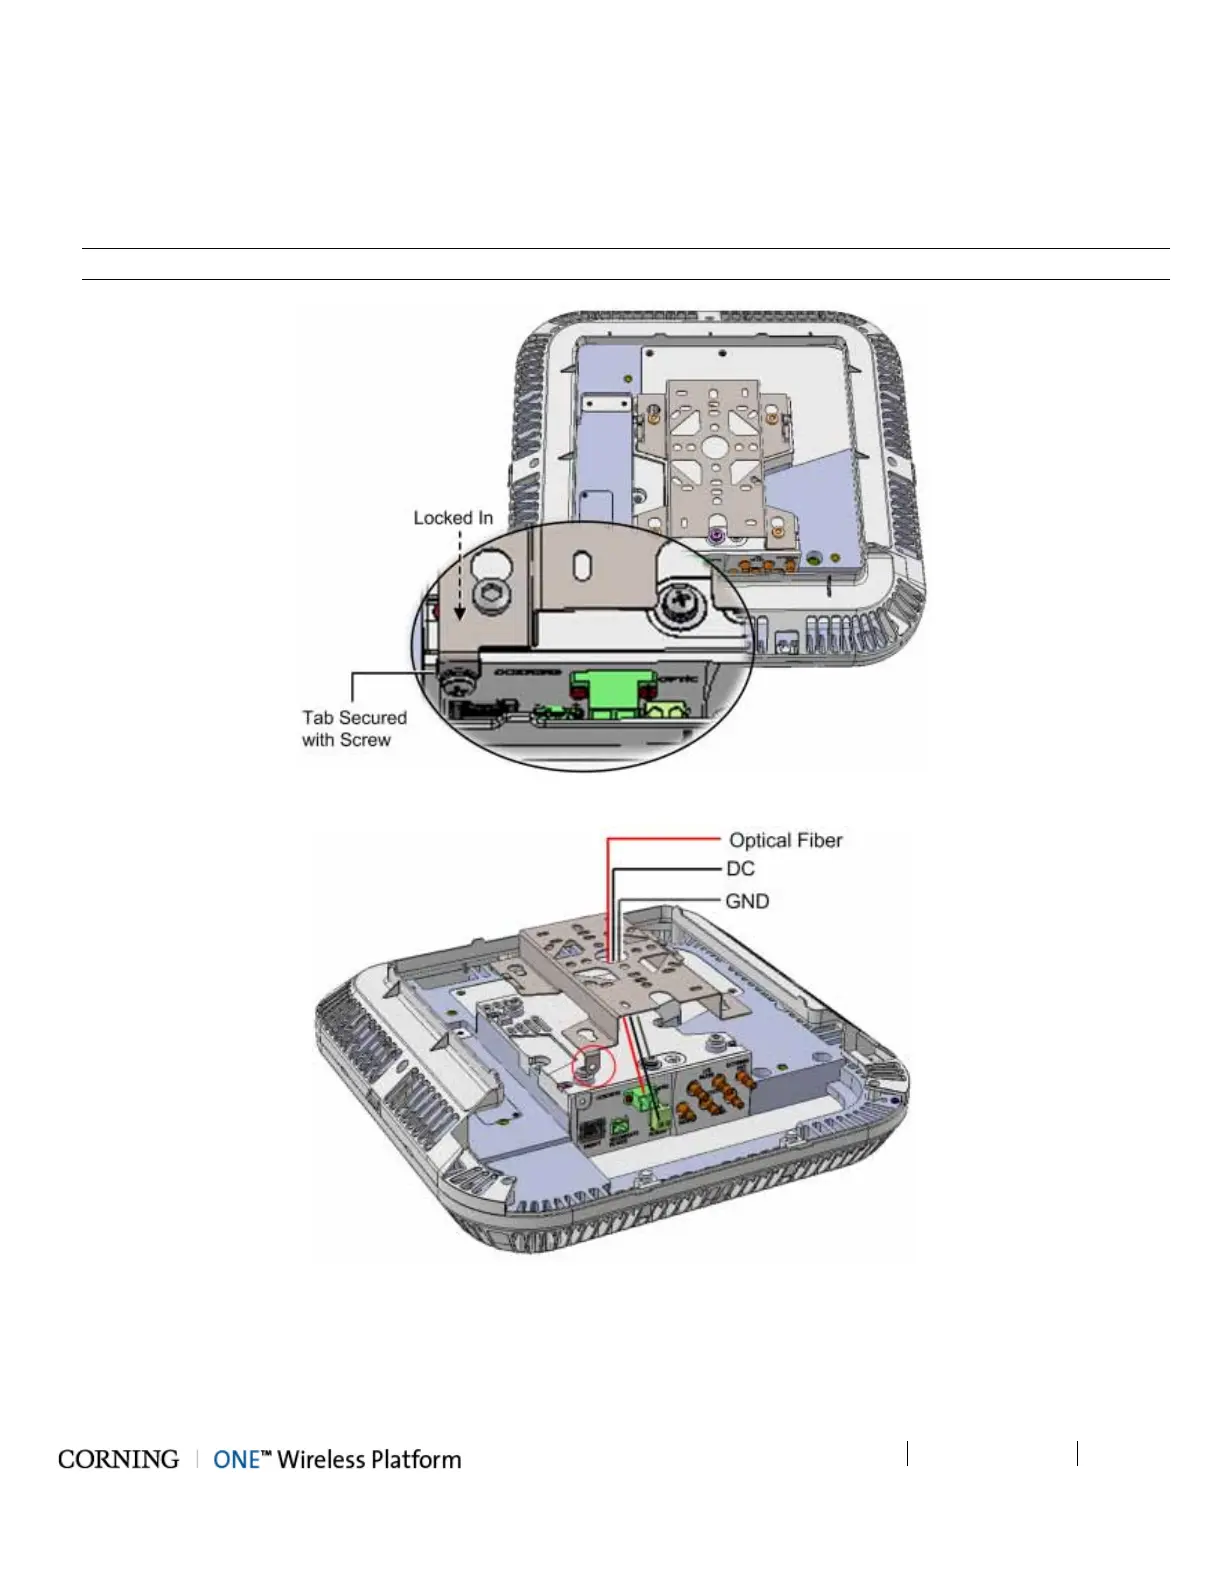
2. Referring to Figure 5-71 and Figure 5-70, insert the RAU pins (four) into the bracket key-holes and lock in.
Note: The safety screw tab (circled in Figure 5-71) should be in the same direction of the RAU connectors.
Figure 5-70. RAU and Bracket Assembly
Figure 5-71. Mounting RAU onto Mounting Bracket
3. Secure the bracket safety screw tab to the RAU using an 8-32X3/8, Pan Head, Philips screw (provided). See Figure 5-70.
4. Fit the front panel cover back on.
5. For Acoustic Ceiling Mounts - using the supplied security cable, attach the RAU to a permanent structure within the ceiling
(e.g. acoustic ceiling grid or concrete ceiling above).