Installation – RF Path Elements P/N 709C011801 Page 99
5.2.2.4 Mounting RAU Installation Bracket (Wall/Concrete Ceiling)
Note: If using the RAU mid-mount bracket accessory kit – refer to section 5.2.2.6.
Note the following:
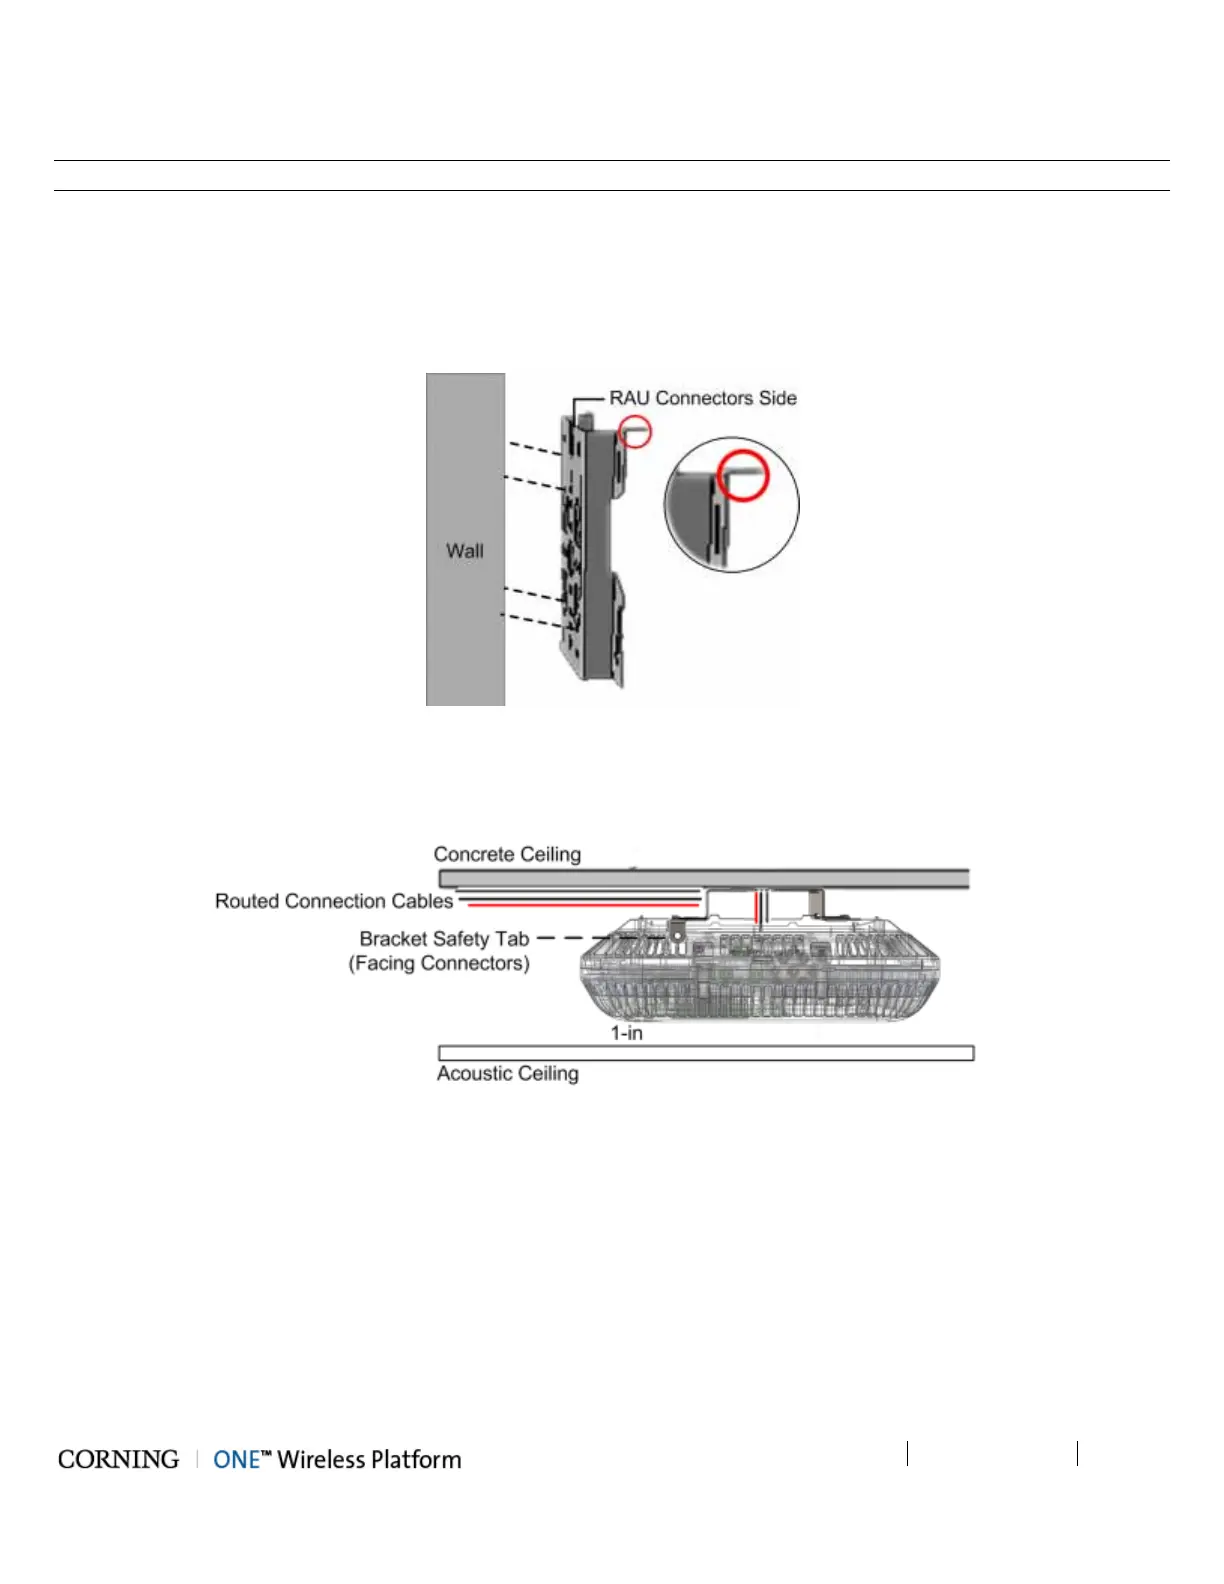
• When mounting the bracket, the Safety tab (circled in Figure 5-51 and Figure 5-52) should always be positioned to face the
same direction as the RAU connectors (up or down).
• When installing above acoustic ceiling, allow for at least 1 inch above the acoustic ceiling for air flow cooling. See
Figure 5-52.
Figure 5-51. Wall Mount Bracket Installation
Remove mounting bracket from RAU underside and mount the bracket on the wall (Figure 5-51) or concrete ceiling
(Figure 5-52) using any of the applicable screw holes (screws not provided).
Figure 5-52. Above Acoustic Ceiling Installation