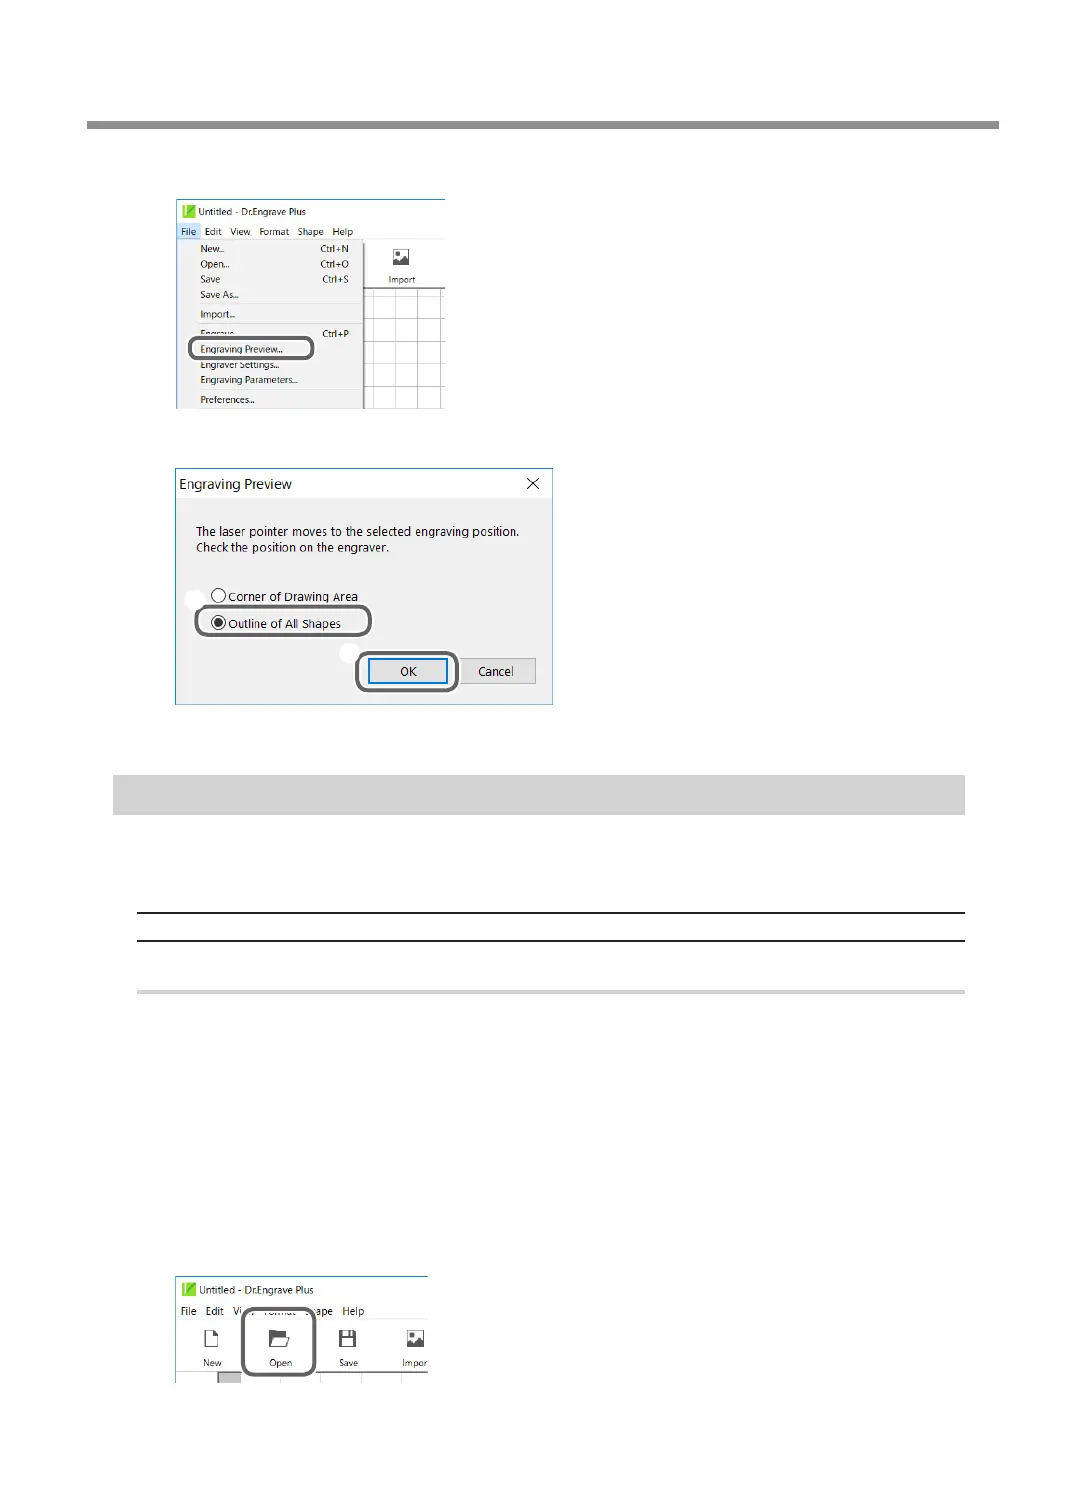
H
Click [File] - [Engraving Preview].
I
On the [Engraving Preview] screen, select [Outline of All Shapes].
1
2
This starts the path preview.
Checking the Four Corners of the Engraving Area (Area Preview)
The laser pointer pauses at the points of four corners of the engraving area to indicate the area. Verify
that the laser pointer stops within the intended area of the loaded workpiece.
Previewing Engraving Data Created Using Dr. Engrave Plus
Procedure
A
Set the workpiece.
" P. 38 "Setting the Workpiece"
B
Close the front cover.
C
Press [ENTER/PAUSE].
D
Start Dr. Engrave Plus.
If engraving data is already open, proceed to step
H
.
E
Click [Open].
Previewing before Engraving
119
Chapter 5 Various Engraving Methods