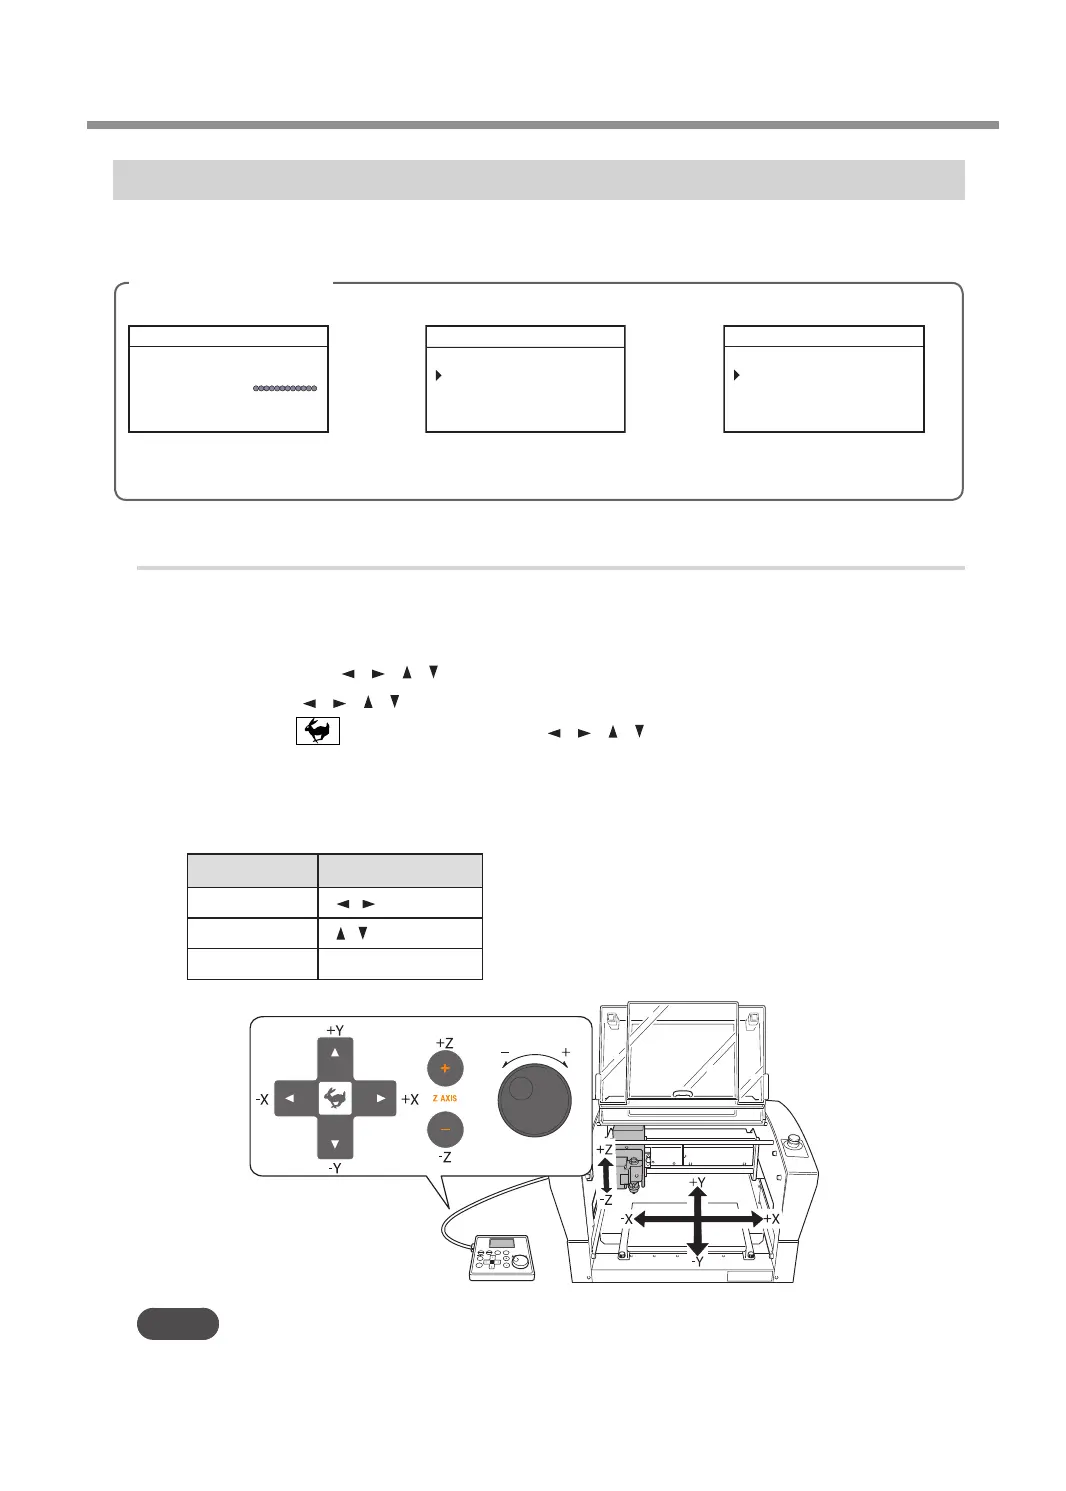
Moving to the Desired Position
When the screens shown below are displayed on the handy panel, you can move the tool manually using the
[Dial] or the Movement buttons.
Screens on the handy panel
X 15.00mm
Y 23.00mm
Z 0.00mm S 5000rpm
012345678901234567 READY
Movement along the X, Y, and
Z axes with the [Dial] or
Movement buttons
Main screen
ORIGIN SET XY
XY X Y
X 38.88mm
Y 17.00mm
012345678901234567 READY
Movement along the X and
Y axes only with the
Movement buttons
When setting the XY origin
Z0
Z -30.00mm
012345678901234567 READY
Movement along the Z axis
only with the Movement
buttons
When setting the Z origin
Procedure
A
Close the front cover and press [ENTER/PAUSE].
B
Press the Movement buttons or turn the [Dial].
• Each single press of [
], [ ], [ ], [ ], [+Z], or [-Z] performs movement by 0.01 mm (0.0004 in.).
• Holding down [
], [ ], [ ], [ ], [+Z], or [-Z] performs slow continuous movement.
• Holding down while pressing and holding [ ], [ ], [ ], [ ], [+Z], or [-Z] performs rapid continuous
movement.
• Turning the [Dial] performs movement by 0.01 mm (0.0004 in.) at a time.
The cursor moves to a dierent axis on the screen on the handy panel. You can change the axis to move by
pressing the Movement buttons in advance.
Axis to move Movement buttons
X
[
] [ ]
Y
[
] [ ]
Z
[+Z] [−Z]
MEMO
This operation cannot be performed while the front cover is open.
Moving the Tool
19
Chapter 2 Basic Operation