Step 3: Installing a Character Cutter/Parallel Cutter
Use the nose unit when engraving using a character cutter or parallel cutter.
" P. 83 "Nose Unit Overview and Precautions"
WARNING
Never inadvertently touch the computer or handy panel while performing this task.
Unintended operation of the machine may lead to you being caught in the machine.
WARNING
Securely fasten the cutting tool and workpiece in place. After securing in place,
make sure no spanners or other articles have been left behind inadvertently.
Otherwise, such articles may be thrown from the machine with force, posing a
risk of injury.
CAUTION
Be careful around the cutting tool.
The cutting tool is sharp. Broken cutting tools are also dangerous. To avoid injury,
exercise caution.
CAUTION
The machine contains blades and other sharp components.
Be careful not to touch the tool tip or any other sharp edges. Doing so may cause
injury.
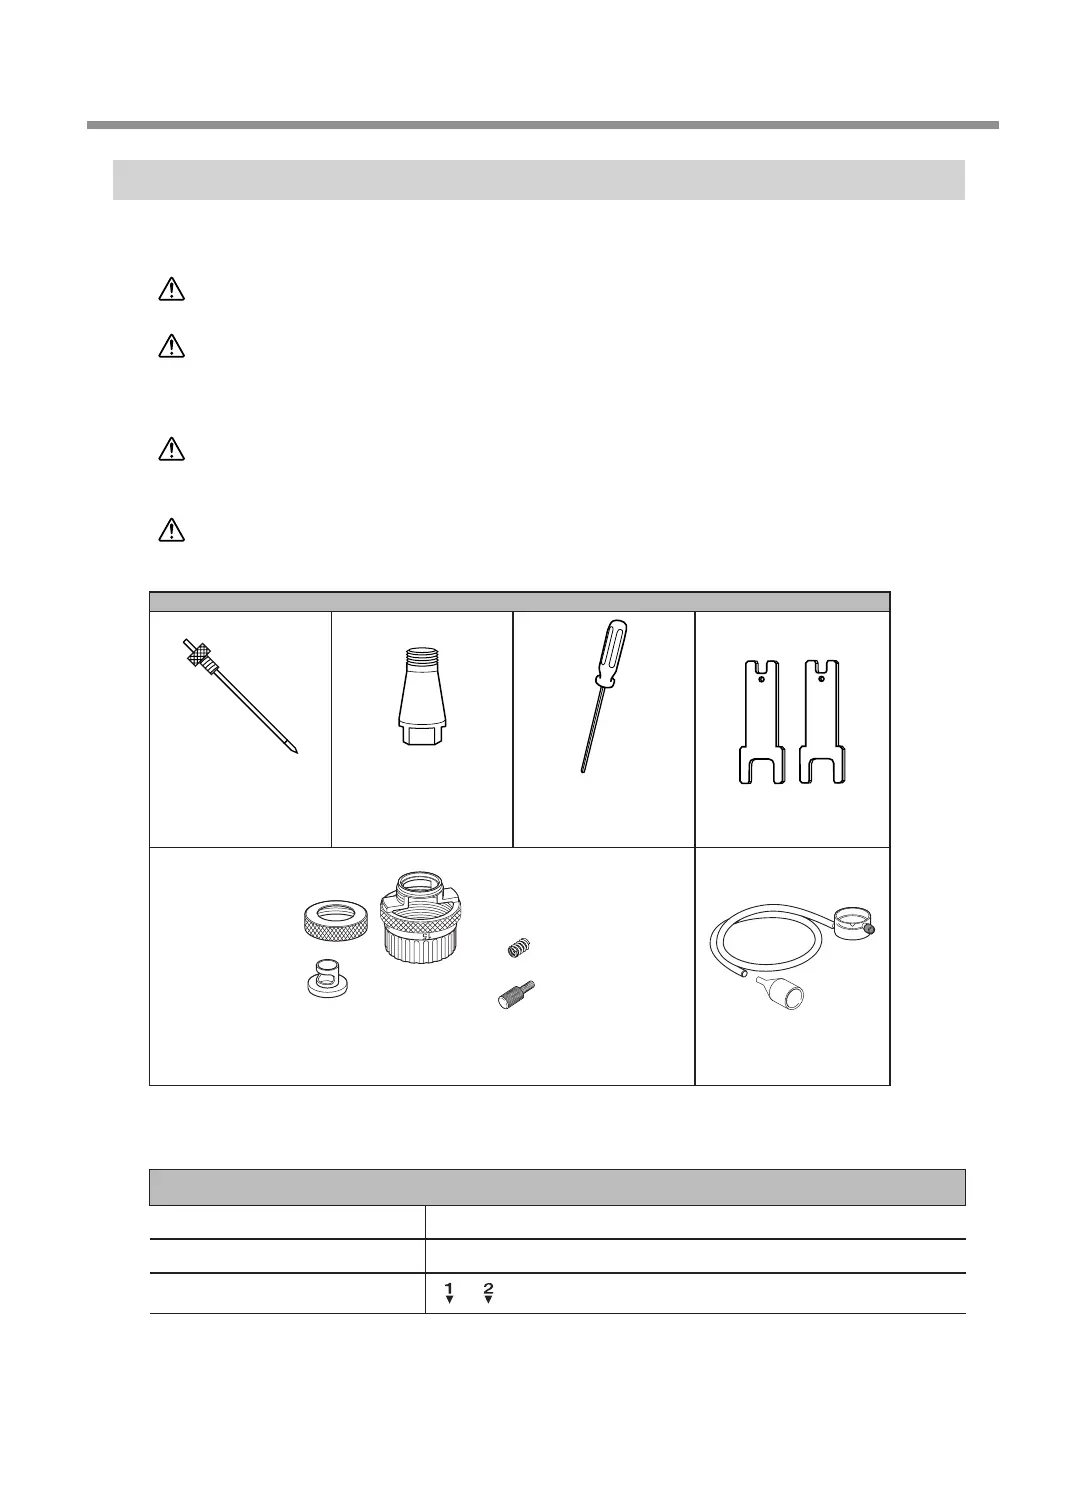
Items used in this procedure
Character cutter
or
parallel cutter
Solid collet
*1
Hexagonal
screwdriver
Wrenches (2)
Retaining screw
Nose cone
(resin or metal)
Spring
Nose unit
*2
Vacuum adapter
*1 There are two types of solid collets. Use a solid collet that ts the diameter of the cutter that will be used. Collet
for ø4.36 cutters is an optional item.
*2 Use a resin or metal nose cone. To use it selectively, refer to P. 44 “Assemble the nose unit.” in the procedure.
Settings for this machine
Automatic Z control ON
Spindle rotation ON
Lock lever position
or
Starting Engraving
41
Chapter 3 Basic Engraving Methods