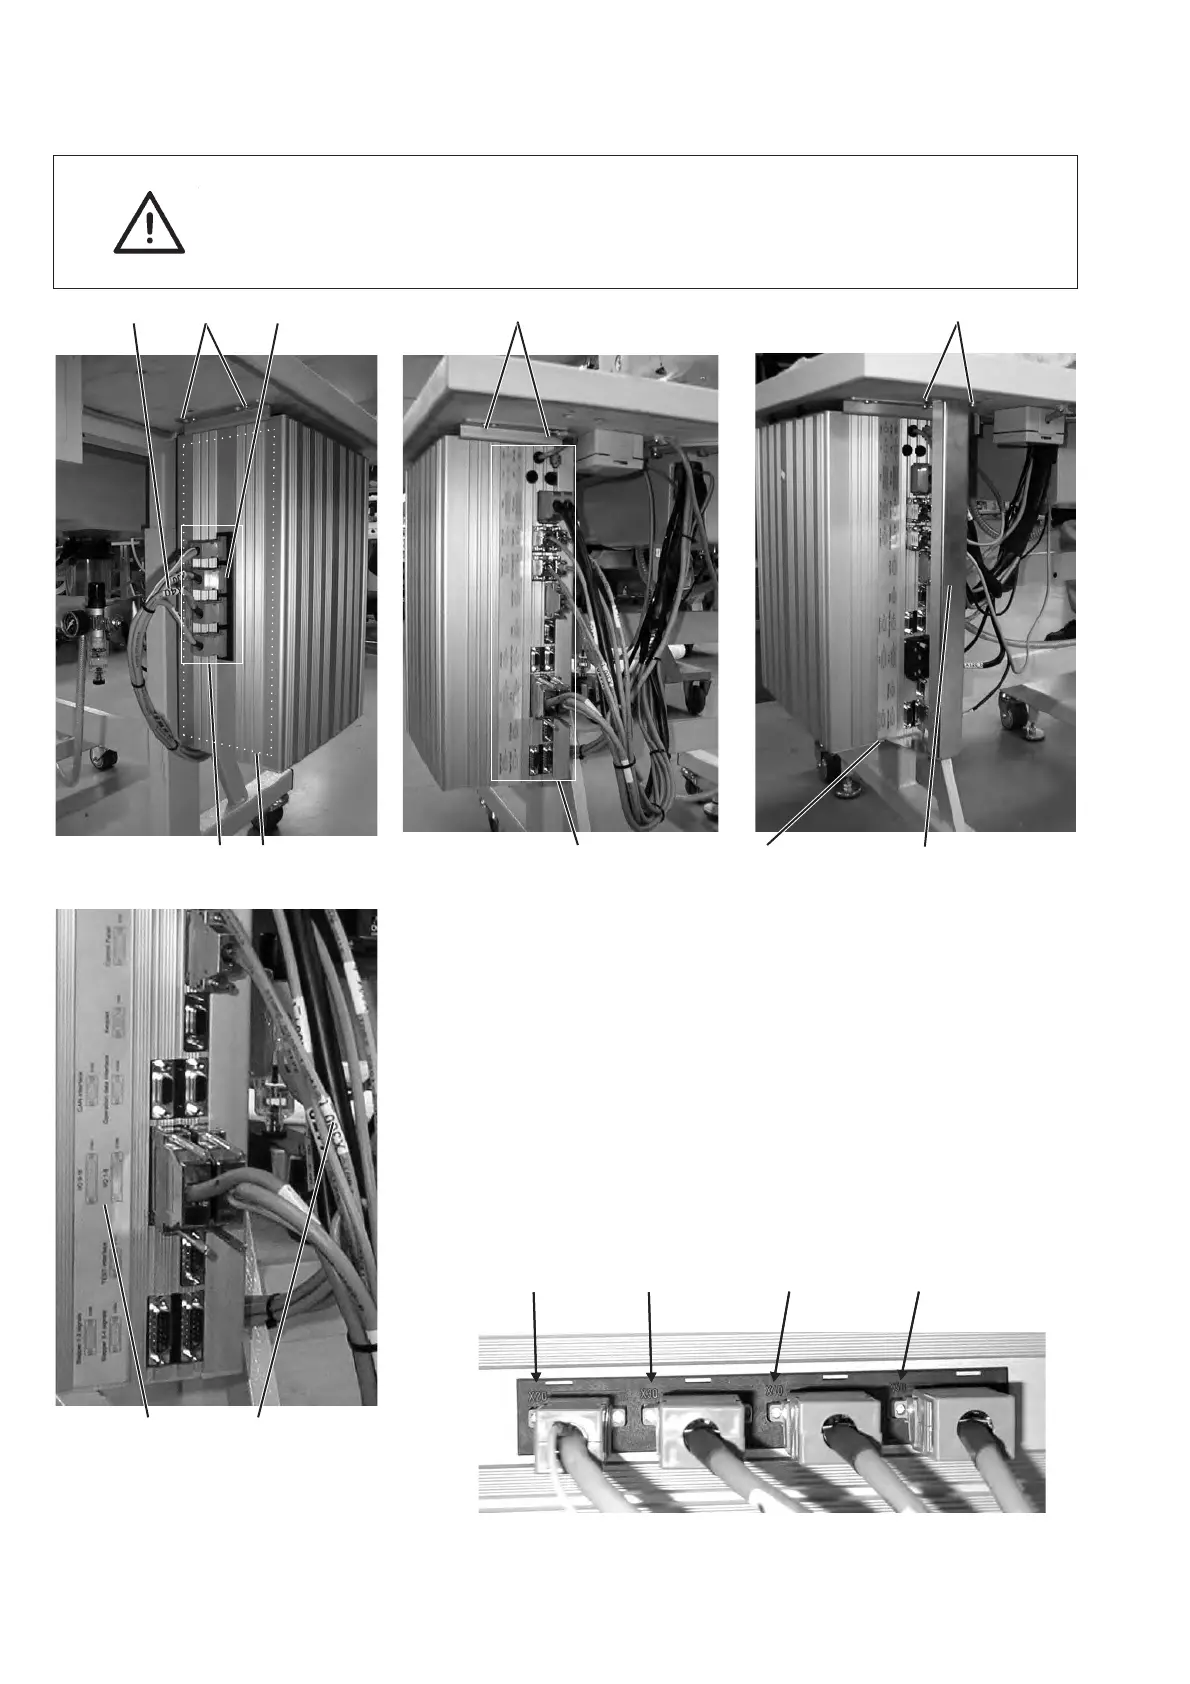
6. Assembly of the control
Attention!
The control must not stand on the floor because otherwise the
ventilation grid are covered. This can lead to the overheating of the
control.
–
Screw the control on the underside of the table top with the
screws 2 and 3. The s ide carrying the data plate points to the
front.
–
Connect all plugs in field 1 and 4 w ith the respective bushes. The
plugs are clearly marked with an imprint on c able 8 and the
bushes at the casing 7! Cable and bush have the same
designation. Check w hether every plug is in the correct bush !
–
Screw plugs and bushes together.
–
Finally screw 6 the protective bracket 5 under the table top so
that the c ables cannot be ripped out or damaged inadvertently. In
addition secure the protective bracket by screwing it together with
the control using the screws 10.
6
19 4 10 5
827 3 6
78
X20 X30 X40 X50
 Loading...


