4. Lifting eye bolt
The lifting eye bolt helps you to lift the automat into the stand. For
example you can hoist the automat by a ceiling crane or you put a rigid
bar (e.g. the bar of the thread stand) through the lifting eye bolt and lift
the automat with 2 persons. The lifting eye bolt is included in the
accessories.
–
Screw the lifting eye bolt 8 on the automat.
–
Lift the automat into the stand.
–
Unscrew the lifting eye bolt 8 when the automat is mounted.
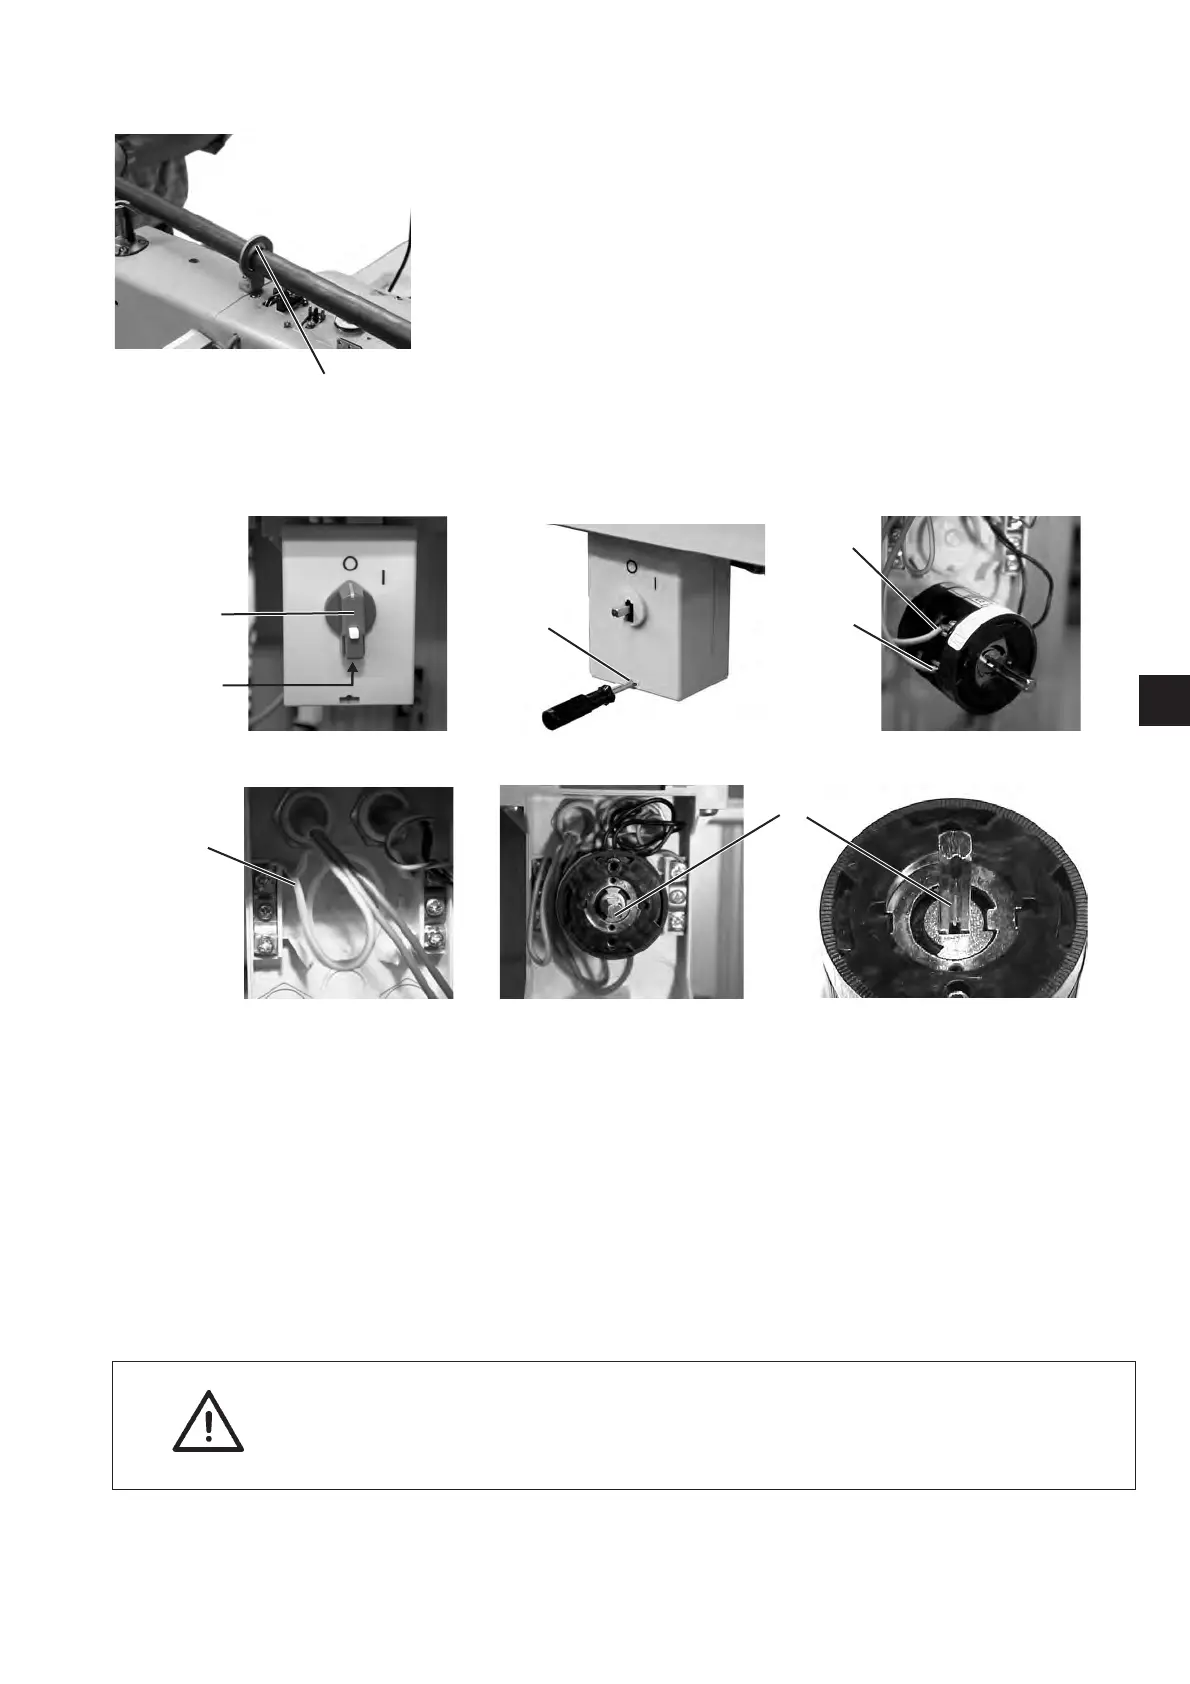
5. Assembly of the main switch
–
Loosen the screw 4 and remove the switching knob 5.
–
Removethemainswitchcover.
For this purpose, unlock the tab in the hole 6.
–
Insert the c able from the control box in the main switch.
–
Connect the cable cores of the control box to the terminals
L1 (1à brown) and L2 (2 à blue).
Connect the protective earth (3 à yellow-green) of the control box
to the main switch too.
–
Make sure that the notch 7 of the main switch faces down.
–
Put the main switch cover again. Put on the switching knob 5 and
screw it tight.
Hint
If you manufacture the table top yourself, fit the main switch at
an easily accessible place because the main switch is also the
emergency stop s witch.
2
5
8
5
4
1
2
6
7
3
 Loading...


