Feed dog
Service Instructions 867 - 04.0 - 10/2019 37
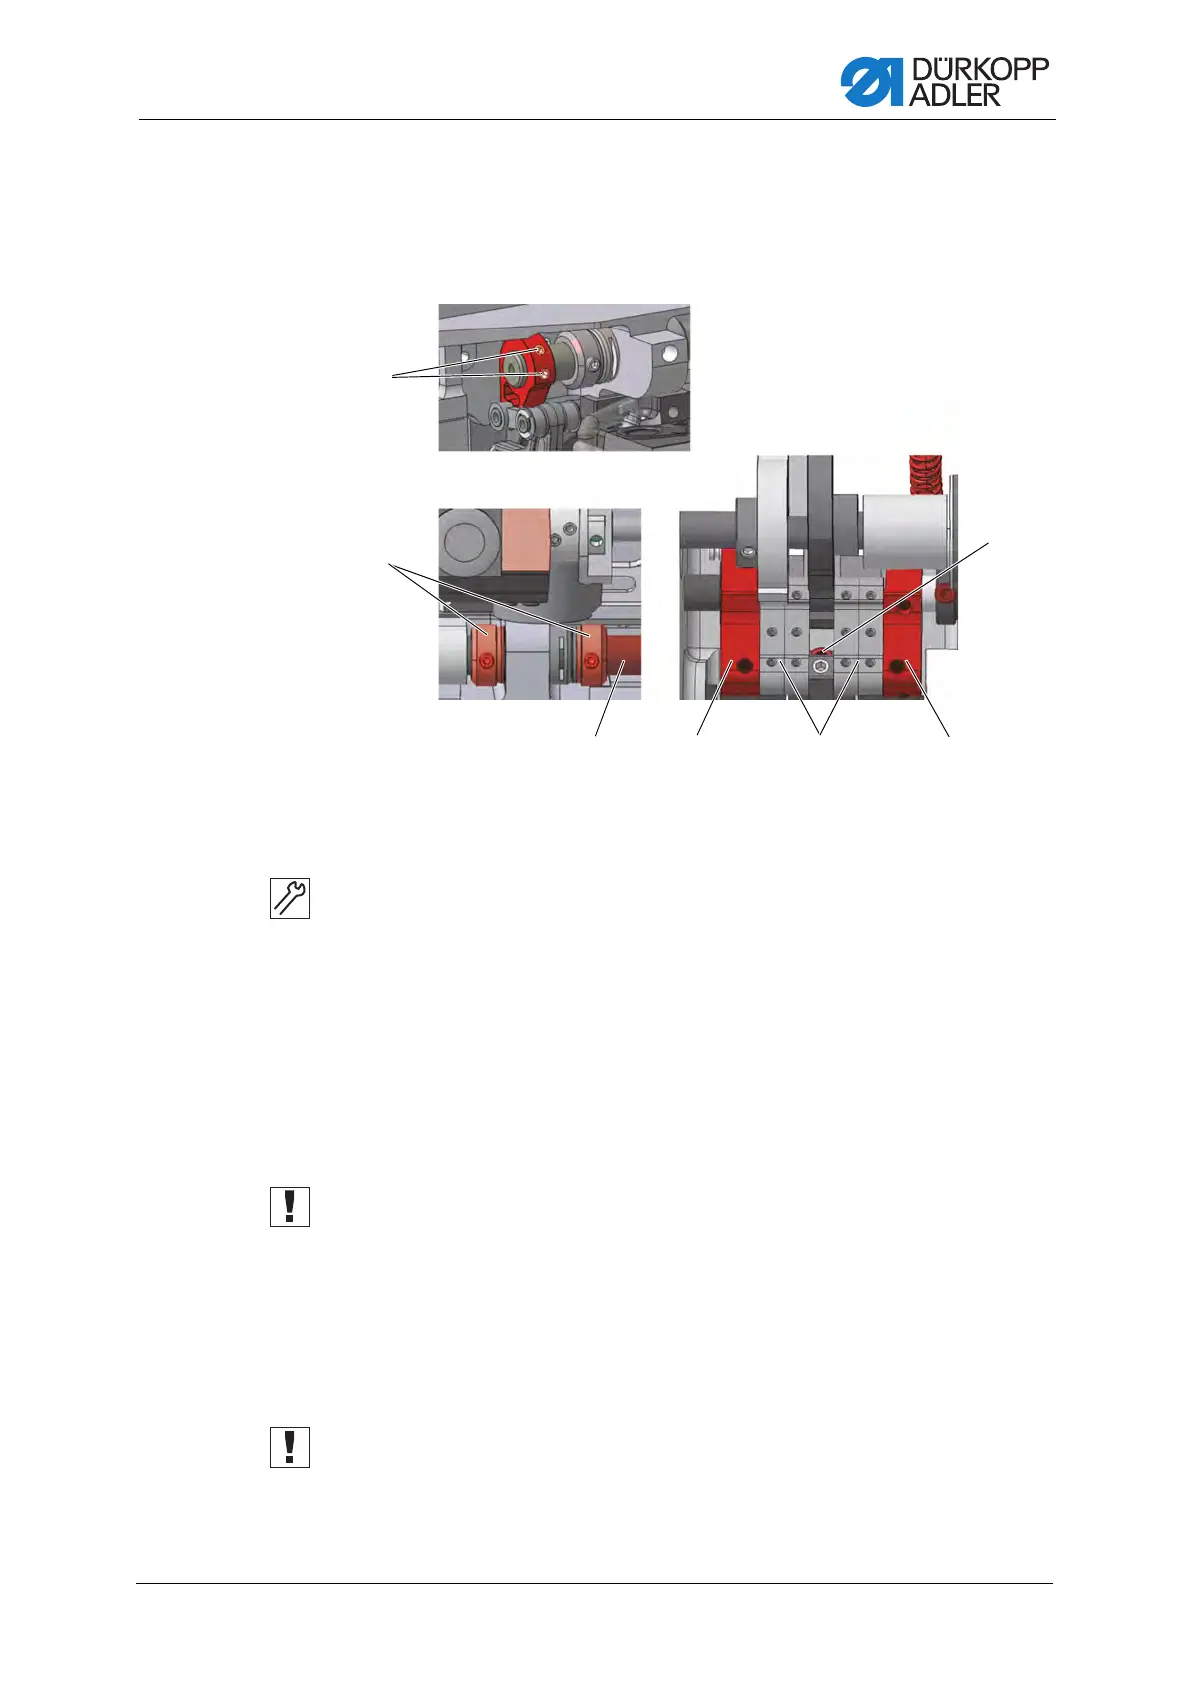
8.1.2 Moving the feed dog carrier
The feed dog carrier is connected to the stitch regulator gear via
the pusher shaft and can be moved on this shaft.
Fig. 22: Moving the feed dog carrier
To move the feed dog carrier:
1. Tilt the machine head ( p. 14).
2. Set the upper stitch length adjusting wheel to 0.
3. Loosen the connection to the pull rod using the two screws (1).
4. Loosen the screw (6).
5. Unscrew threaded pins for the set collars (2).
6. Move the feed dog carrier perpendicular to the sewing direction so that
the feed dog is exactly in the center of the throat plate cutout.
7. Push the set collars (2) toward each other as far as they will go.
Important
Make sure that the pusher shaft (3) is tightened by the set collars.
8. Tighten the threaded pins for the set collars (2).
9. Move the feed dog carrier in the sewing direction such that the feed
dog is exactly in the center of the throat plate cutout.
10. Tighten the rear screw (6).
11. Tighten the connection to the pull rod using the screws (1).
Important
In the process, make sure that the feed dog height has the correct
setting ( p. 39).
(1) - Screws
(2) - Set collars
(3) - Pusher shaft
(4) - Adjusting frame
(5) - Plates
(6) - Screw