Adjusting the stitch length adjusting wheels
Service Instructions 867 - 04.0 - 10/2019 33
6. Remove the lower stitch length adjusting wheel (2) from the shaft (4).
7. To set the stitch length, use a size 10 wrench to carefully turn
the shaft (4).
• to set a shorter stitch length: turn counterclockwise
• to set a longer stitch length: turn clockwise
8. Perform a sewing test with a sheet of paper and readjust if necessary.
9. Turn the scale (5) so that the number indicating the stitch length is
exactly next to the adjusting mark (3).
10. Place the lower stitch length adjusting wheel (2) onto the shaft (4) and
tighten it with the wrench (6).
11. Tighten the screw (1).
7.3 Adjusting the stitch length limit
If not all of the stitch lengths are available during sewing operation, a limit
can be placed on the maximum stitch length that can be set.
12, 9, or 6 mm can be selected as the maximum stitch length.
The appropriate throat plate must be selected for the selected maximum
stitch length. The throat plate cutout must be large enough to prevent the
feed dog from hitting the edges of the throat plate at the front and rear
dead center.
Proper setting
Turn the upper stitch length adjusting wheel clockwise as far as it will go.
The upper stitch length adjusting wheel can only be turned up to
the set maximum stitch length.
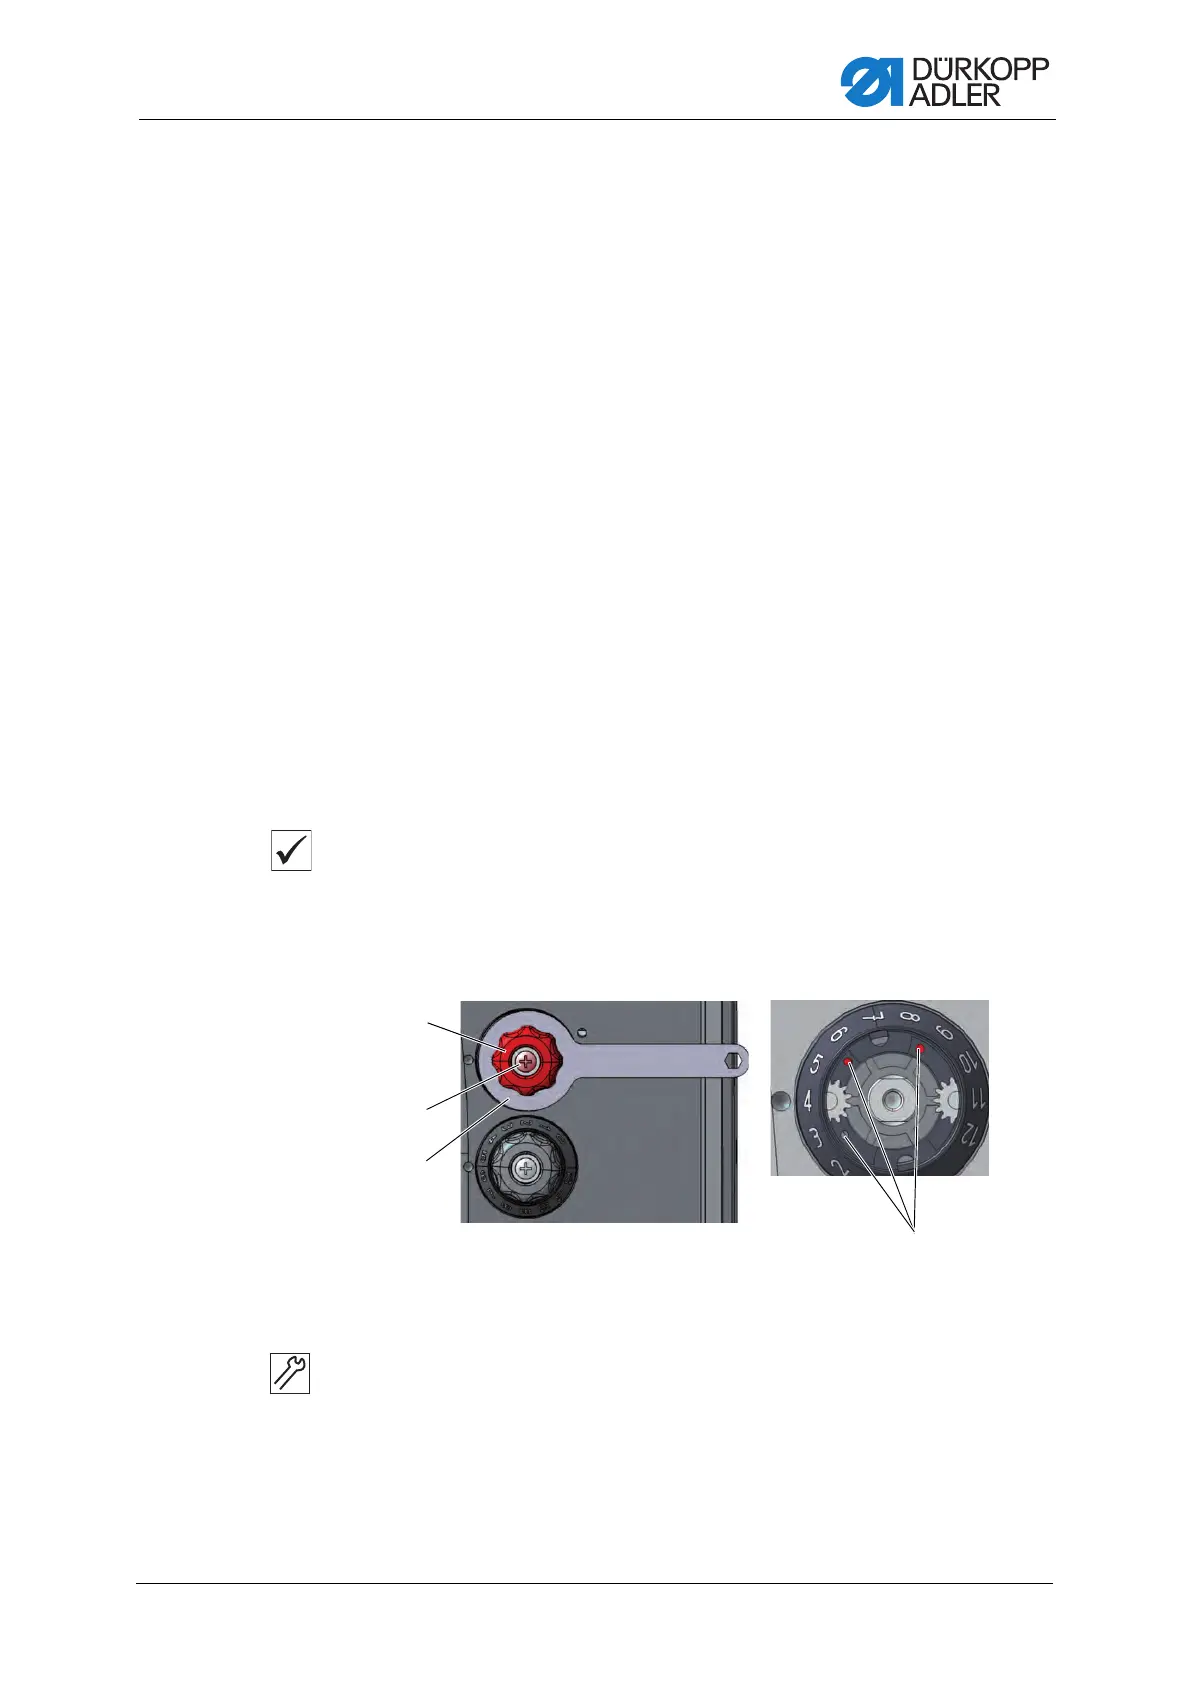
Fig. 19: Adjusting the stitch length limit
To adjust the stitch length limit:
1. Position the upper stitch length adjusting wheel (1) to 0.
2. Hold the upper stitch length adjusting wheel (1) in place using
the wrench (3).
3. Loosen the screw (2).
(1) - Upper stitch length adjusting wheel
(2) - Screw
(3) - Wrench
(4) - Mark-off slots