EasyManuals Logo

DURKOPP ADLER 867 Service Manual

DURKOPP ADLER 867
164 pages
To Next Page IconTo Next Page
To Previous Page IconTo Previous Page
Page #95 background imageLoading...
Page #95 background image
Machines with integrated motor
Service Instructions 867 - 04.0 - 10/2019 93
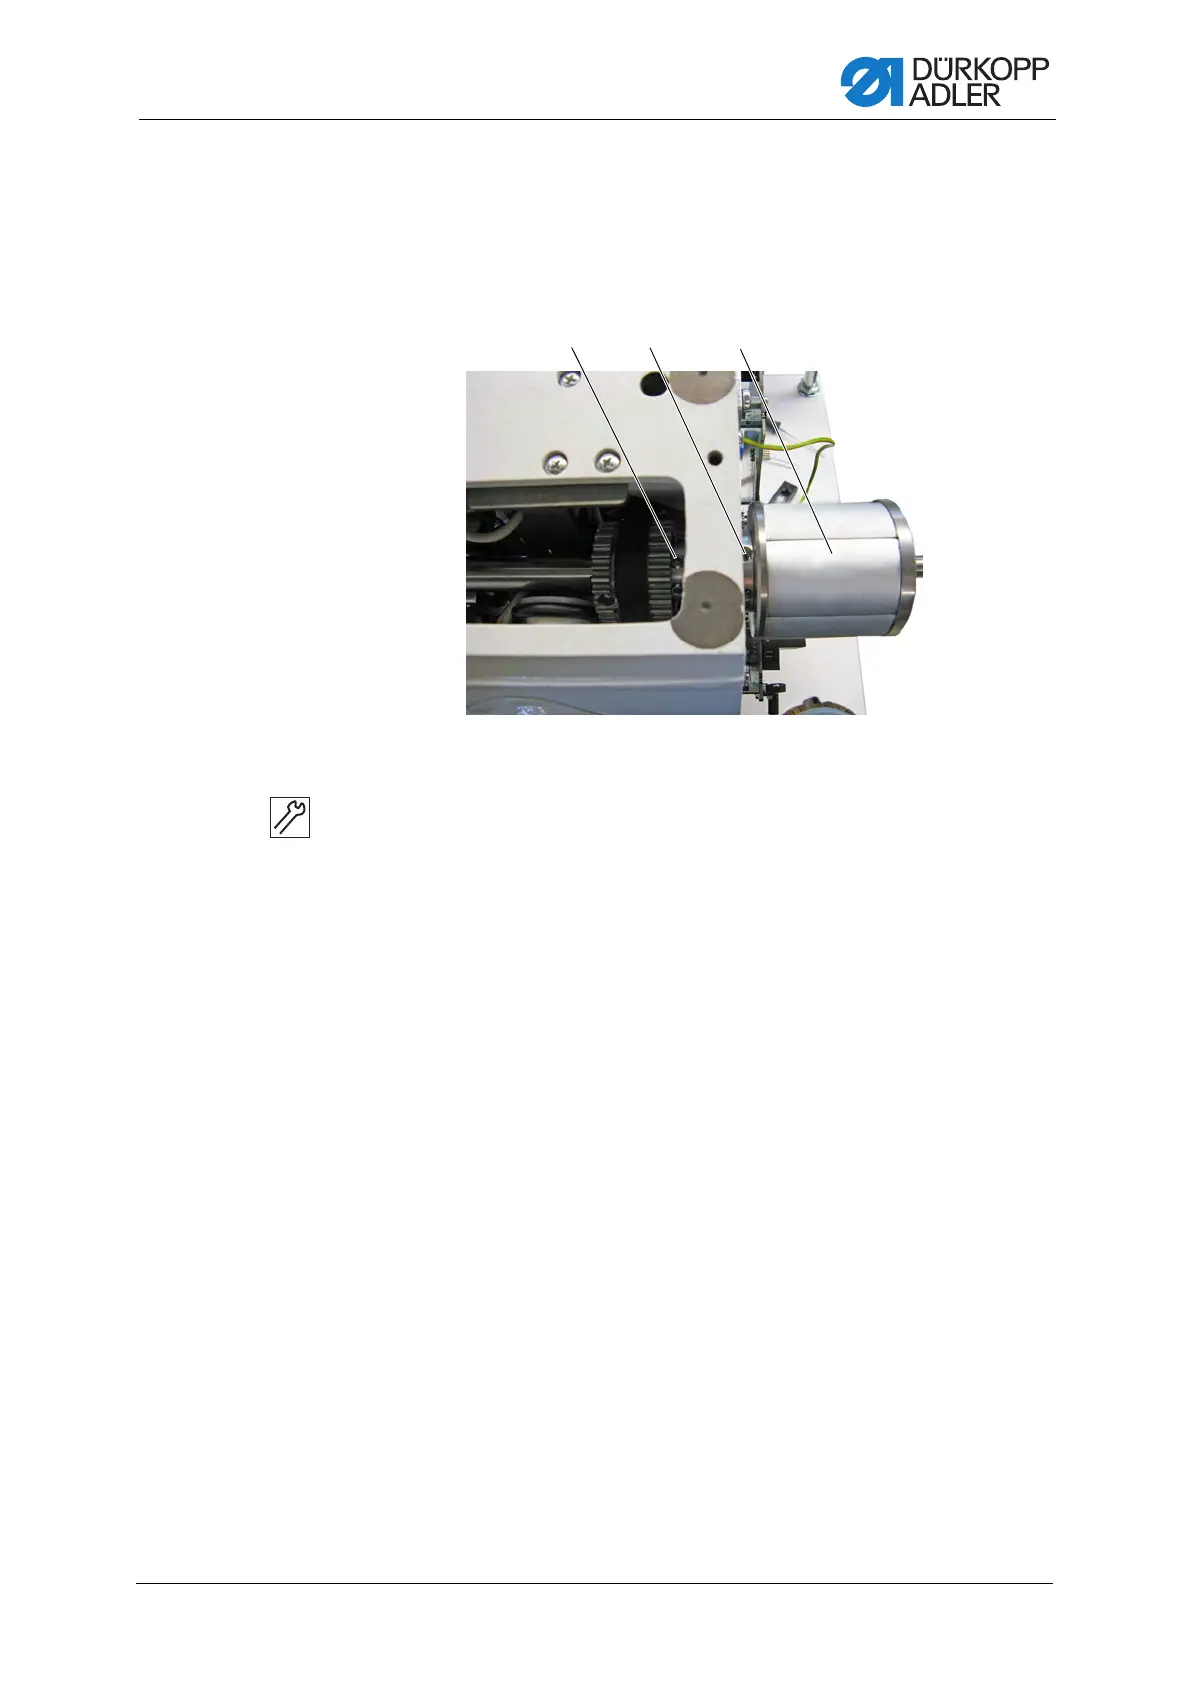
19.3 Assembling the drive
19.3.1 Assembling the rotor
Fig. 78: Assembling the rotor
To assemble the rotor:
1. Push the rotor with deep groove ball bearing (3) onto the shaft until
the deep groove ball bearing is resting against the stop.
2. Tighten threaded pins (1) and (2).
Observe the surface of the shaft in doing so: Tighten the 1
st
screw in
the direction of rotation firmly in place on the surface.
(1) - Threaded pins
(2) - Threaded pins
(3) - Rotor with deep groove ball bearing
①②

Table of Contents

Other manuals for DURKOPP ADLER 867

Questions and Answers:

Question and Answer IconNeed help?

Do you have a question about the DURKOPP ADLER 867 and is the answer not in the manual?

DURKOPP ADLER 867 Specifications

General IconGeneral
Stitch TypeLockstitch
Max Stitch Length12 mm
Needle System134-35
Needle Thread TensionAdjustable
LubricationAutomatic
TypeIndustrial Sewing Machine
Max Sewing Speed3000 stitches per minute
Presser Foot Lift20 mm
Power Requirements230V/50Hz

Related product manuals