Adjusting the stitch length adjusting wheels
34 Service Instructions 867 - 04.0 - 10/2019
4. Remove the upper stitch length adjusting wheel (1).
5. Loosen the threaded pin from one of the 3 mark-off openings.
6. Screw the threaded pin into the mark-off opening for the required
maximum stitch length.
The slots are marked with numbers for the stitch length.
7. Turn the scale so that the 0 is exactly next to the adjusting mark.
8. Place the upper stitch length adjusting wheel (1) and hold it in position
using the wrench.
9. Tighten the screw (2).
7.4 Adjusting the eccentric for the forward and backward
stitches
Proper setting
The forward and backward stitches are the same length.
As a test, sew a seam forward, stop, and sew a seam backward.
The punctures of the forward and backward stitches have to lie within one
another.
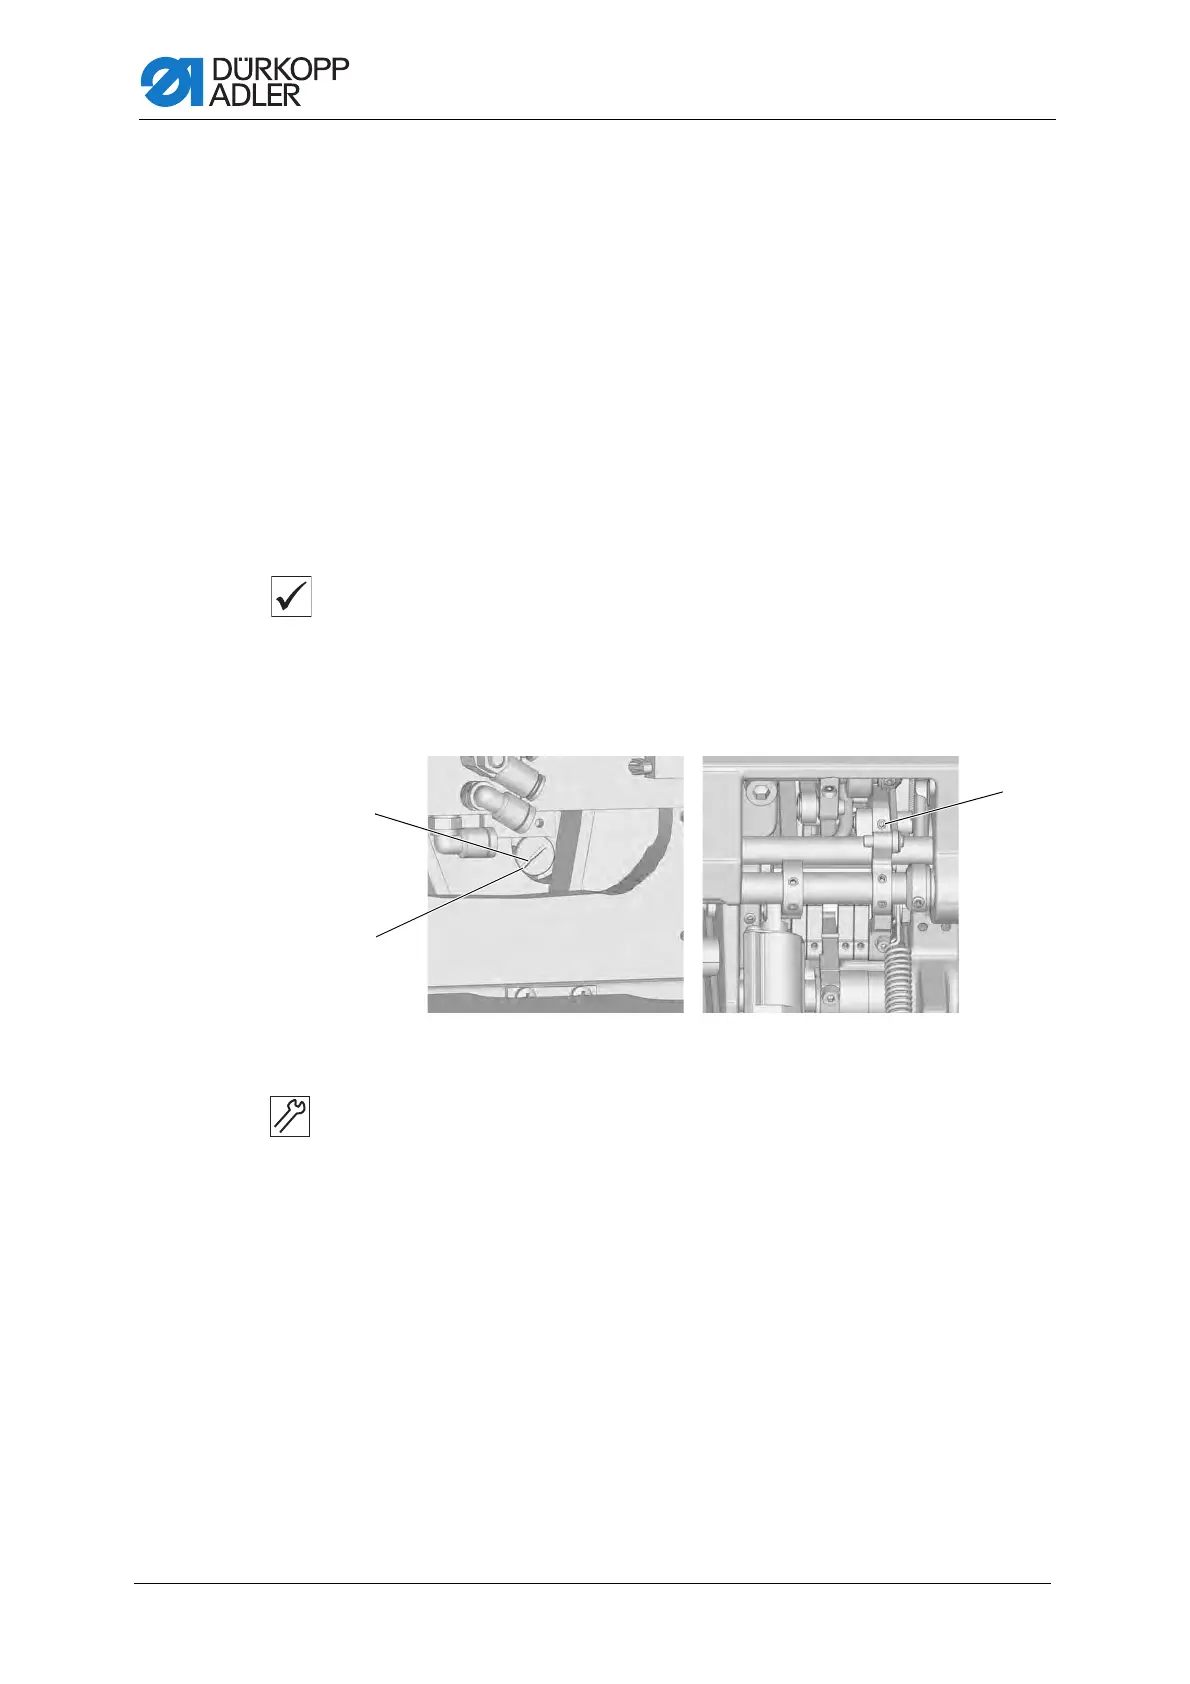
Fig. 20: Adjusting the eccentric for the forward and backward stitches
To adjust the eccentric for forward and backward stitches:
1. Tilt the machine head ( p. 14).
2. Loosen the threaded pin (3).
3. Turn the eccentric screw (1) from the right through the slot in the base
plate:
Initial position:
The slot in the eccentric screw (1) is parallel to the axle of
the machine, and the recess (2) faces down.
If the forward and backward stitches are not the same length:
• Turn clockwise: the forward stitch becomes larger, the backward
stitch smaller.
• Turn counterclockwise: the forward stitch becomes smaller,
the backward stitch larger.
4. Tighten the threaded pin (3).
(1) - Eccentric slot
(2) - Recess
(3) - Threaded pin