Adjusting the stitch length adjusting wheels
Service Instructions 867 - 04.0 - 10/2019 31
To switch over between the stitch lengths: Press the button for the stitch
length on the machine arm (1).
If the upper adjusting wheel is activated, then the button (1) lights up.
Upon switching on the machine, the stitch length adjusting wheel
activated most recently is always active.
Order
Adjust the upper stitch length adjusting wheel first before adjusting
the lower stitch length adjusting wheel.
7.1 Adjusting the upper stitch length adjusting wheel
Proper setting
The upper stitch length adjusting wheel is set to the maximum stitch length
that can be achieved with the built-in sewing equipment.
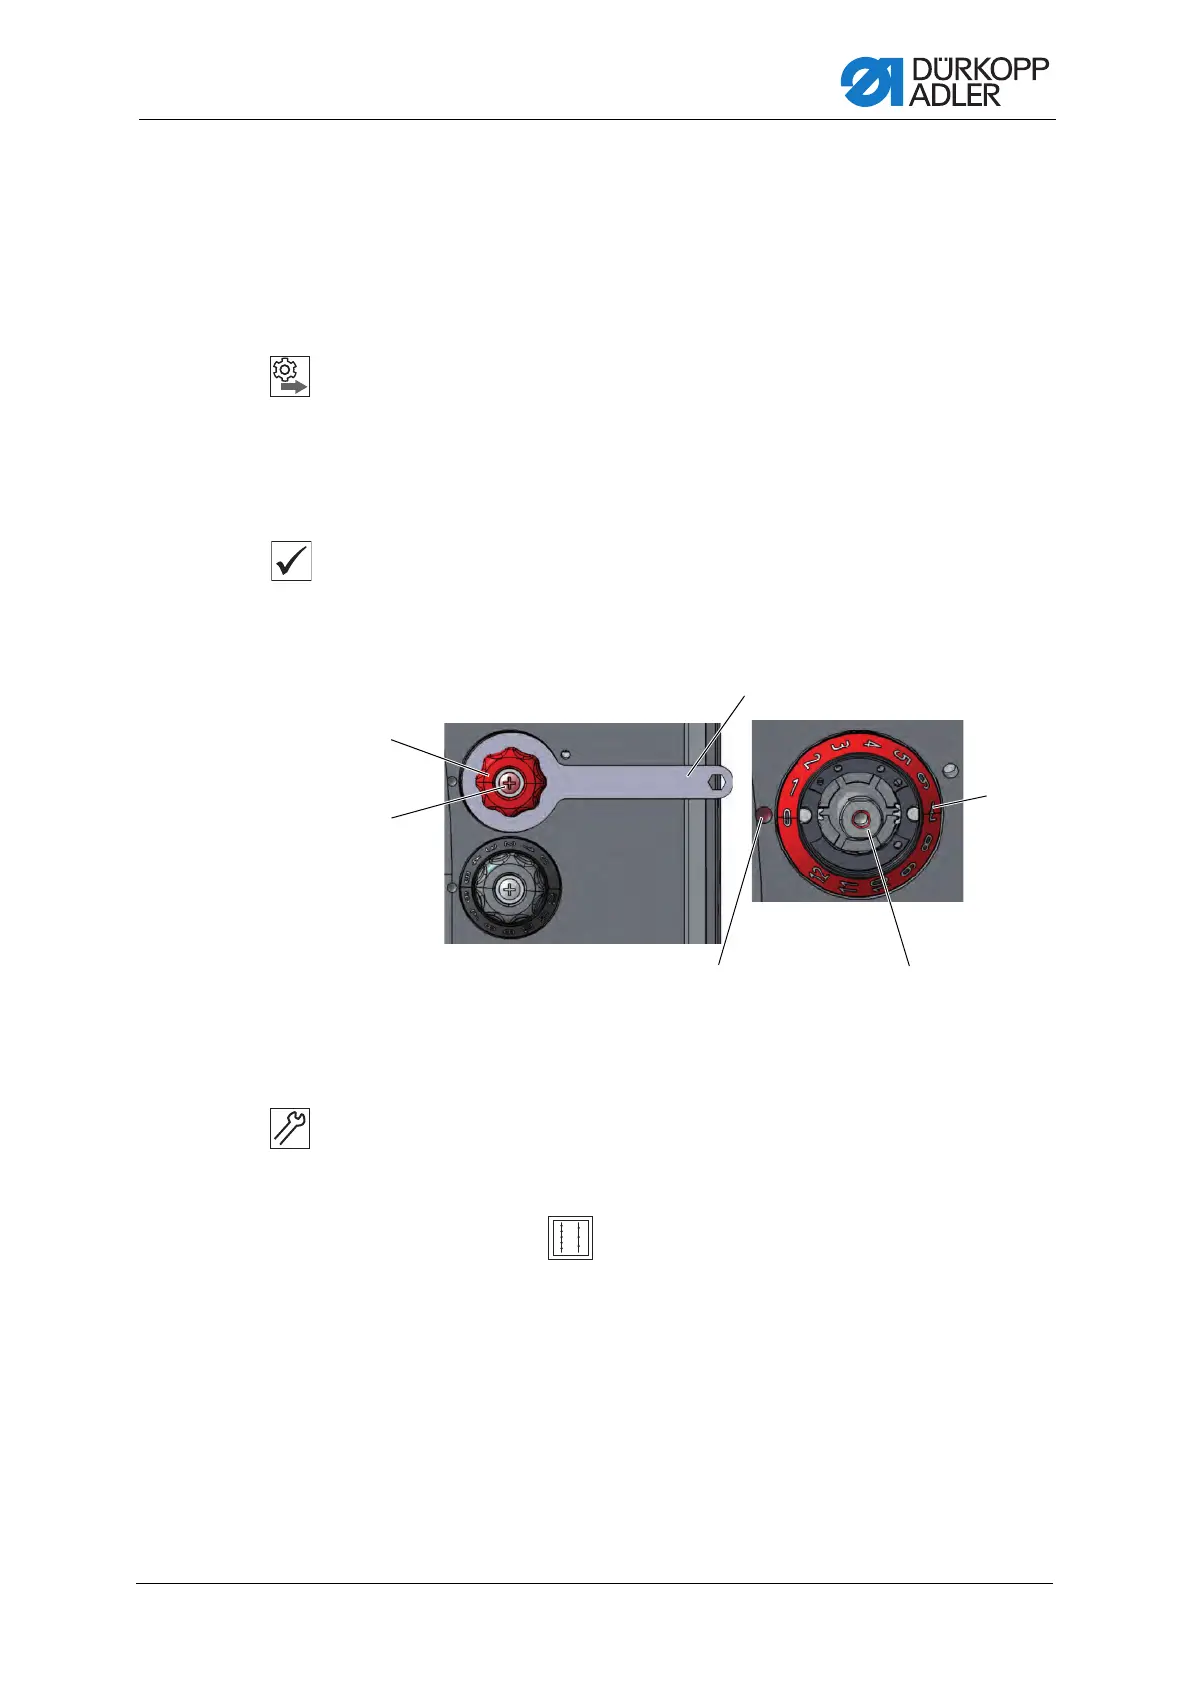
Fig. 17: Adjusting the upper stitch length adjusting wheel
To adjust the upper stitch length adjusting wheel:
1. Switch on the machine.
2. Unthread the needle thread.
3. Press the button on the machine arm.
The button lights up.
The machine switches over to the upper stitch length adjusting
wheel.
4. Hold the upper stitch length adjusting wheel (1) in place using a
wrench (6).
5. Loosen the screw (2).
6. Remove the upper stitch length adjusting wheel (1) from the shaft (4).
(1) - Upper stitch length adjusting wheel
(2) - Screw
(3) - Adjusting mark
(4) - Shaft
(5) - Scale
(6) - Wrench