Epson Artisan 810/835/837/710/725/730/Epson Stylus Photo PX810FW/TX810FW/PX820FWD/TX820FWD/PX830FWD/PX710W/TX710W/PX720WD/TX720WD/PX730WD/TX730WD
Revision G
DISASSEMBLY/ASSEMBLY Disassembly Procedures 143
Confidential
4.2.5.5 CSIC Assy
Parts/Components need to be removed in advance:
ADF Unit (Artisan 810/835/837/PX810FW/TX810FW/PX820FWD/TX820FWD/
PX830FWD only)/Scanner Unit/Upper Left Housing/Paper Guide Top Assy/
Upper Housing
Removal procedure
1. Disconnect the CSIC FFC from the CSIC connector.
Figure 4-76. Removing the CSIC Assy (1)
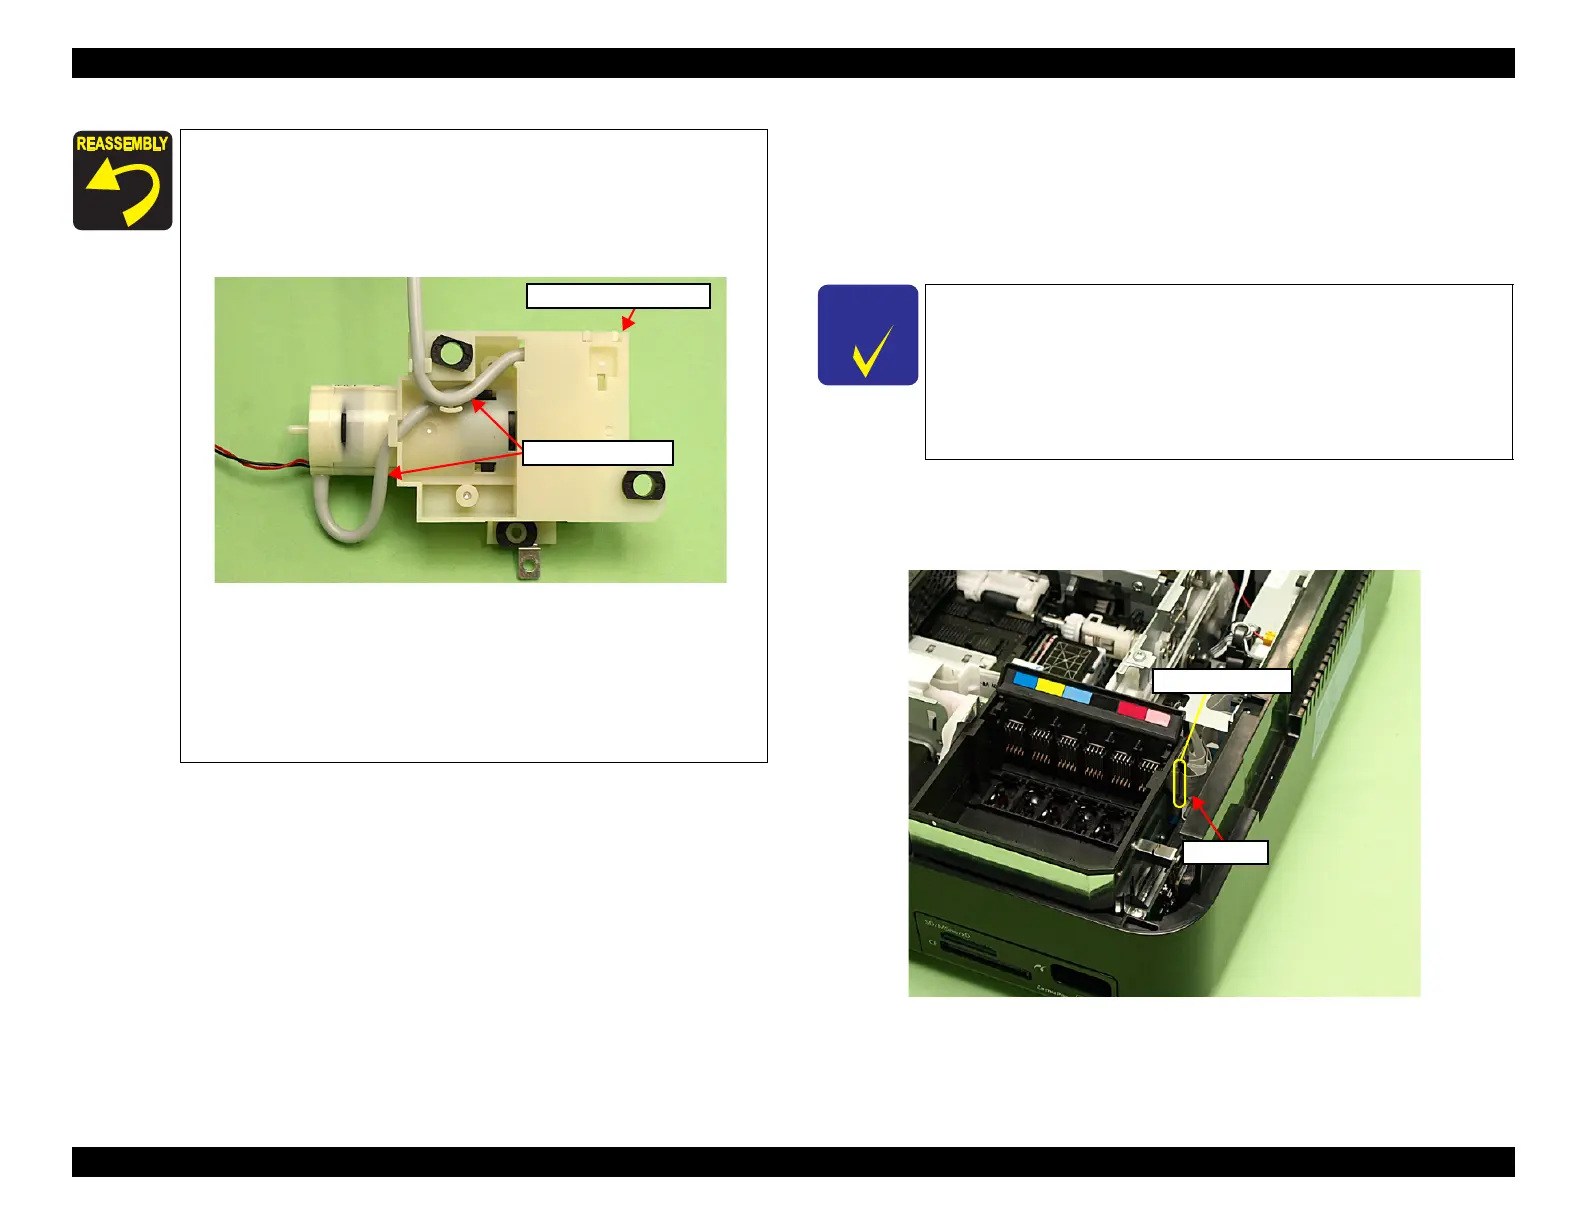
When routing the Decompression Pump Motor cable, make
sure to secure it with the dowels (x6) and the hook on top of the
Decompression Pump Unit as shown in
Fig. 4-74.
When routing the decompression tube, confirm no clipped part
or fold on the tube. (See
Fig. 4-73, Fig. 4-75.)
Figure 4-75. Installing the Decompression Pump Unit
Put the decompression tube through the groove on the Base
Frame (section A and B), and route it behind the FFC. (See
Fig.
4-73.)
Make sure to insert the decompression tube into the socket on
the Cartridge Box Unit to the full to its base. (See
Fig. 4-73.)
Decompression Pump Unit
Decompression tube
In the case of Artisan 710/725/730/PX710W/TX710W/PX720WD/
TX720WD/PX730WD/TX730WD, removing the following parts
earlier will make the operation easier.
Artisan 710/725/PX710W/TX710W/PX720WD/TX720WD:
Rear Right Housing
(p186)
, Right Housing
(p187)
Artisan 730/PX730WD/TX730WD:
Rear Right Housing
(p314)
, Right Housing
(p315)

 Loading...


