Epson Artisan 810/835/837/710/725/730/Epson Stylus Photo PX810FW/TX810FW/PX820FWD/TX820FWD/PX830FWD/PX710W/TX710W/PX720WD/TX720WD/PX730WD/TX730WD
Revision G
Artisan 835/725/PX820FWD/TX820FWD/PX720WD/TX720WD
Disassembly/assembly 266
Confidential
8.3.2.2 Upper Housing
Parts/Components need to be removed in advance:
Scanner Unit/Upper Left Housing/Paper Guide Top Assy
Removal procedure
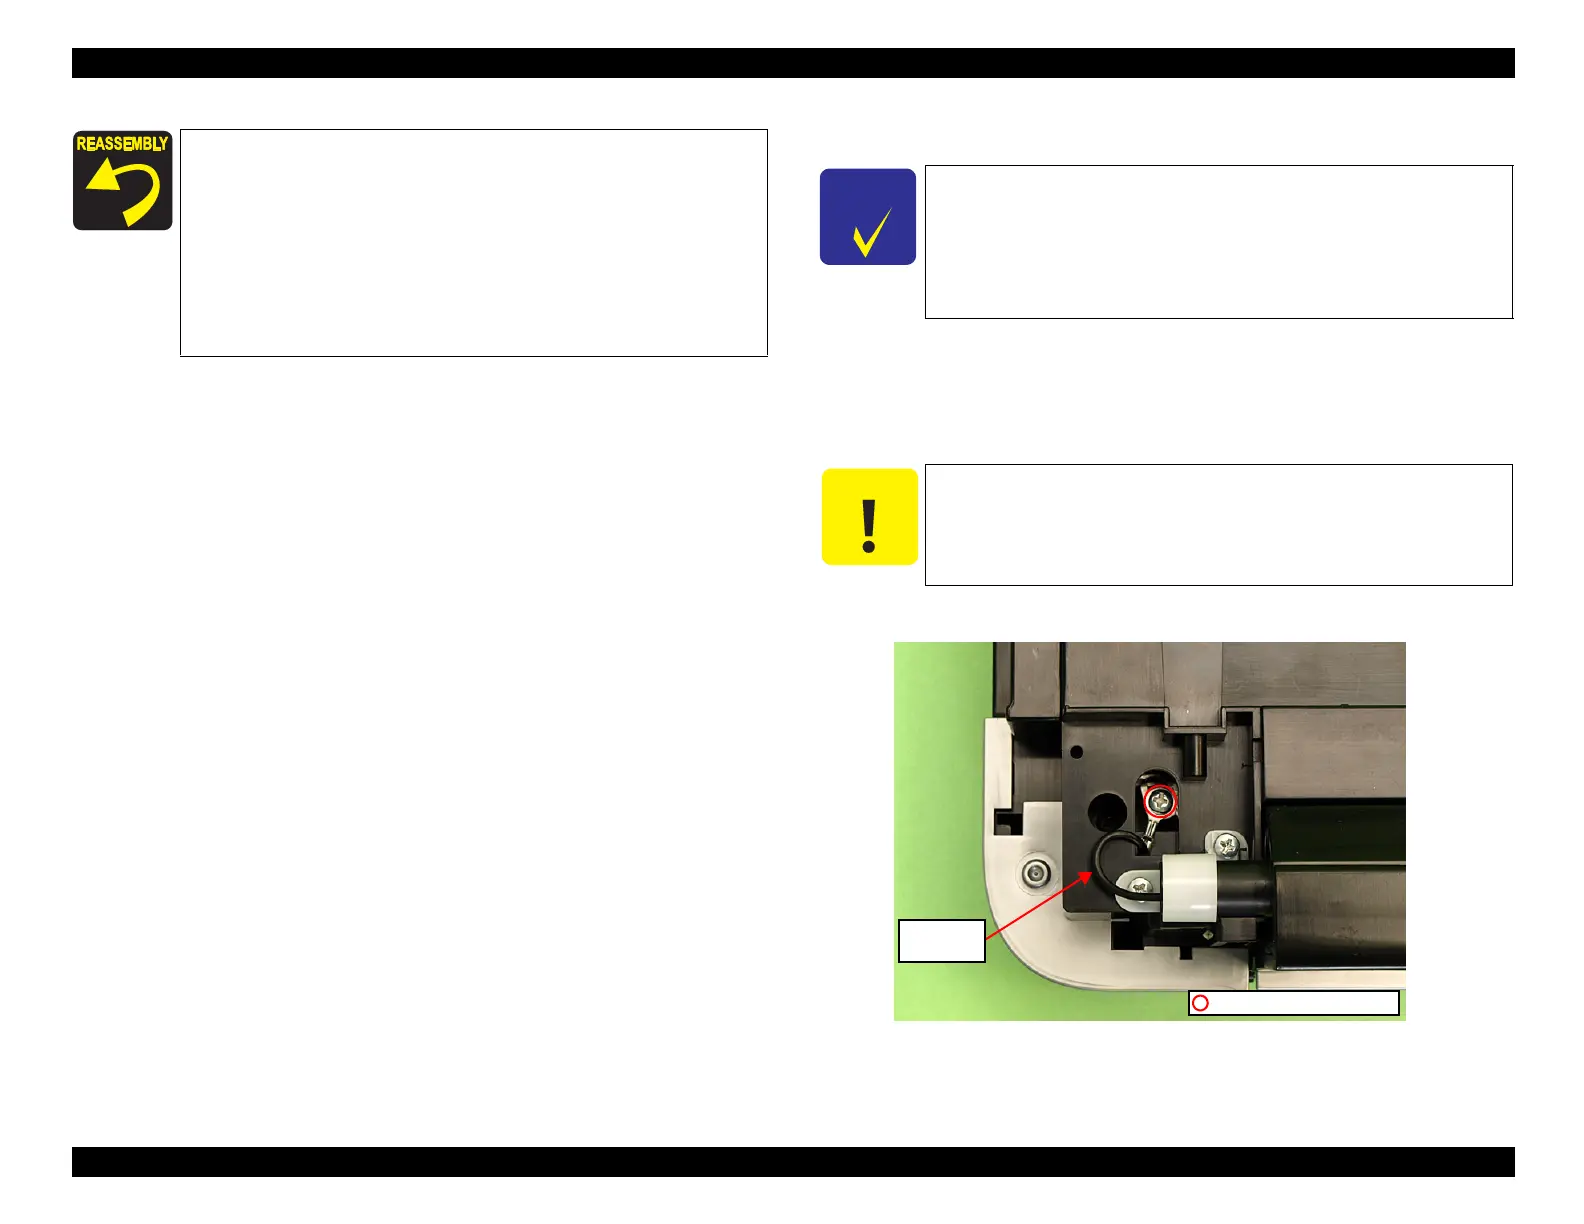
1. Remove the screw (x1) and release the grounding wire.
Figure 8-7. Releasing the Grounding Wire
To confirm the ADF Unit is properly secured after installing the
ADF Unit without the hook releasers attached, make sure the
hinges of the ADF Unit will not come off even if they are
unhooked from the rear of the printer. (See
Fig. 8-6.)
Insert the terminal of the grounding wire to the end of the rib of
the Frame. (See
Fig. 8-4.)
For routing cables, see 4.4 "Routing FFC/cables" (p196).
When installing the Cable Cover, secure it with a new Harness
Cover Clamp. (See
Fig. 8-3.)
This section describes the disassembly/reassembly procedures of the
Upper Housing for Artisan 725/PX720WD/TX720WD.
The disassembly/reassembly procedures for Artisan 835/
PX820FWD/TX820FWD are the same as those for Artisan 810/
PX810FW/TX810FW, therefore, see
4.2.3.5 "Upper Housing"
(p115) for the procedures.
The grounding wire is attached to the frame with a screw. Be
careful not to deform the Frame when removing the screw.
C.B.S. 3x6 (8±1Kgfcm)
Grounding
wire

 Loading...


