Epson Artisan 810/835/837/710/725/730/Epson Stylus Photo PX810FW/TX810FW/PX820FWD/TX820FWD/PX830FWD/PX710W/TX710W/PX720WD/TX720WD/PX730WD/TX730WD
Revision G
DISASSEMBLY/ASSEMBLY Disassembly Procedures 130
Confidential
4.2.4.3 Power Supply Unit
Parts/Components need to be removed in advance:
ADF Unit (Artisan 810/835/837/PX810FW/TX810FW/PX820FWD/TX820FWD/
PX830FWD only)/Scanner Unit/Upper Left Housing/Paper Guide Top Assy/
Upper Housing/Rear Left Housing/Left Housing
Removal procedure
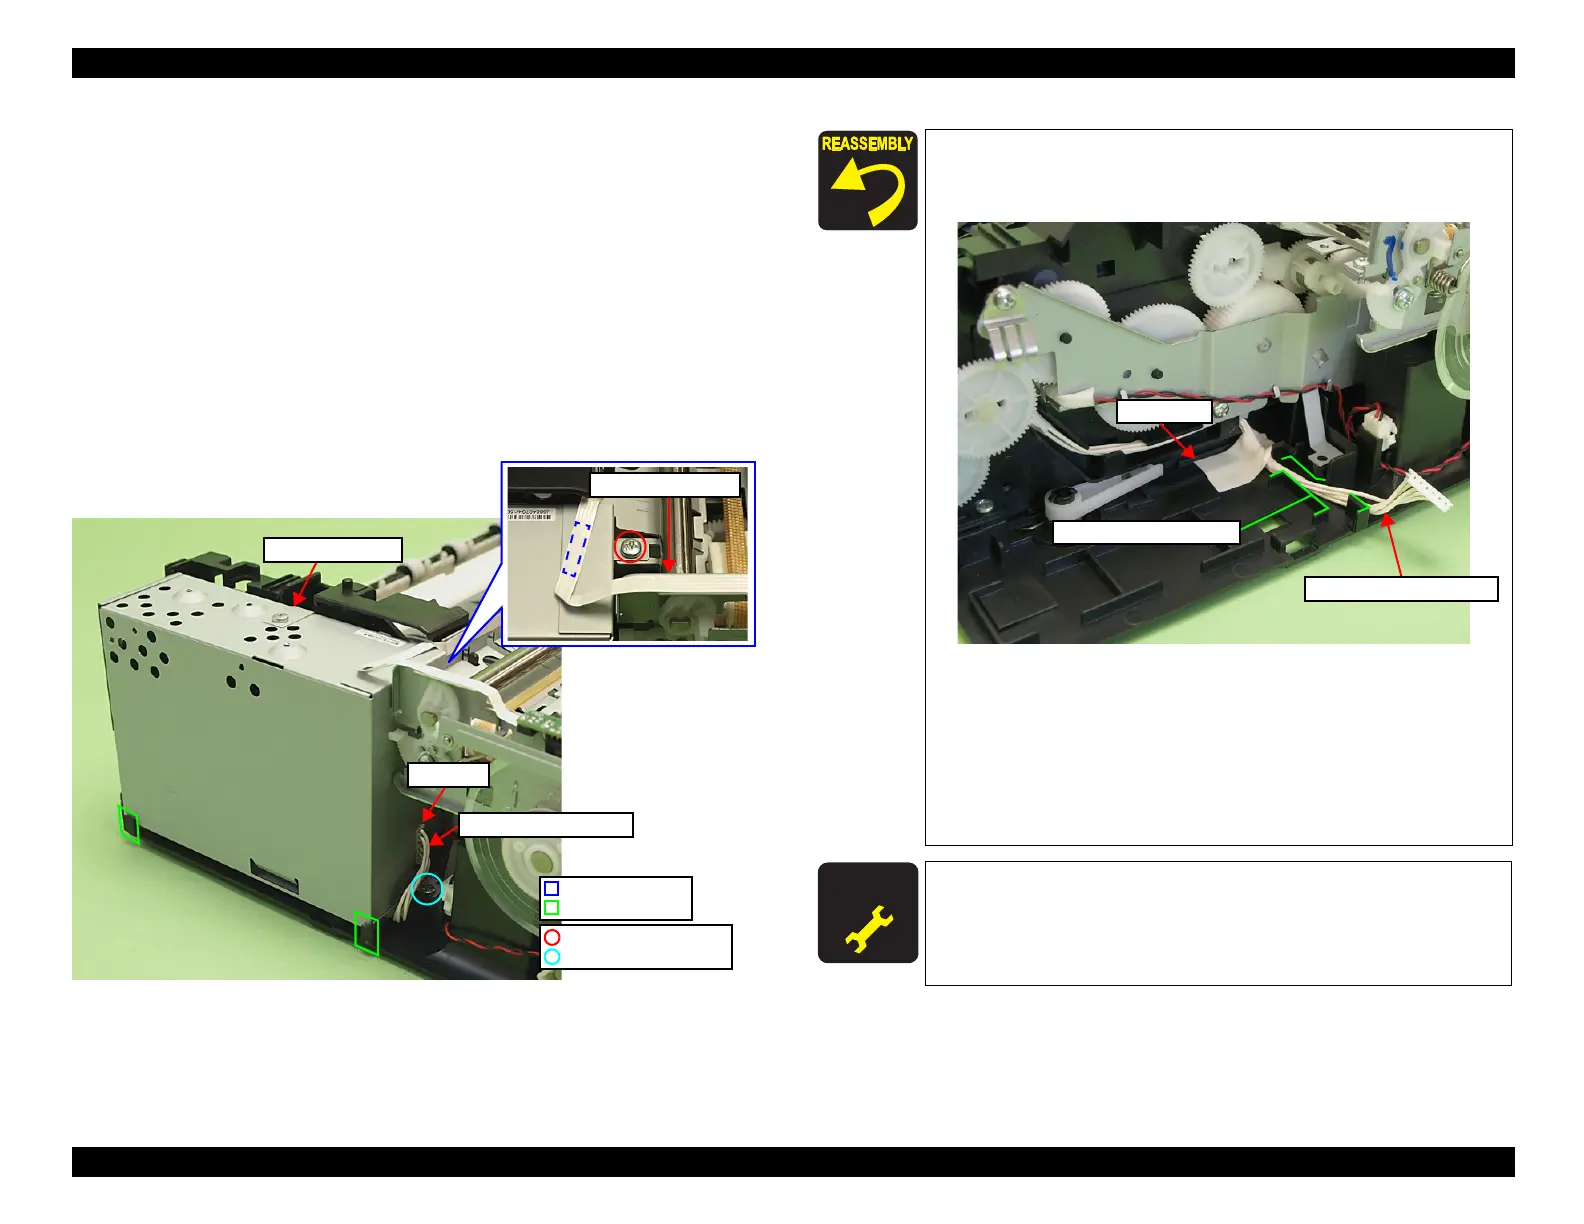
1. Peel off the PF Encoder FFC from the Power Supply Unit. (See Fig. 4-46.)
2. Disconnect the Power Supply Unit cable from the connector of the Power
Supply Unit. (See
Fig. 4-46.)
3. Remove the screws (x2) that secure the Power Supply Unit, and remove the
Power Supply Unit from the Base Frame.
Figure 4-46. Removing the Power Supply Unit
Double-sided tape
Rib
Connector
Power Supply Unit cable
C.B.P. 3x8 (6±1Kgfcm)
C.B.S. 3x6 (8±1Kgfcm)
Power Supply Unit
Route the Power Supply Unit Cable through the groove of the
Base Frame and secure it with acetate tape first, and then install
the Power Supply Unit to the Base Frame.
Figure 4-47. Installing the Power Supply Unit
Install the Power Supply Unit inside the ribs (x2) of the Base
Frame. (See
Fig. 4-46.)
Be careful not to damage the Power Supply Unit cable by
catching it with the screw when screwing. (See
Fig. 4-46.)
Secure the PF Encoder FFC to the Power Supply Unit with
double-sided tape. (See
Fig. 4-46.)
A D J U S T M E N T
R E Q U I R E D
After removing/replacing the Power Supply Unit, make the
specified adjustments. (See
Chapter 5 "ADJUSTMENT".)
Power Supply Unit Cable
Groove of the Base Frame
Acetate tape

 Loading...


