Epson Artisan 810/835/837/710/725/730/Epson Stylus Photo PX810FW/TX810FW/PX820FWD/TX820FWD/PX830FWD/PX710W/TX710W/PX720WD/TX720WD/PX730WD/TX730WD
Revision G
DISASSEMBLY/ASSEMBLY Disassembly Procedures 124
Confidential
4.2.4 Removing the Circuit Board
4.2.4.1 Panel Unit
Parts/Components need to be removed in advance:
Upper Left Housing
Removal procedure
1. Remove the grounding wire. (See 4.2.3.5 Upper Housing Step1 (p115).)
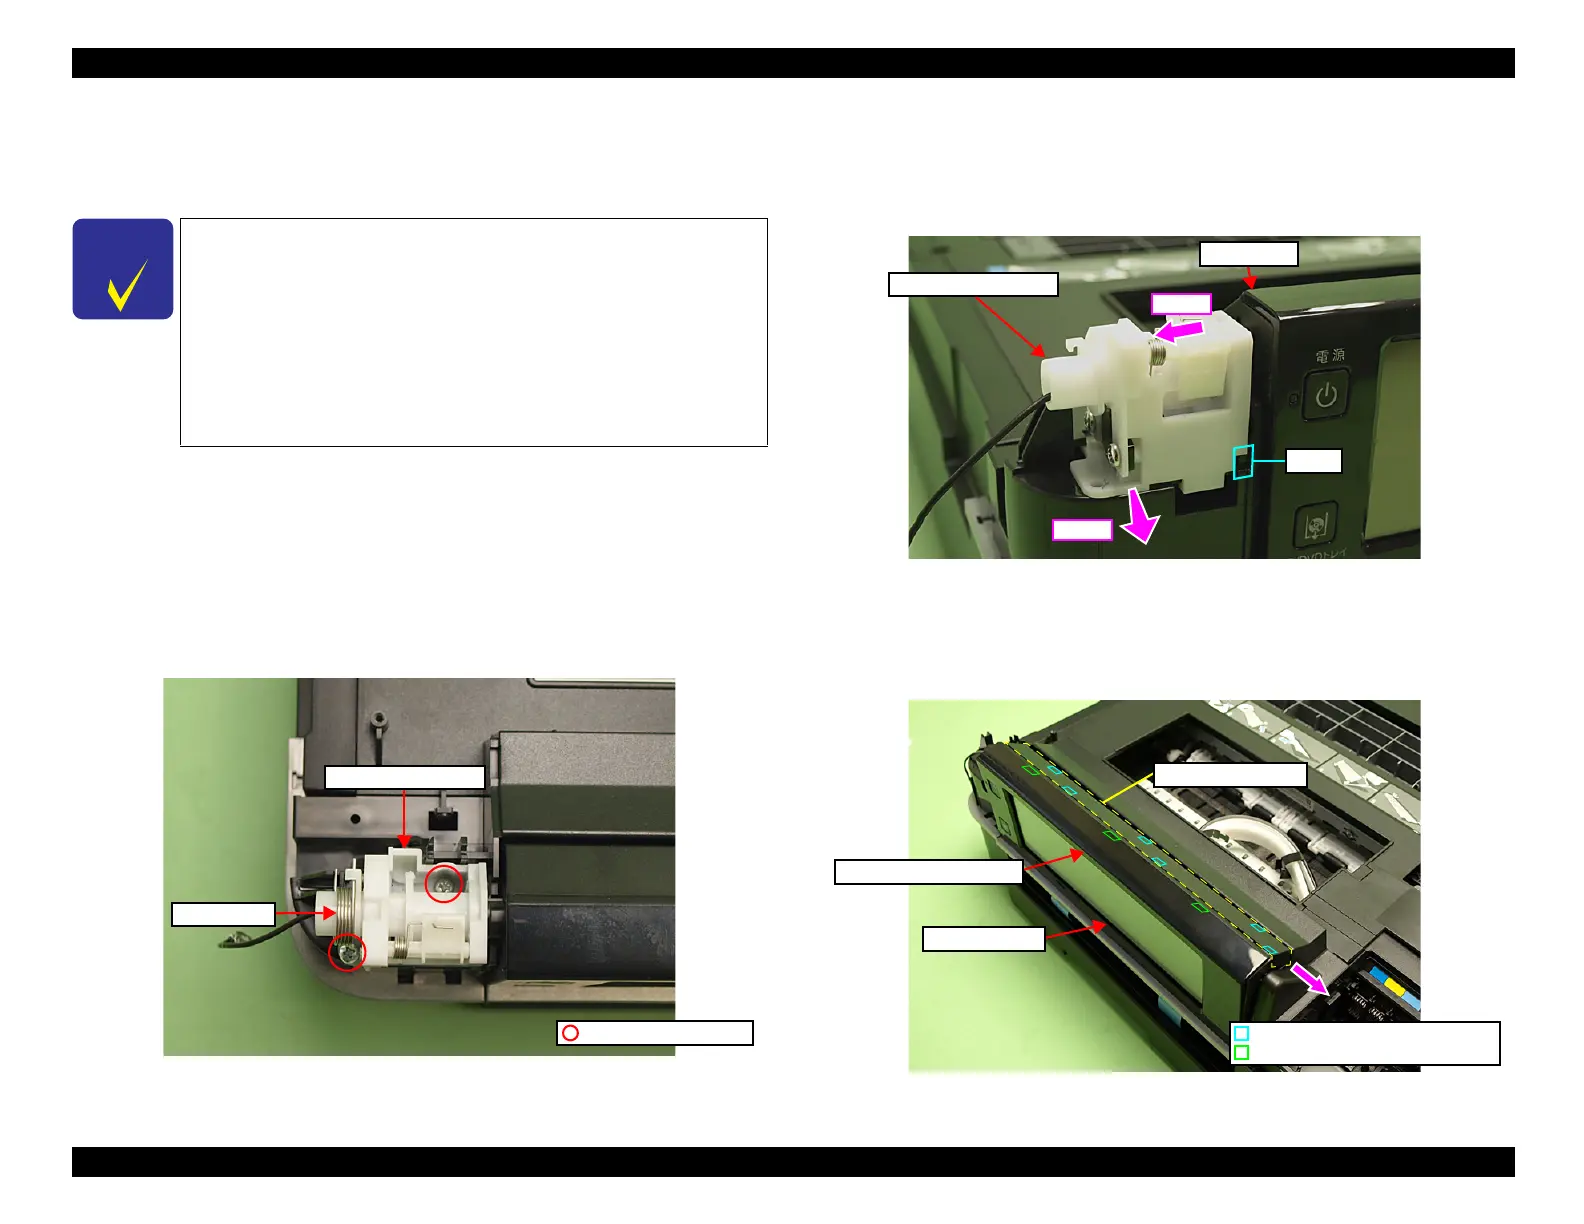
2. Remove the Panel Spring (x1). (See Fig. 4-37.)
3. Remove the screws (x2) that secure the Ratchet Holder Assy.
Figure 4-37. Removing the Ratchet Holder Assy (1)
4. Slide the Ratchet Holder Assy to the left, and release the rib A. (See Fig.
4-38.)
5. Slide the Ratchet Holder Assy to the front to remove it from the Upper
Housing, and remove it from the Panel Unit.
Figure 4-38. Removing the Ratchet Holder Assy (2)
6. Release the hooks (x3) of the Front Panel Unit Cover. (See Fig. 4-39.)
7. Slide the Upper Panel Cover in the direction of the arrow to release the hooks
(x6), and remove the Upper Panel Cover.
Figure 4-39. Removing the Panel Unit (1)
The disassembly/reassembly procedures for Artisan 837/710/725/
730/PX830FWD/PX710W/TX710W/PX720WD/TX720WD/
PX730WD/TX730WD differ from those for Artisan 810/835/
PX810FW/TX810FW/PX820FWD/TX820FWD. See below for the
procedures.
Artisan 710/PX710W/TX710W:
4.3.2.1 Panel Unit (p.188)
Artisan 725/PX720WD/TX720WD:
8.3.2.3 Panel Unit (p.268)
Artisan 837/PX830FWD:
9.4.2.10 Panel Unit (p.302)
Artisan 730/PX730WD/TX730WD:
9.4.2.18 Panel Unit (p.311)
C.B.P. 3x10 (6±1Kgfcm)
Ratchet Holder Assy
Panel Spring
Step 4
Rib A
Panel Unit
Step 5
Ratchet Holder Assy
Front Panel Unit Cover
Panel Unit
Upper Panel Cover
Hook of the Upper Panel Cover
Hook of the Front Panel Unit Cover

 Loading...


