Epson Artisan 810/835/837/710/725/730/Epson Stylus Photo PX810FW/TX810FW/PX820FWD/TX820FWD/PX830FWD/PX710W/TX710W/PX720WD/TX720WD/PX730WD/TX730WD
Revision G
Artisan 837/730/PX830FWD/PX730WD/TX730WD
Disassembly/assembly 307
Confidential
9.4.2.14 Scanner Upper Housing
Parts/Components need to be removed in advance:
ADF Unit/Scanner Unit
Removal procedure
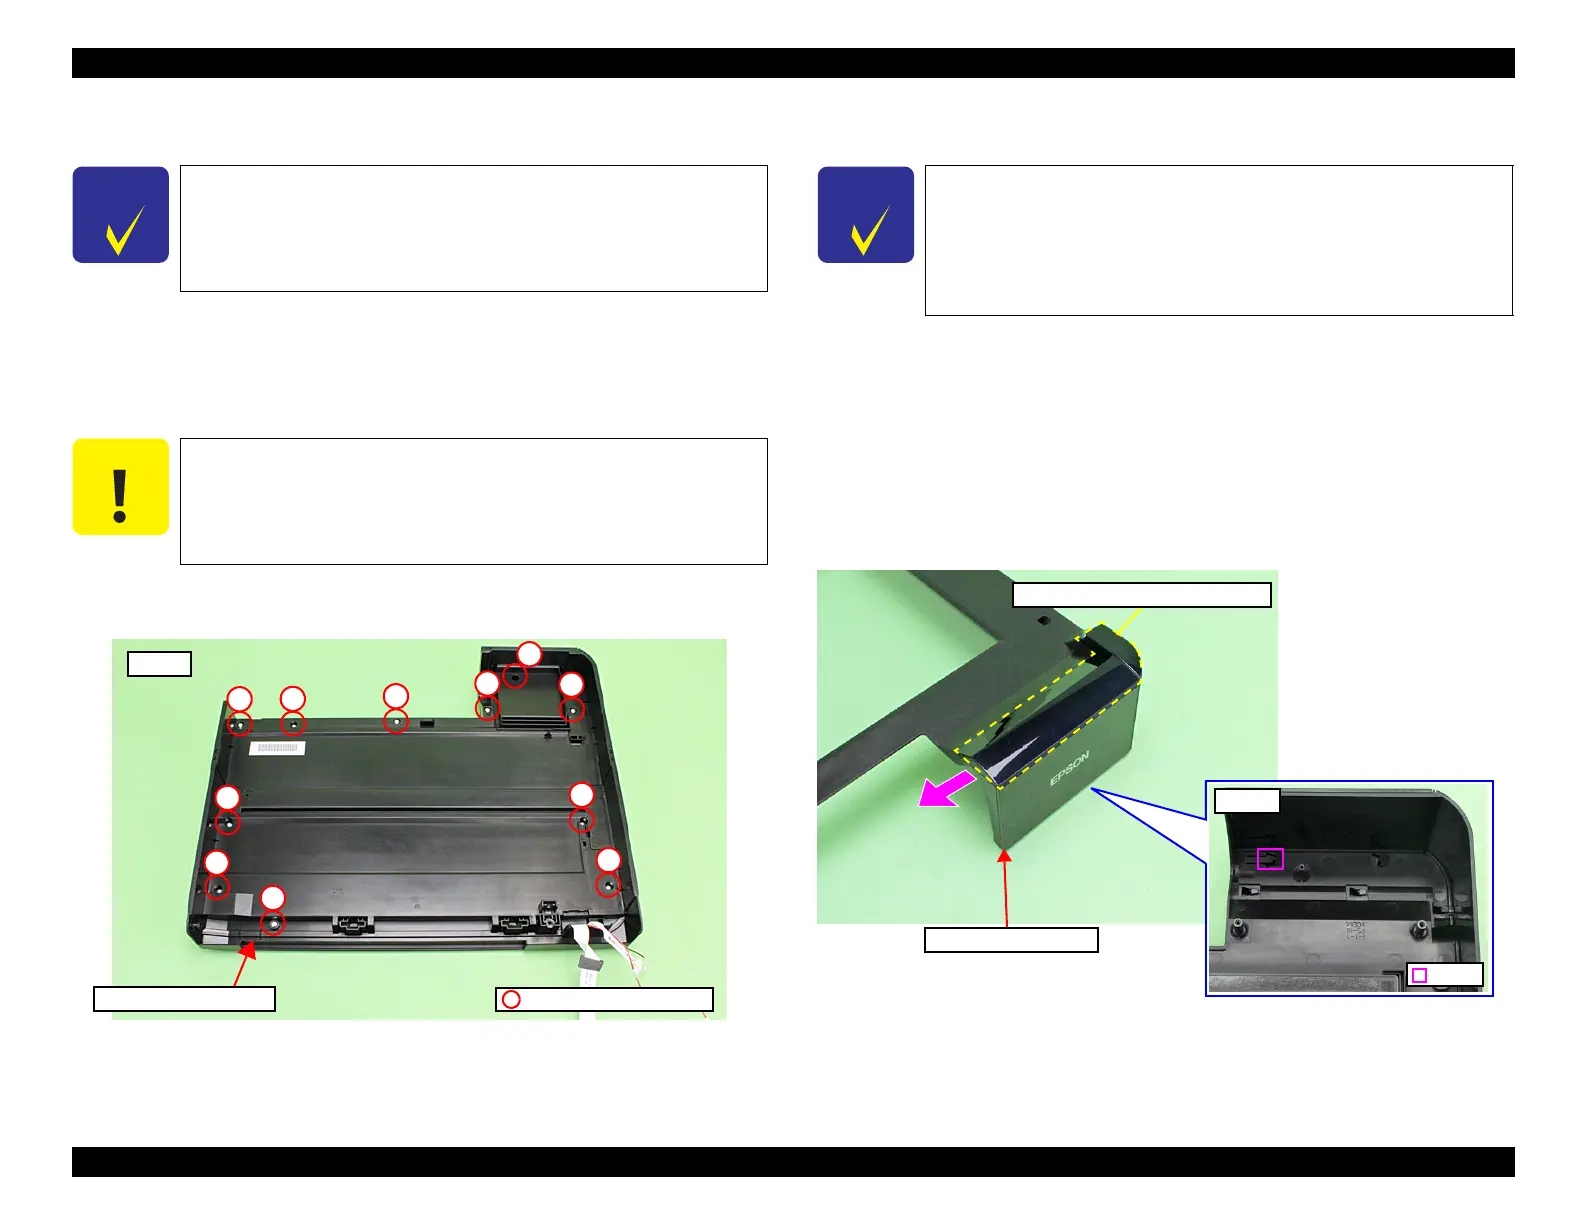
1. Remove the screws (x11) that secure the Scanner Upper Housing, and remove
the
Scanner Upper Housing.
Figure 9-36. Removing the Scanner Upper Housing
9.4.2.15 Scanner Decoration Plate Front
Parts/Components need to be removed in advance:
ADF Unit/Scanner Unit/Scanner Upper Housing
Removal procedure
1. Release the hook (x1) that secures the Scanner Decoration Plate Front from
the bottom of the
Scanner Upper Housing.
2. Slide the Scanner Decoration Plate Front in the direction of the arrow and
remove the Scanner Decoration Plate Front.
Figure 9-37. Removing the Scanner Decoration Plate Front
This section describes the disassembly/reassembly procedures of the
Scanner Upper Housing for Artisan 837/PX830FWD.
The disassembly/reassembly procedures for Artisan 730/PX730WD/
TX730WD differ from those for Artisan 837/PX830FWD, therefore,
see
"9.4.2.23 Scanner Upper Housing" (p.317) for the procedures.
It is recommended to remove the Scanner Upper Housing in a
clean room or on a clean bench to keep away from dust and
dirt.
Be careful not to damage the document glass on the Scanner
Upper Housing.
Bottom
C.B.P. 3x10 (5±1kgfcm)
Scanner Upper Housing
1
2
3
4
5
6
7
8
9
10
11
This section describes the disassembly/reassembly procedures of the
Scanner Decoration Plate Front for Artisan 837/PX830FWD.
The disassembly/reassembly procedures for Artisan 730/PX730WD/
TX730WD differ from those for Artisan 837/PX830FWD, therefore,
see
"9.4.2.24 Scanner Decoration Plate Front" (p.318) for the
procedures.
Scanner Decoration Plate Left Upper
Scanner Upper Housing

 Loading...


