Epson Artisan 810/835/837/710/725/730/Epson Stylus Photo PX810FW/TX810FW/PX820FWD/TX820FWD/PX830FWD/PX710W/TX710W/PX720WD/TX720WD/PX730WD/TX730WD
Revision G
DISASSEMBLY/ASSEMBLY Disassembly Procedures 163
Confidential
4.2.6.3 Scanner Carriage Unit
Parts/Components need to be removed in advance:
ADF Unit (Artisan 810/835/837/PX810FW/TX810FW/PX820FWD/TX820FWD/
PX830FWD only)/Scanner Unit/Scanner Upper Housing/Scanner Motor Unit
Removal procedure
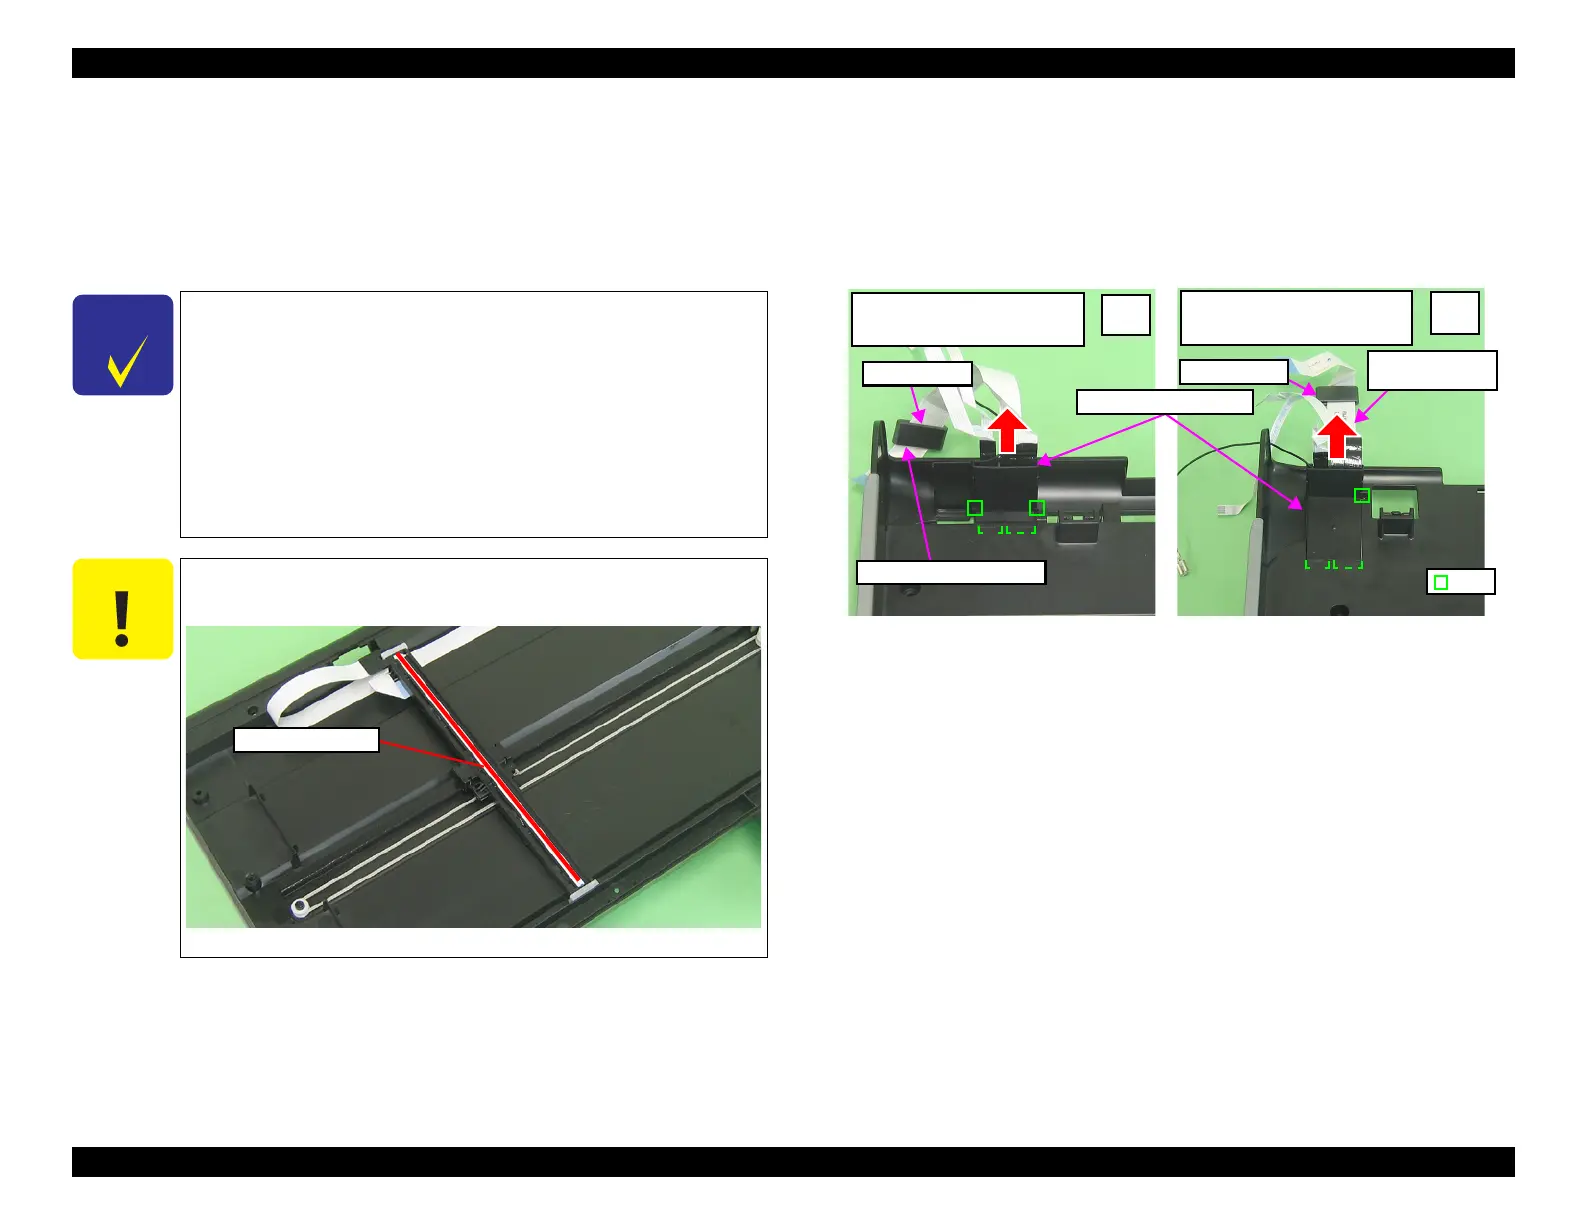
1. Release the ribs (Artisan 810/835/837/PX810FW/TX810FW/PX820FWD/
TX820FWD/PX830FWD: x4, Artisan 710/725/730/PX710W/TX710W/
PX720WD/TX720WD/PX730WD/TX730WD: x3) that secure the Scanner
Cable Cover to the Scanner Lower Housing, and remove the Scanner Cable
Cover from the Scanner Lower Housing in the direction of the arrow.
2. Pull out the ferrite core from the Scanner Carriage FFC.
Figure 4-119. Removing the Scanner Carriage Unit (1)
Some of the parts of
Artisan 810/835/837/PX810FW/TX810FW/
PX820FWD/TX820FWD/PX830FWD
differ from those of
Artisan
710/725/730/PX710W/TX710W/PX720WD/TX720WD/PX730WD/
TX730WD
.
Unless otherwise specified, this section describes the procedures for
Artisan 810/835/837/PX810FW/TX810FW/PX820FWD/TX820FWD/
PX830FWD
. The differences that may affect the disassembly/
reassembly procedures for
Artisan 710/725/730/PX710W/TX710W/
PX720WD/TX720WD/PX730WD/TX730WD
will be provided in
“Reassembly”, etc.
Be careful no to damage the Rod Lens Array when removing
Scanner Carriage Unit.
Figure 4-118. Handling the Scanner Carriage Unit
Ferrite core
Scanner Carriage FFC
Rib
Scanner Carriage
FFC
Rear
side
Rear
side
Ferrite core
Scanner Cable Cover
Artisan 810/835/837/PX810FW/
TX810FW/PX820FWD/
TX820FWD/PX830FWD
Artisan 710/725/730/PX710W/
TX710W/PX720WD/TX720WD/
PX730WD/TX730WD

 Loading...


