Maintenance 6. Maintenance Parts Replacement Procedures
194 RC620 Rev.8
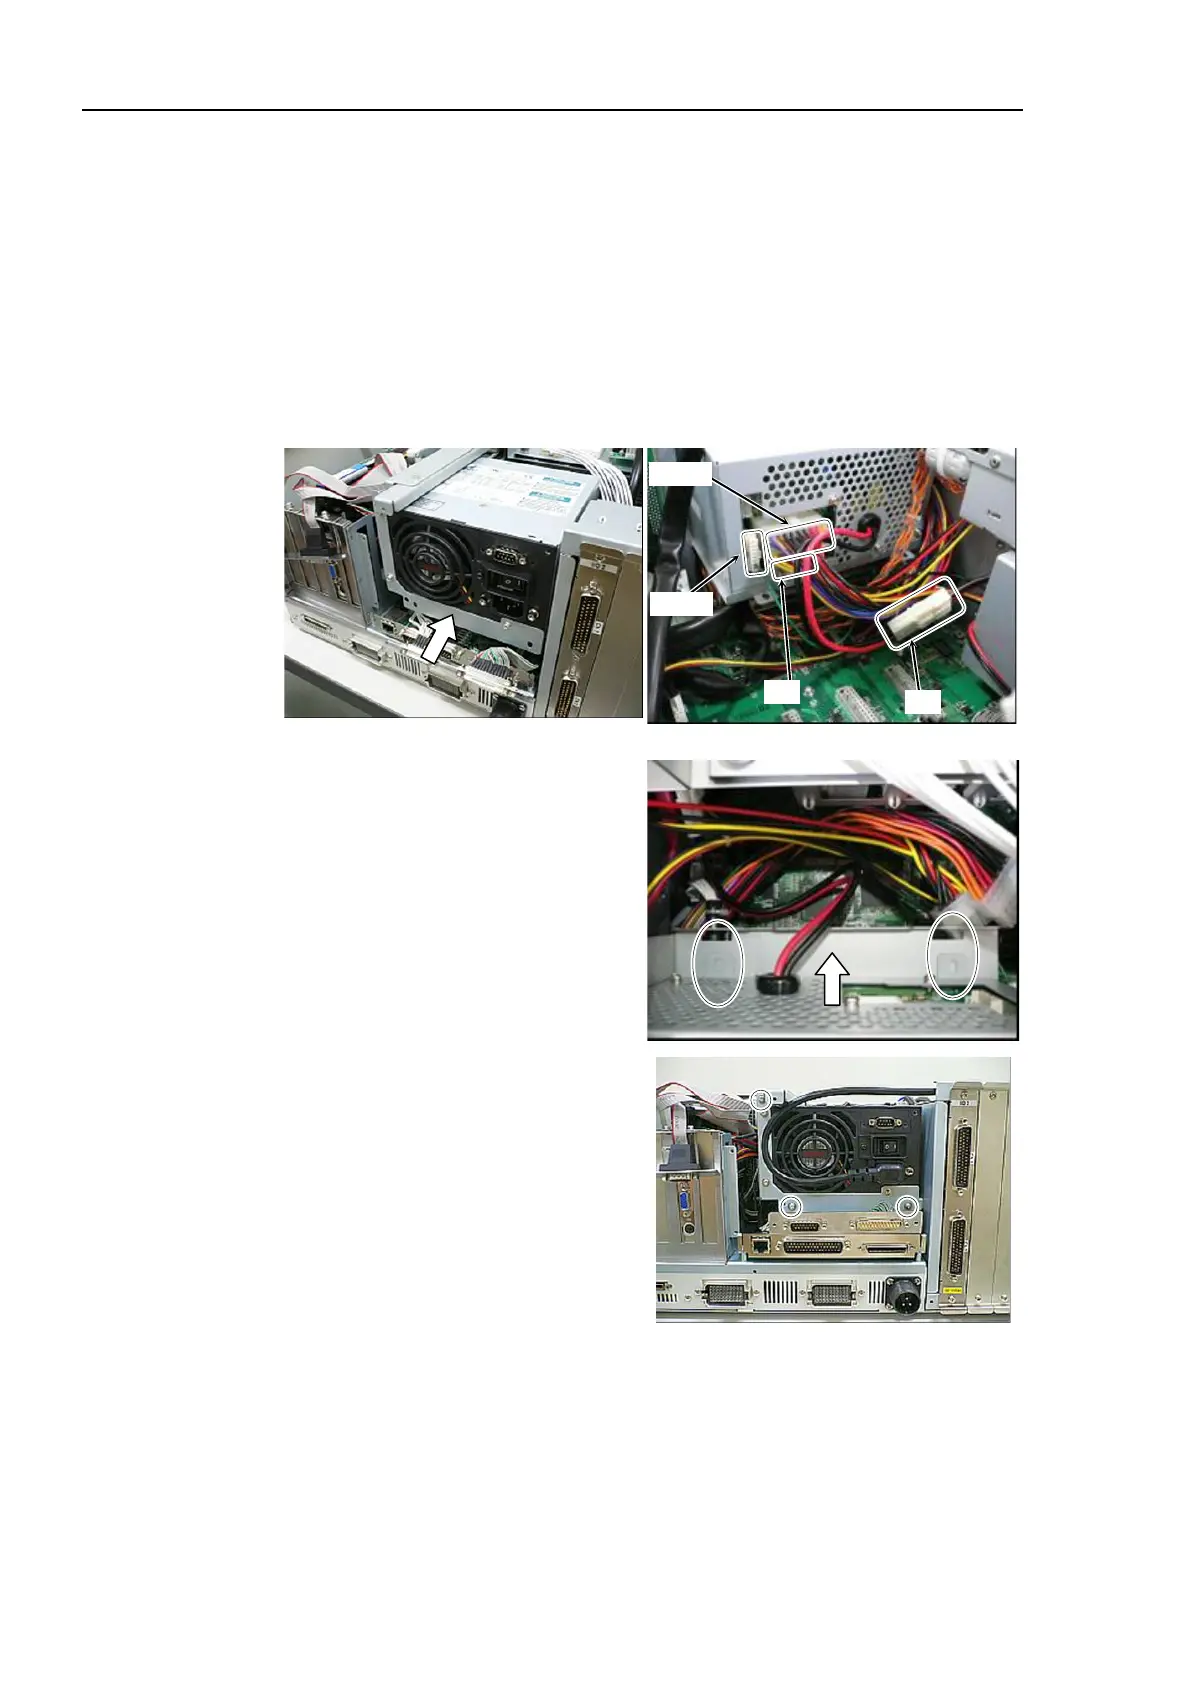
ATX)
fixing plate to a new Switching Power Supply (ATX) using 3 screws.
Switching Power Supply (ATX
) into the Controller as shown in the photo
and connect the following connectors.
Cable No. (12), (14)
Refer to Maintenance: 3.2 Diagram of Cable Connections.
UPS option is mounted:
Connect Cable No. (13).
Be careful not to catch cables and
slowly insert the
Switching Power
(ATX) all the way.
Make sure that tabs of the
Switching
(ATX) fit into the
the Controller.
Switching Power Supply
ATX) to the Controller using 3 screws.