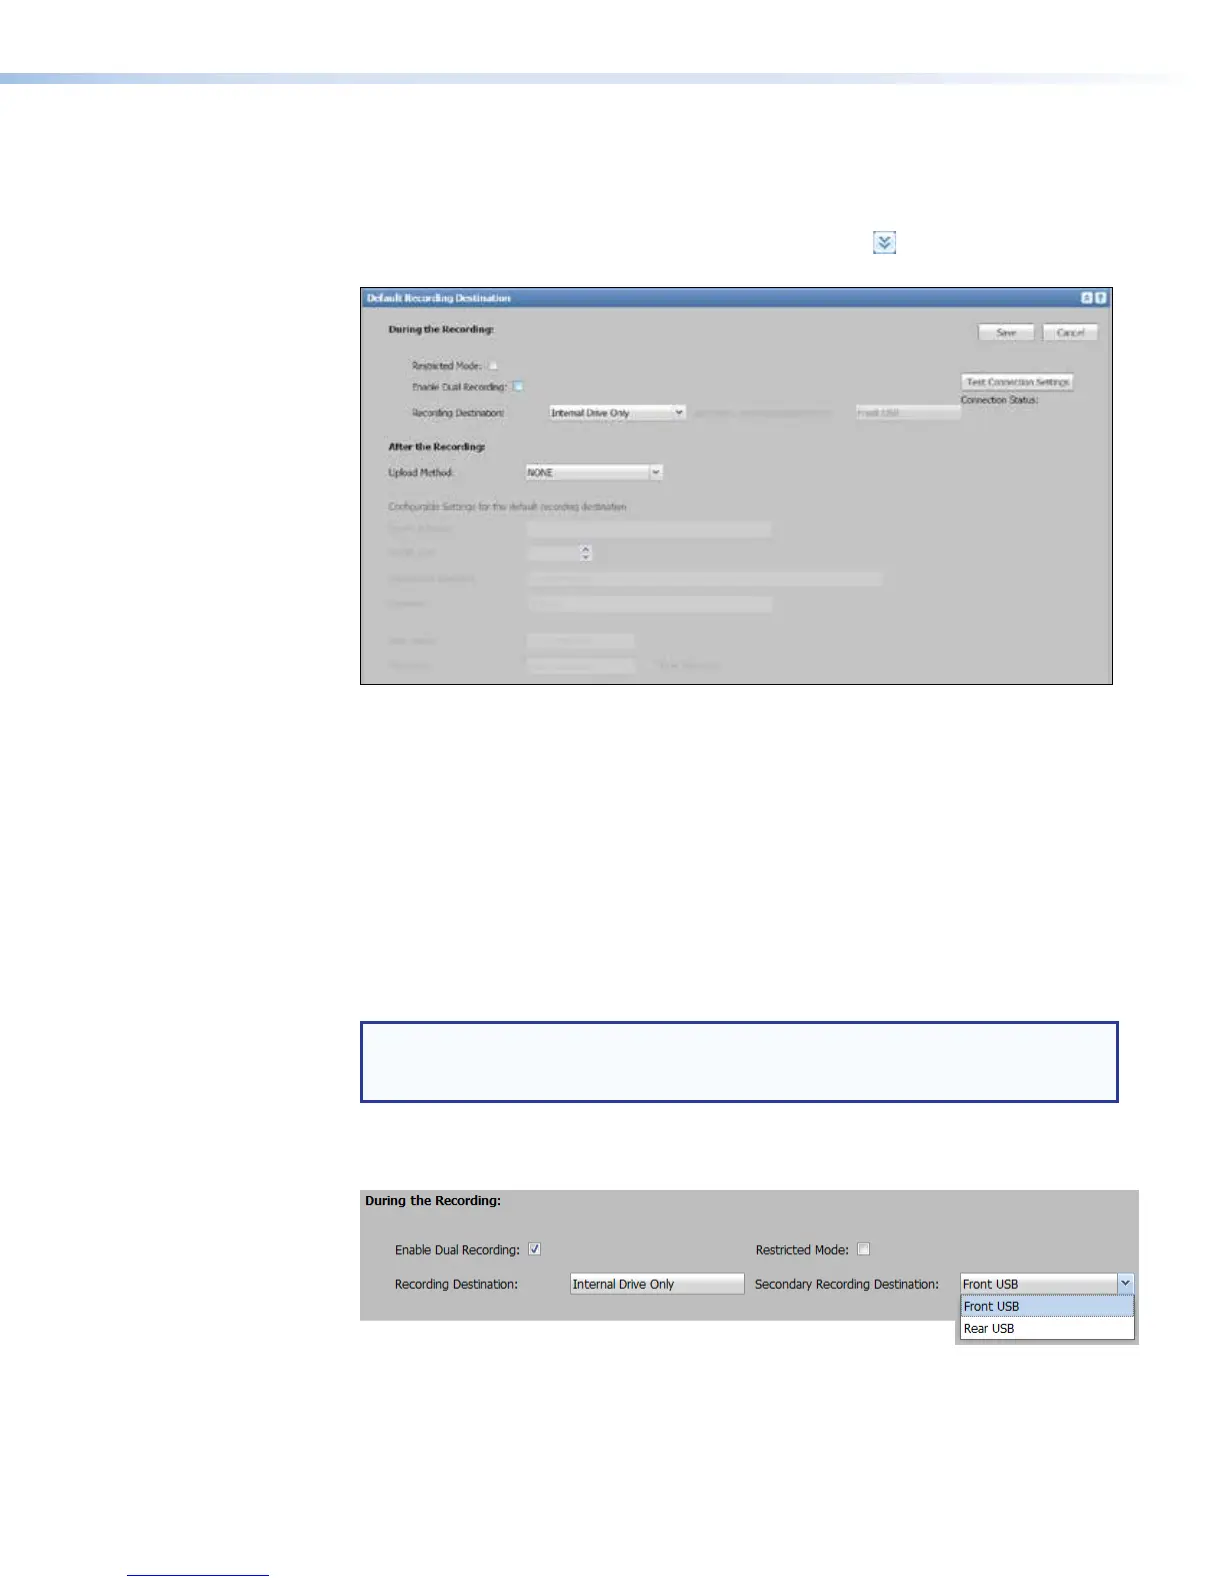
Setting the default recording destination
To choose where the recording is saved during its creation and to select the protocol for
uploading presentation recordings to a server, do the following:
1. In the System Settings page, click the Expand button (
) for the Default
Recording Destination pane. The pane opens.
2. To save recordings to a single location (to use single recording mode):
a. Verify that the Enable Dual Recording check box is disabled (unchecked).
b. In the Recording Destination drop-down list, select where recordings should
be stored as they are being made (during recording).
• Auto — The SMP351 stores recordings where space is available. The SMP stores
the recording to available locations in the following order of priority: front USB > rear
USB > internal drive.
• Internal Drive Only — This forces the unit to store recordings only in its
internal storage, even if USB drives are attached to the front and rear panel ports.
• Front USB Only, Rear USB Only — These options force the unit to record to a
USB drive connected to the corresponding port.
NOTE: The SMP 351 can automatically upload recording files to a network server
only for files that are recorded to and stored on the internal drive. If you select one
of the USB-only options, files cannot be auto-uploaded to a server.
3. To save recordings to two locations at once (to use dual recording mode):
a. Select (check) the Enable Dual Recording check box.
• The selection in the Recording Destination: field changes to Internal
Drive Only. This cannot be changed while dual recording mode is enabled.
The recording is always stored to the internal drive.
• The Secondary Recording Destination: drop-down list is enabled.
SMP351 • Web-Based User Interface 117