Position and size an image
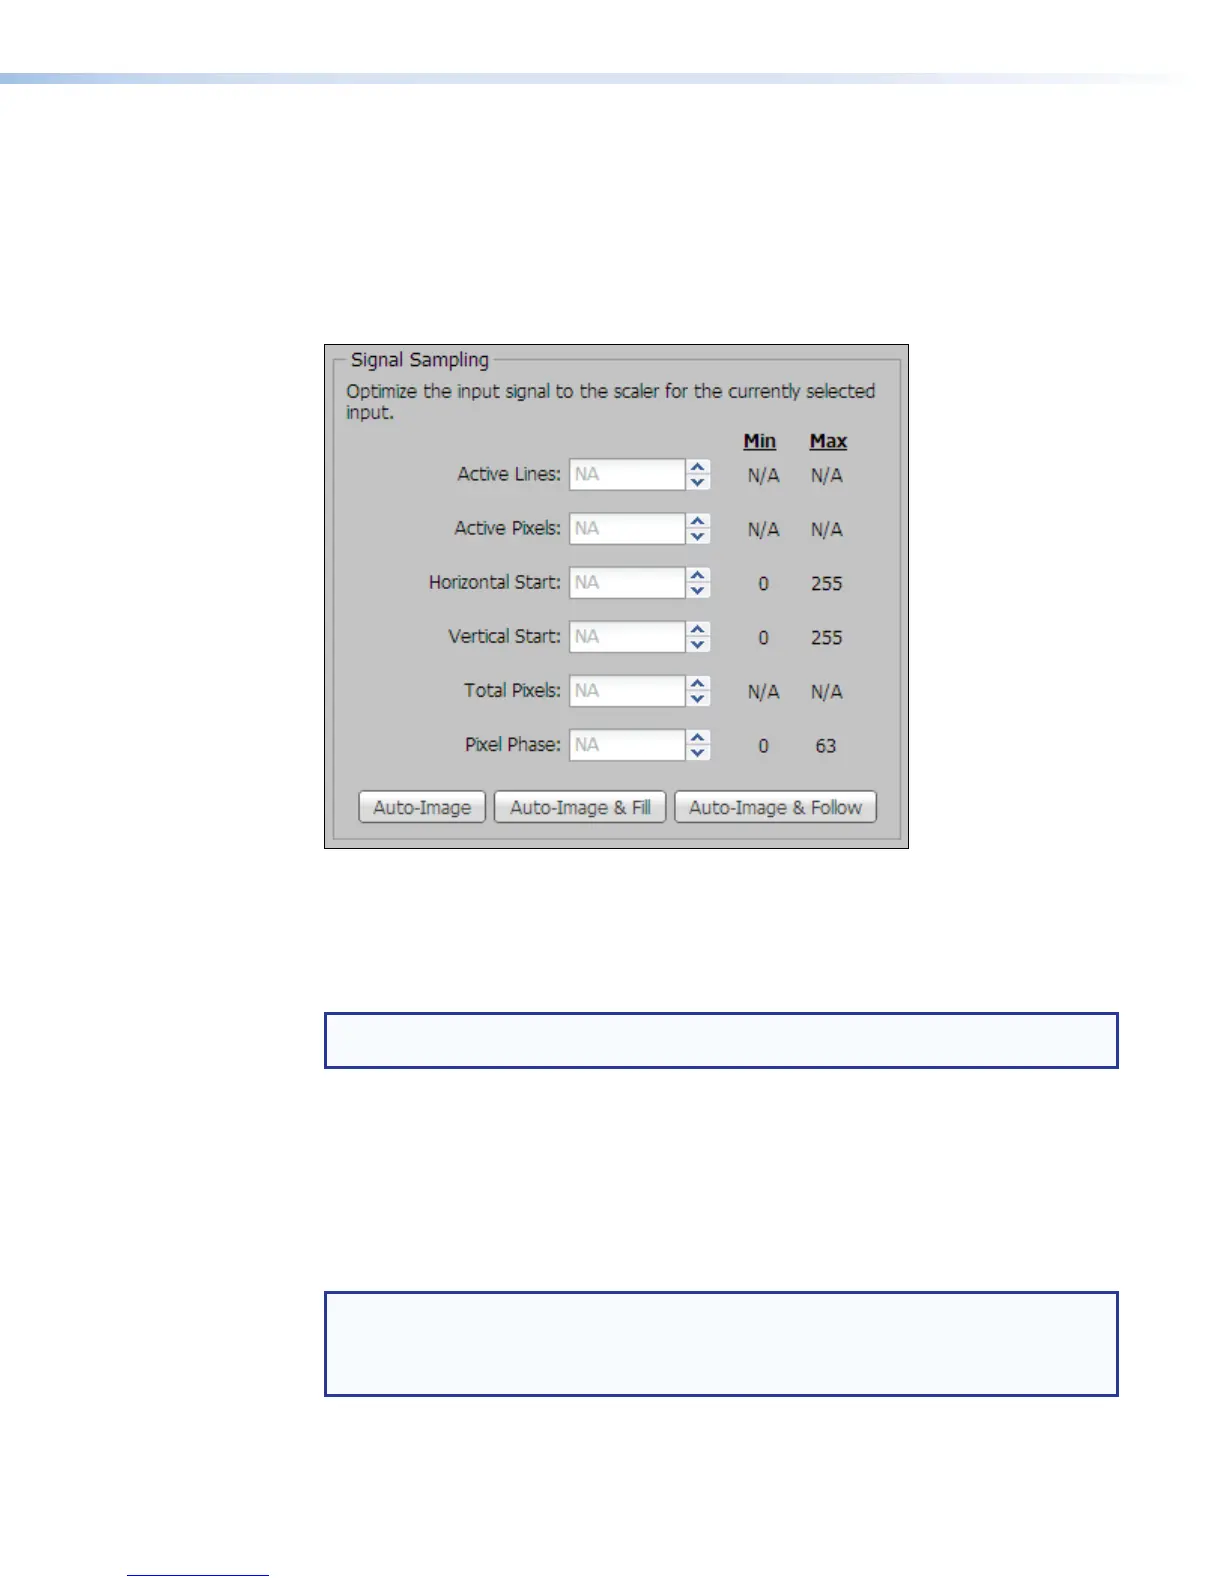
The Signal Sampling panel of the Image Settings page provides two options to size
or crop and to set the location and aspect ratio of the currently selected input:
• Manual – Set each individual detailed parameter using direct entry or the Up and Down
arrows.
• Automatic – Select one of three Auto-Image options (Auto-Image, Auto-Image &
Fill, Auto-Image & Follow) and let the SMP351 make the adjustments.
Figure 56. Signal Sampling Panel
To set up each signal sampling parameter for the active input, for each field in the Signal
Sampling panel either enter a number into the field or use the Up and Down arrows to
select a number within the range for each adjustment. Minimum and maximum values for
each setting are shown to the right of each field.
NOTE: An asterisk beside a chosen value for a signal sampling setting indicates that it is
a default value for the applied input signal.
To automatically apply signal sampling for the active input:
In the Signal Sampling panel, click one of the following buttons to select the option:
Auto-Image — Applies Auto-Image one time to the input. This setting is for analog input
signals. When selected, Auto-Image is applied whenever there is a change in the input sync.
Auto-Image automatically sizes and centers the selected input. The processor measures the
sync frequencies of an incoming video source and uses an internal table to set the active
image area, total image area, and the sampling frequency.
NOTE: Issuing an Auto-Image with overscan enabled recalls the default values of the
detected input rate. To apply Auto-Image on an ongoing basis instead of a one-time
basis, see the setting in the Input/Output Settings page (see Input/Output
Settings on page75).
Auto-Image & Fill— Fills the entire output window.
SMP351 • Web-Based User Interface 84