FT-111, User Manual Rev. 2.0.0, June 2022 Page 17 of 137
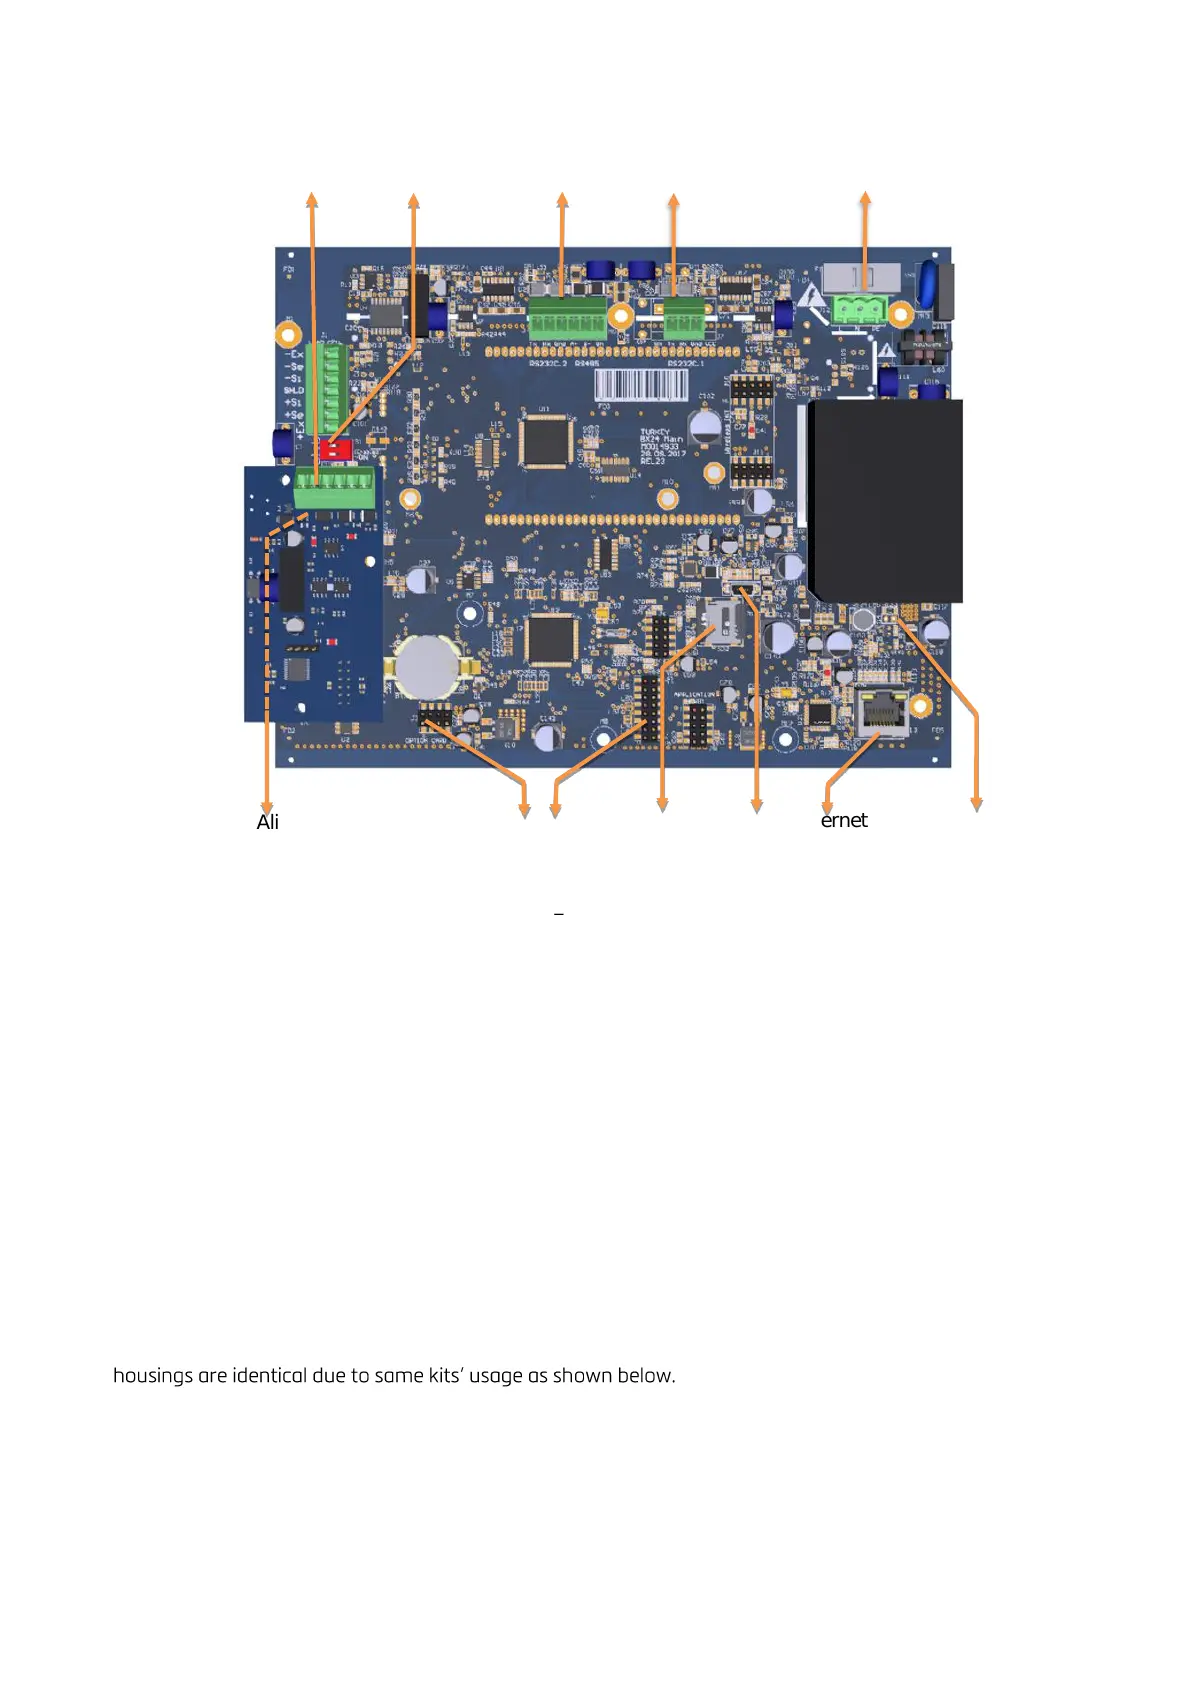
Figure 4.4 FT-111D main board
4.2 INSTALLATION STEPS
Follow the steps below carefully to install the instrument.
Step 1: Preliminary Preparations
Before starting the installation,
1. Select the weighing terminal location. Refer to recommendations in the previous section.
2. Prepare the Protective Earth (PE) cable to grounding the FT-111 housing. The protective earth should
be as good as possible for scale reliability.
3. Prepare the required power source near the weighing terminal.
4. Prepare the cabling tray, pipe etc. from platform to the weighing terminal.
Step 2: Mechanical Installation
Be sure that the mechanical installation of the instrument is done properly for long time operation life and
suitable for the electrical installation as descripted below. Installations of the desk type and wall type
If you use the weighing terminal on a desk without additional mechanical hardware, place the instrument on
the desk. Go to the next step.