▶
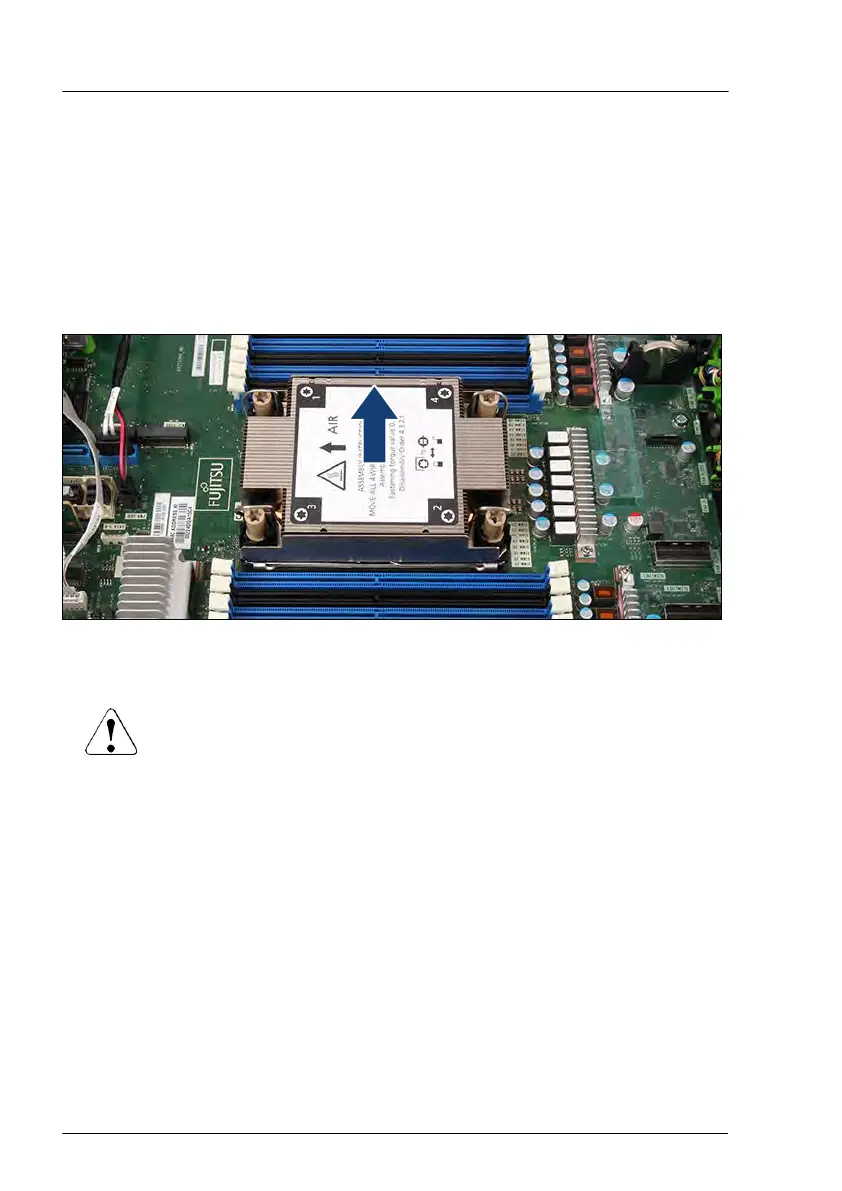
Loosen the captive screws in the sequence printed on the heat sink (1 to 4)
by proceeding as follows:
Torque: 0.9 Nm
▶
First, loosen the captive screws 1 and 2 completely.
▶
Loosen the captive screws 3 and 4 completely
.
▶
Push the four latches inward.
Figure 201: Removing the heat sink (B)
▶
Lift the heat sink together with the CPU frame out of the chassis.
CAUTION
▶
Pay special attention not to damage any system board
components surrounding the CPU socket.
Processor (CPU)
292 Upgrade and Maintenance Manual RX2530 M6

 Loading...


