23
STOP
0
3
A
B D
C
E
MYID001
..0160503010
..0160503009
1
2
7
3
4
5
6
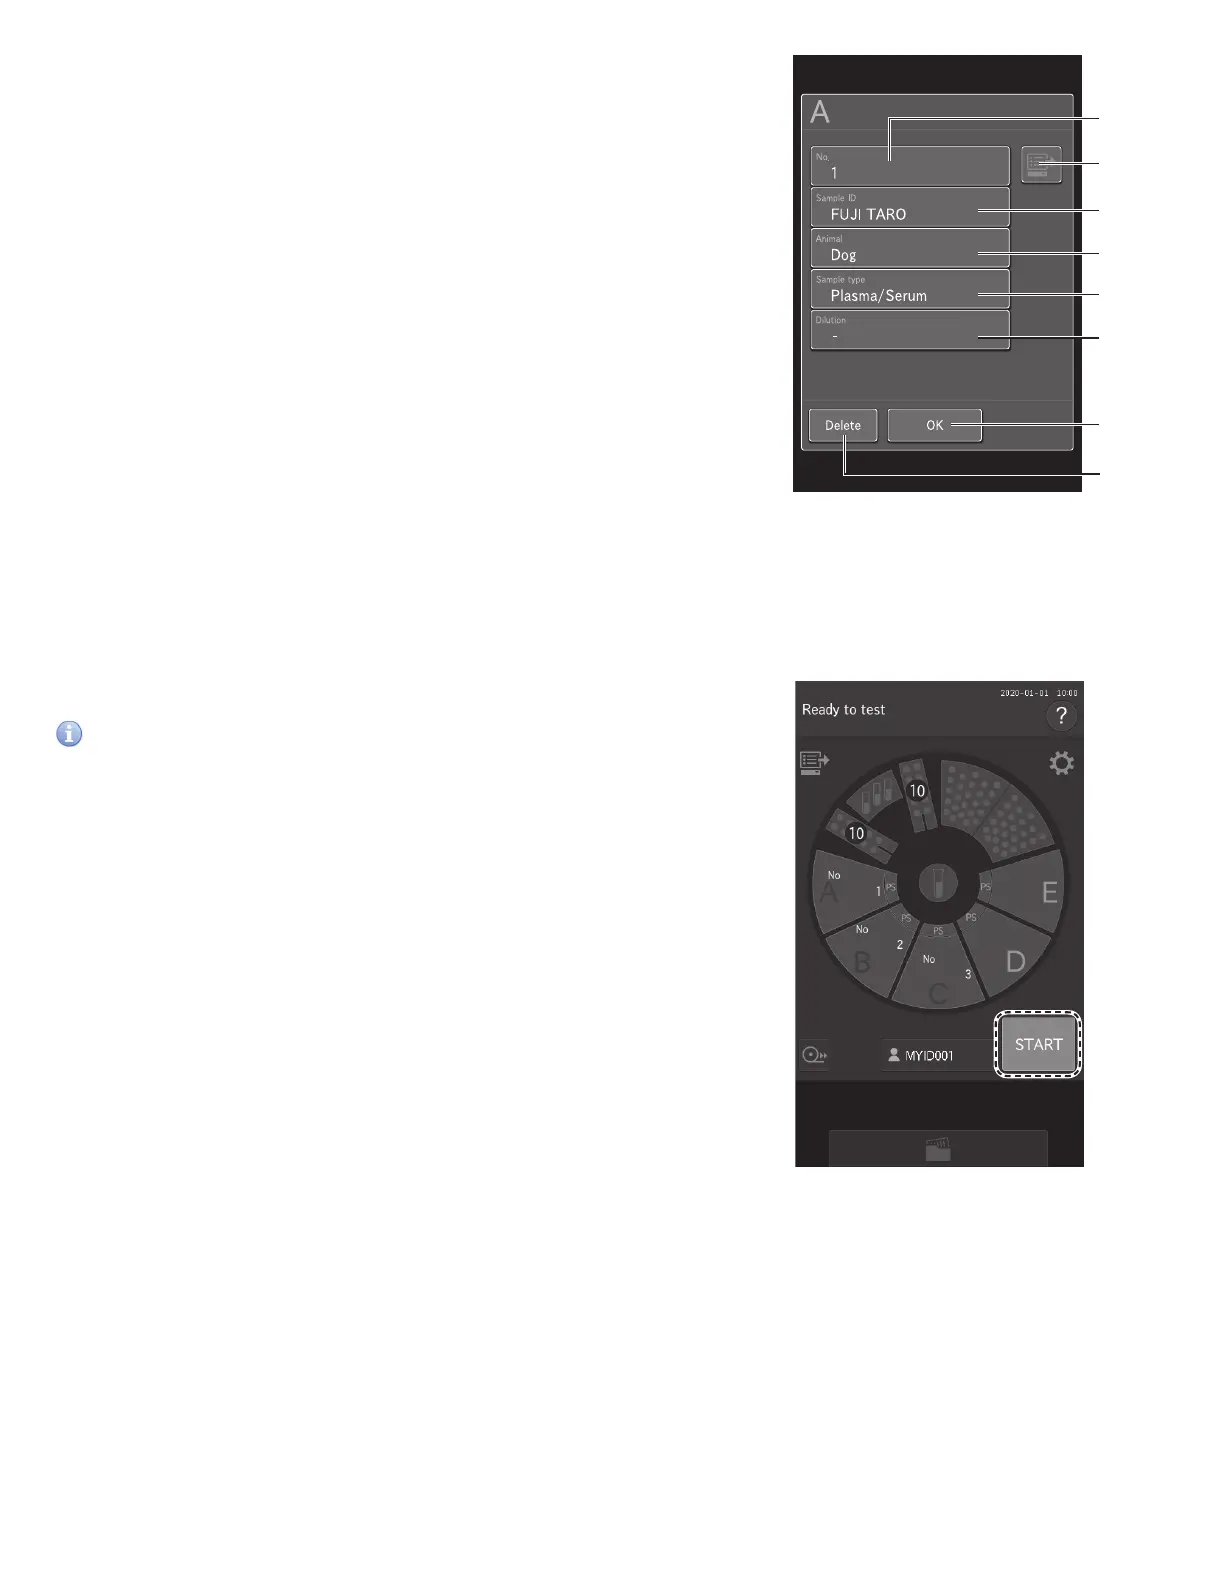
Enter or select the sample information (sample number, sample ID,
reference standard, and sample type), and then touch OK (button 7).
1. If desired, enter the sample number using the software
keyboard.
2. Obtain order information from the host PC if using work lists.
Section 4.4
3. Enter the sample ID using the software keyboard. Section 2.3
4. Select a species (animal) from the list.
5. Sample type should always be plasma/serum.
6. Select a dilution factor from the list, if desired. Section 3.6 &
8.4.12
7. Touch OK.
8. Cancel entry of the registration information, and then return
to the Measurement preparation screen.
NOTE: When the analyzer is connected to a PC, sample information
can be acquired automatically from the work list. Section 4.4.
5. Starting measurement.
Close the sampler cover.
Touch START to begin measurement.
IMPORTANT
Close the disposal box. If it is open, the measurement results will be
affected.
NOTE: When starting measurements, the analyzer recognizes the
presence of sample racks and slides, and then measures properly
loaded samples.