Installation of HP 8110A Pulse Source Subsystem (PSS) (HP 4062F
Only)
This section covers hardware installation of the HP 8110A pulse generator(s) into the system
cabinet. For HP 4062F systems ordered with Option 555 (rack mount kit for the HP 8110A
PG), the HP 8110A is not installed in the system cabinet, so you need to p erform this
installation. If you do not need to p erform this installation, skip the next pro cedure.
Installing the Customer's HP 8110A
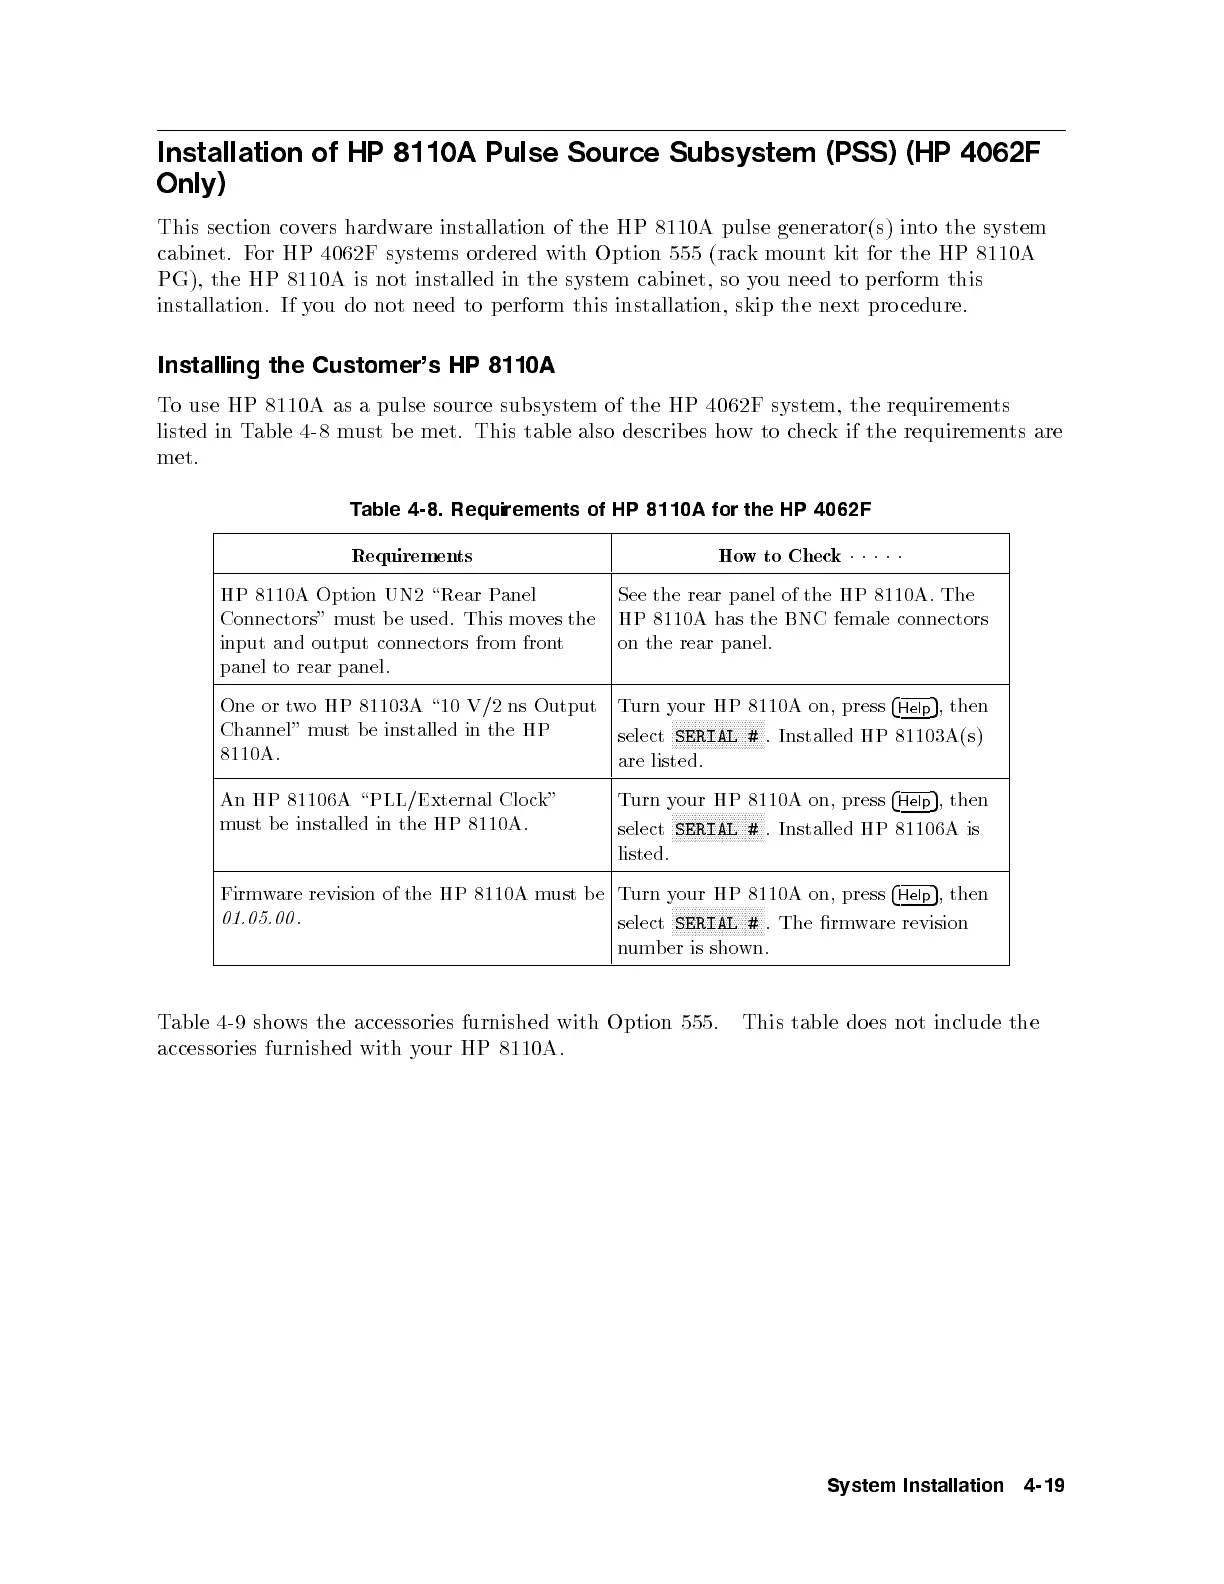
To use HP 8110A as a pulse source subsystem of the HP 4062F system, the requirements
listed in Table 4-8 must b e met. This table also describ es howtocheck if the requirements are
met.
Table 4-8. Requirements of HP 8110A for the HP 4062F
Requirements How to Check
11111
HP 8110A Option UN2 \Rear P
anel
Connectors" must be used. This moves the
input and output connectors from front
panel to rear panel.
See the rear panel of the HP 8110A. The
HP 8110A has the BNC female connectors
on the rear panel.
One or two HP 81103A \10 V/2 ns Output
Channel" must be installed in the HP
8110A.
Turn your HP 8110A on, press
4
Help
5
, then
select
NNNNNNNNNNNNNNNNNNNNNNNN
SERIAL #
. Installed HP 81103A(s)
are listed.
An HP 81106A \PLL/External Clo ck"
must be installed in the HP 8110A.
Turn your HP 8110A on, press
4
Help
5
, then
select
NNNNNNNNNNNNNNNNNNNNNNNN
SERIAL #
. Installed HP 81106A is
listed.
Firmware revision of the HP 8110A must be
01.05.00
.
Turn your HP 8110A on, press
4
Help
5
, then
select
NNNNNNNNNNNNNNNNNNNNNNNN
SERIAL #
. The rmware revision
number is shown.
Table 4-9 shows the accessories furnished with Option 555. This table does not include the
accessories furnished with your HP 8110A.
System Installation 4-19