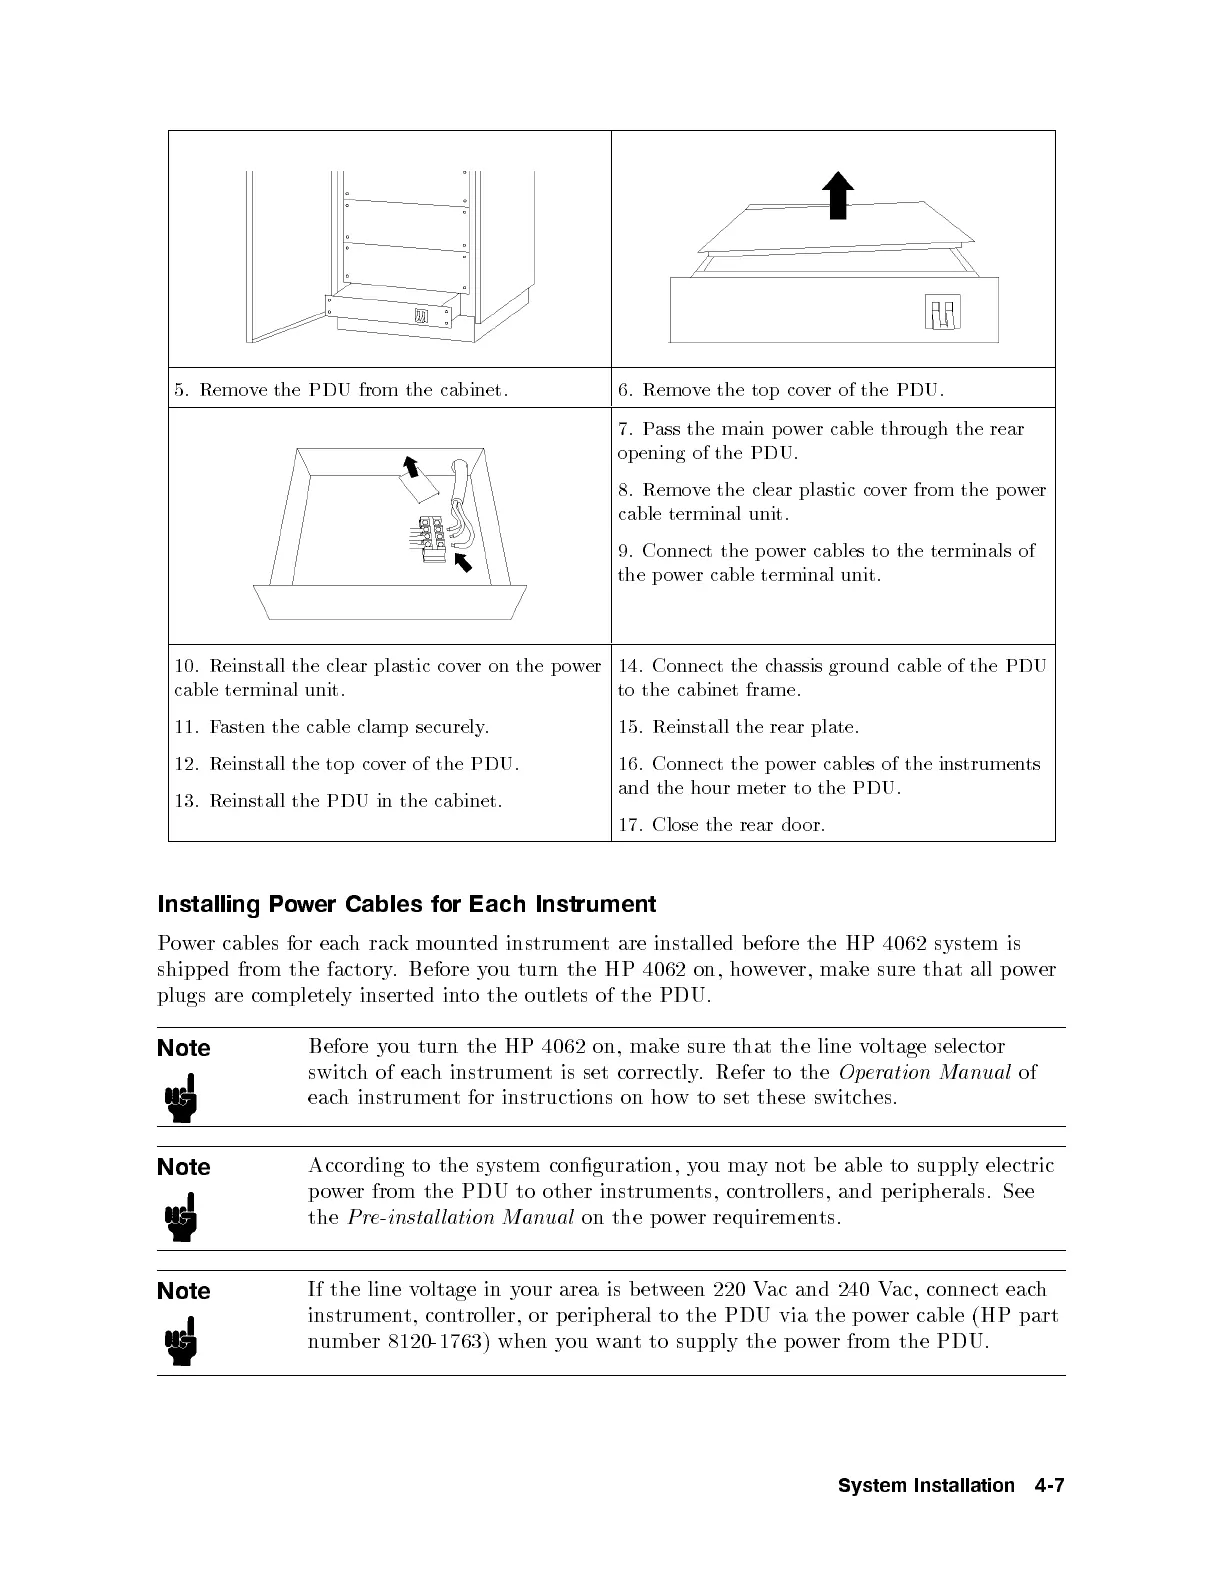
5. Remove the PDU from the cabinet. 6. Remove the top cover of the PDU.
7. Pass the main power cable through the rear
op ening of the PDU.
8. Remove the clear plastic cover from the power
cable terminal unit.
9. Connect the p ower cables to the terminals of
the p ower cable terminal unit.
10. Reinstall the clear plastic cover on the p ower
cable terminal unit.
11. Fasten the cable clamp securely.
12. Reinstall the top cover of the PDU.
13. Reinstall the PDU in the cabinet.
14. Connect the chassis ground cable of the PDU
to the cabinet frame.
15. Reinstall the rear plate.
16. Connect the power cables of the instruments
and the hour meter to the PDU.
17. Close the rear door.
Installing Power Cables for Each Instrument
Power cables for each rack mounted instrument are installed before the HP 4062 system is
shipped from the factory. Before you turn the HP 4062 on, however, make sure that all power
plugs are completely inserted into the outlets of the PDU.
Note
Before you turn the HP 4062 on, make sure that the line voltage selector
switch of each instrument is set correctly. Refer to the
Operation Manual
of
each instrument for instructions on how to set these switches.
Note
According to the system conguration, you may not be able to supply electric
power from the PDU to other instruments, controllers, and peripherals. See
the
Pre-instal lation Manual
on the power requirements.
Note
If the line voltage in your area is b etween 220 Vac and 240 Vac, connect each
instrument, controller, or p eripheral to the PDU via the power cable (HP part
number 8120-1763) when you want to supply the p ower from the PDU.
System Installation 4-7