HT2000H_en_n.doc Page 143 of 167
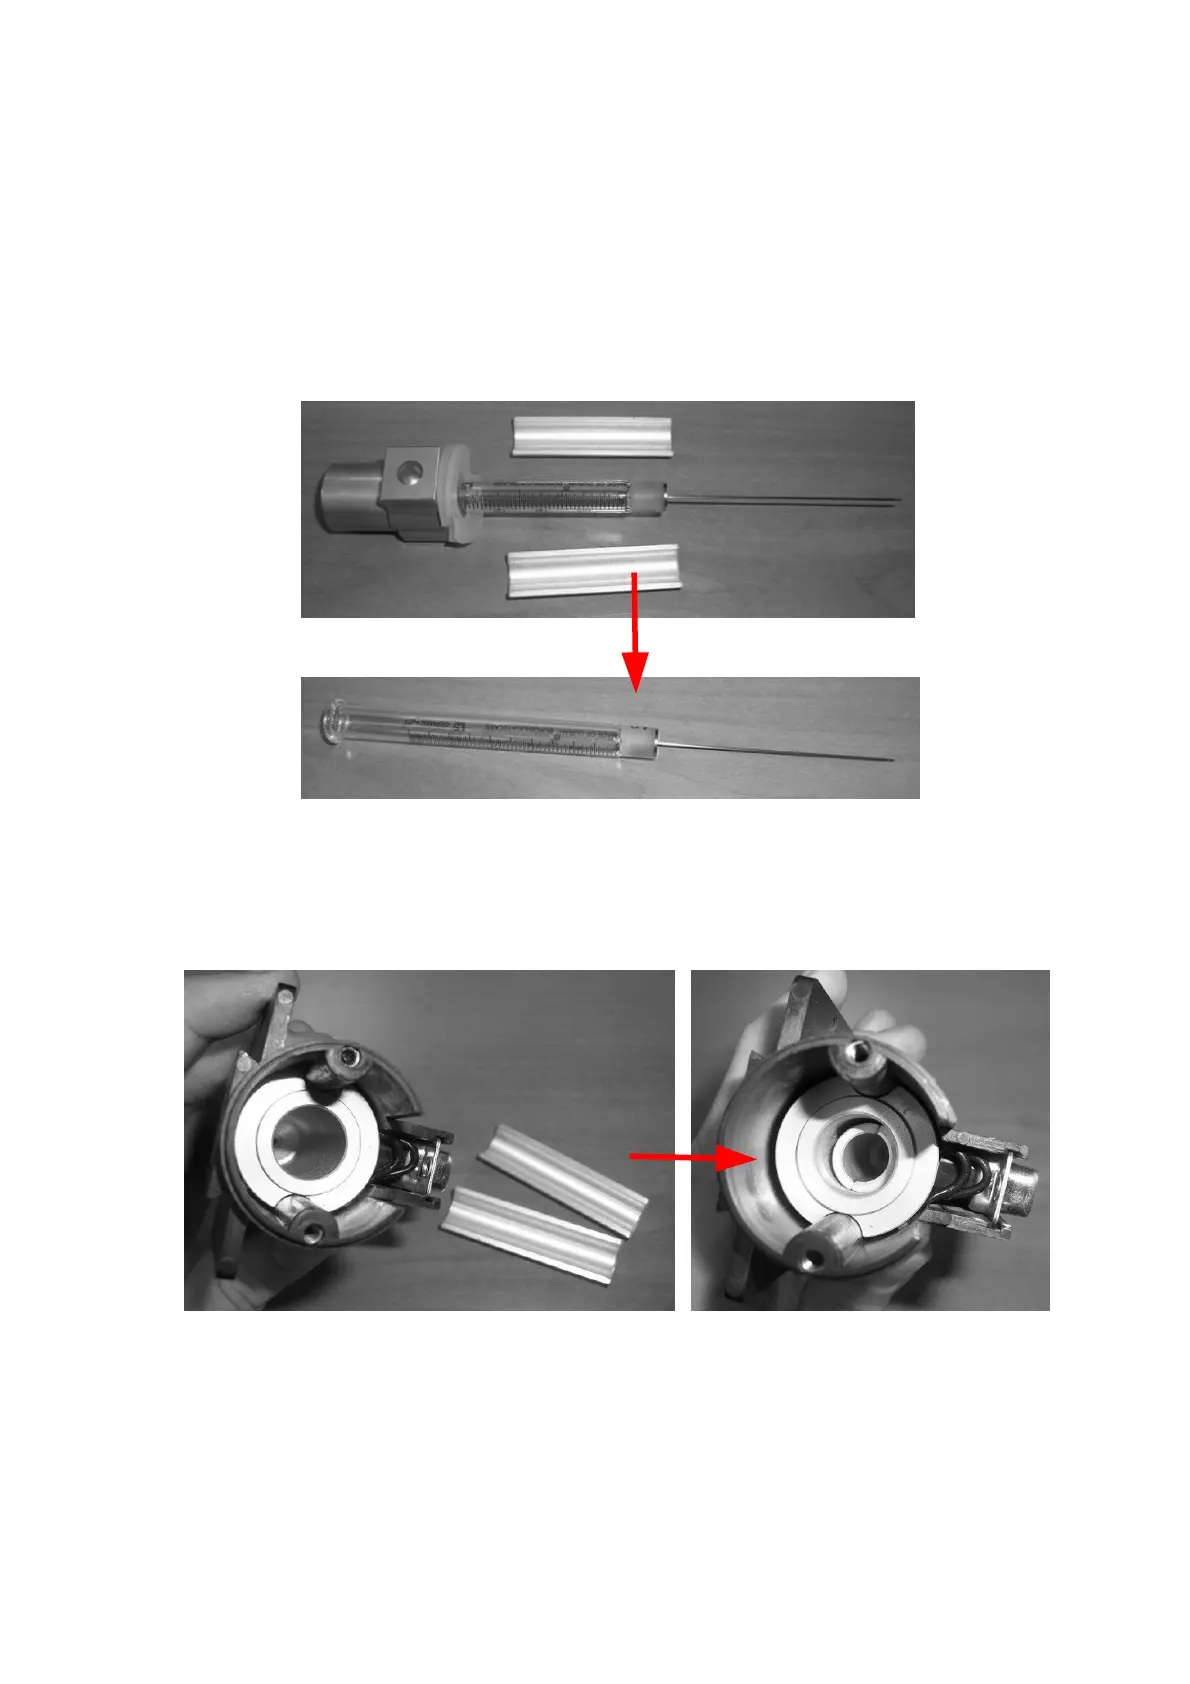
4. The insulating gasket (number 5 in Figure 112), the syringe holder (number 6 in Figure
112), the upper spacer (number 7 in Figure 112) and lower spacers (number 9 in Figure
112, not present in the 5ml syringe) must be extracted from the syringe barrel (number 8 in
Figure 112). Pull them out from the needle side and do it very gently without forcing. Please
note that all of the elements should be separated naturally during the syringe barrel
extraction from the heating body.
Figure 112: Syringe warmer assembly disassembling_2
5. Replace the syringe barrel with a new one.
6. Re-assemble the syringe warmer assembly. Start by placing the lower spacer (number 9 in
Figure 113) inside the heating body. This operation must not be carried out for 5ml syringe.
Figure 113: Lower spacers positioning