Powermax125 Service Manual 808070 189
9 – Power Supply Component Replacement
Connect the gas tube
1. Align the end of the gas tube with the push-to-connect fitting.
2. Gently push the top of the rear panel toward the power supply until the gas tube is fully seated in the
push-to-connect fitting.
3. Complete the following procedures:
a. See Install the end panel bracket on page 175.
b. See Install the component barrier on page 173.
c. See Install the power supply cover on page 172.
d. Reconnect the power and gas supply.
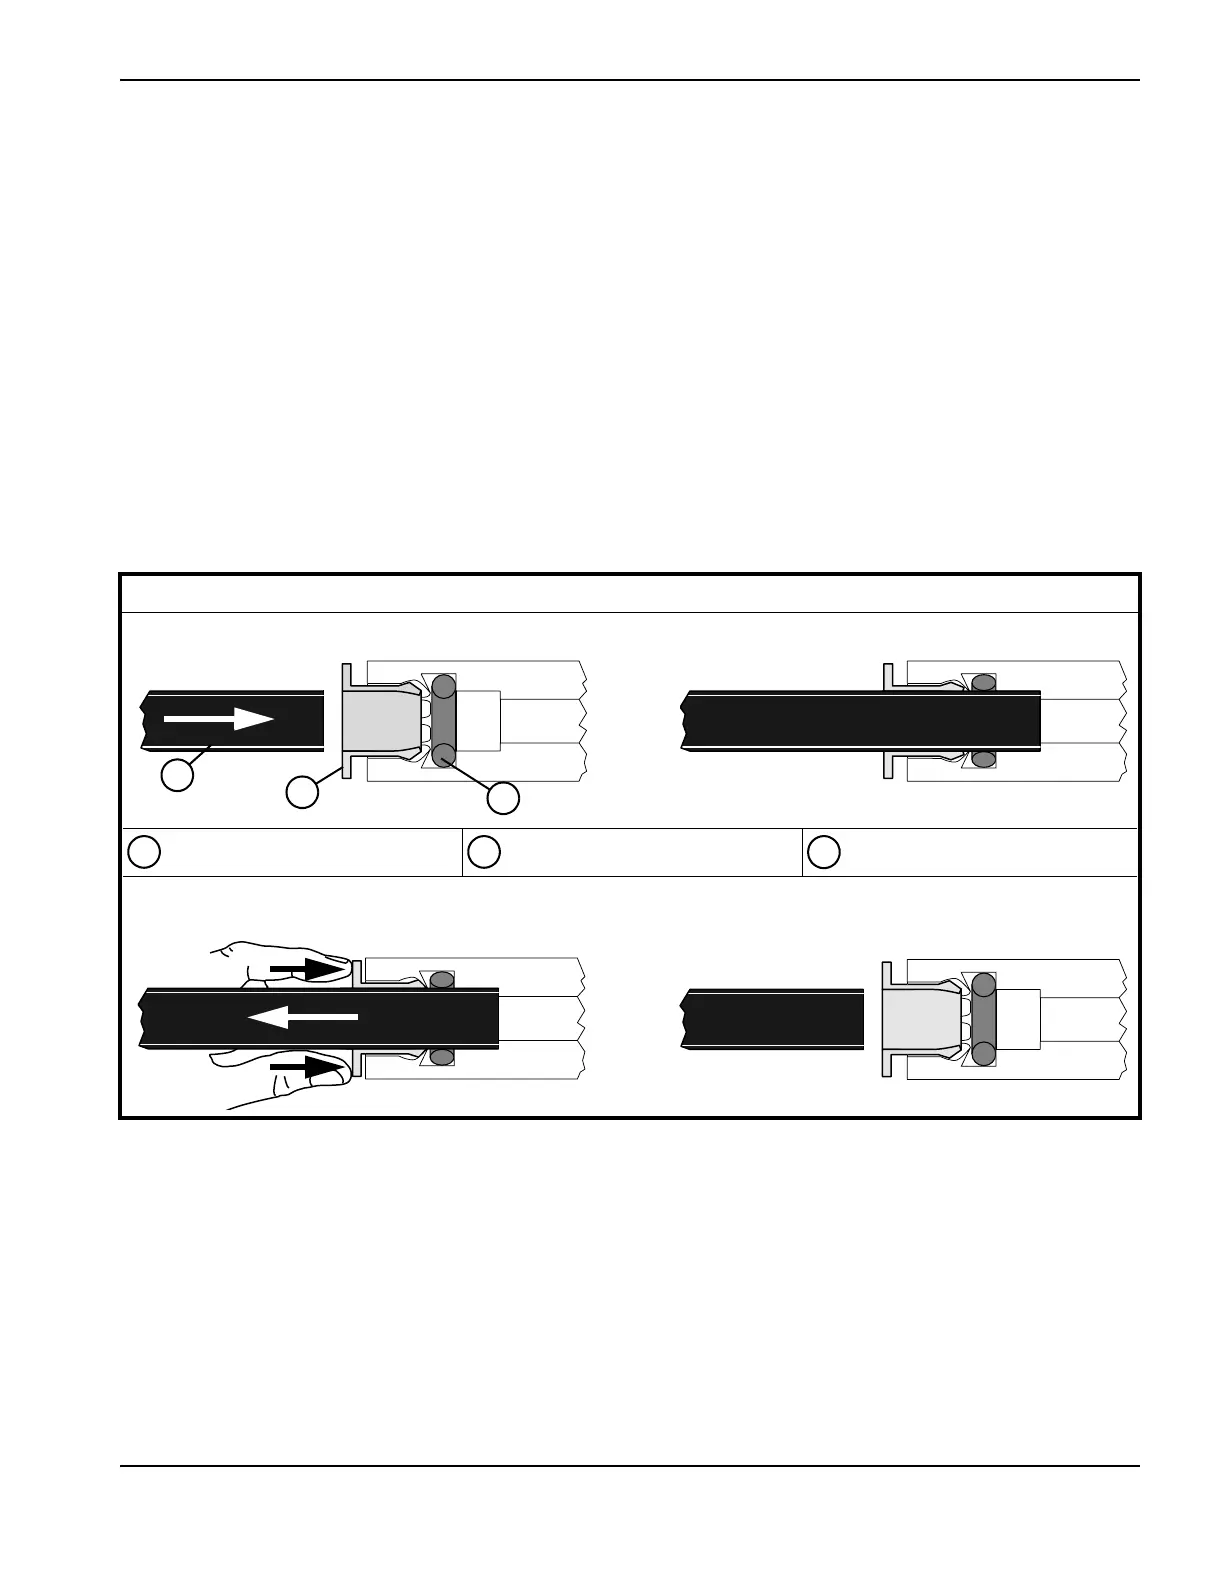
Figure 60 – How to use push-to-connect fittings
Push-to-connect
To connect, push the hose into the fitting until it stops. Pull on the hose to verify that it is secure.
To release, push the fitting collet toward the fitting, and pull the hose away from the fitting.