7–20
Transpector CPM Operating Manual
6 Remove the three screws holding the filament assembly on the shipping fixture.
7 Carefully remove the new filament from its fixture and place it on
the ion source posts.
8 Replace the three filament assembly nuts and washers. Be sure to install the
wire hold downs.
To avoid cracking the ceramic plate, do not overtighten
the three nuts.
9 Reattach the filament leads and tighten the filament lead screws.
10 Reinstall spring and ceramic sealing disk.
7.7.3 Transpector Sensor Ion Source Replacement
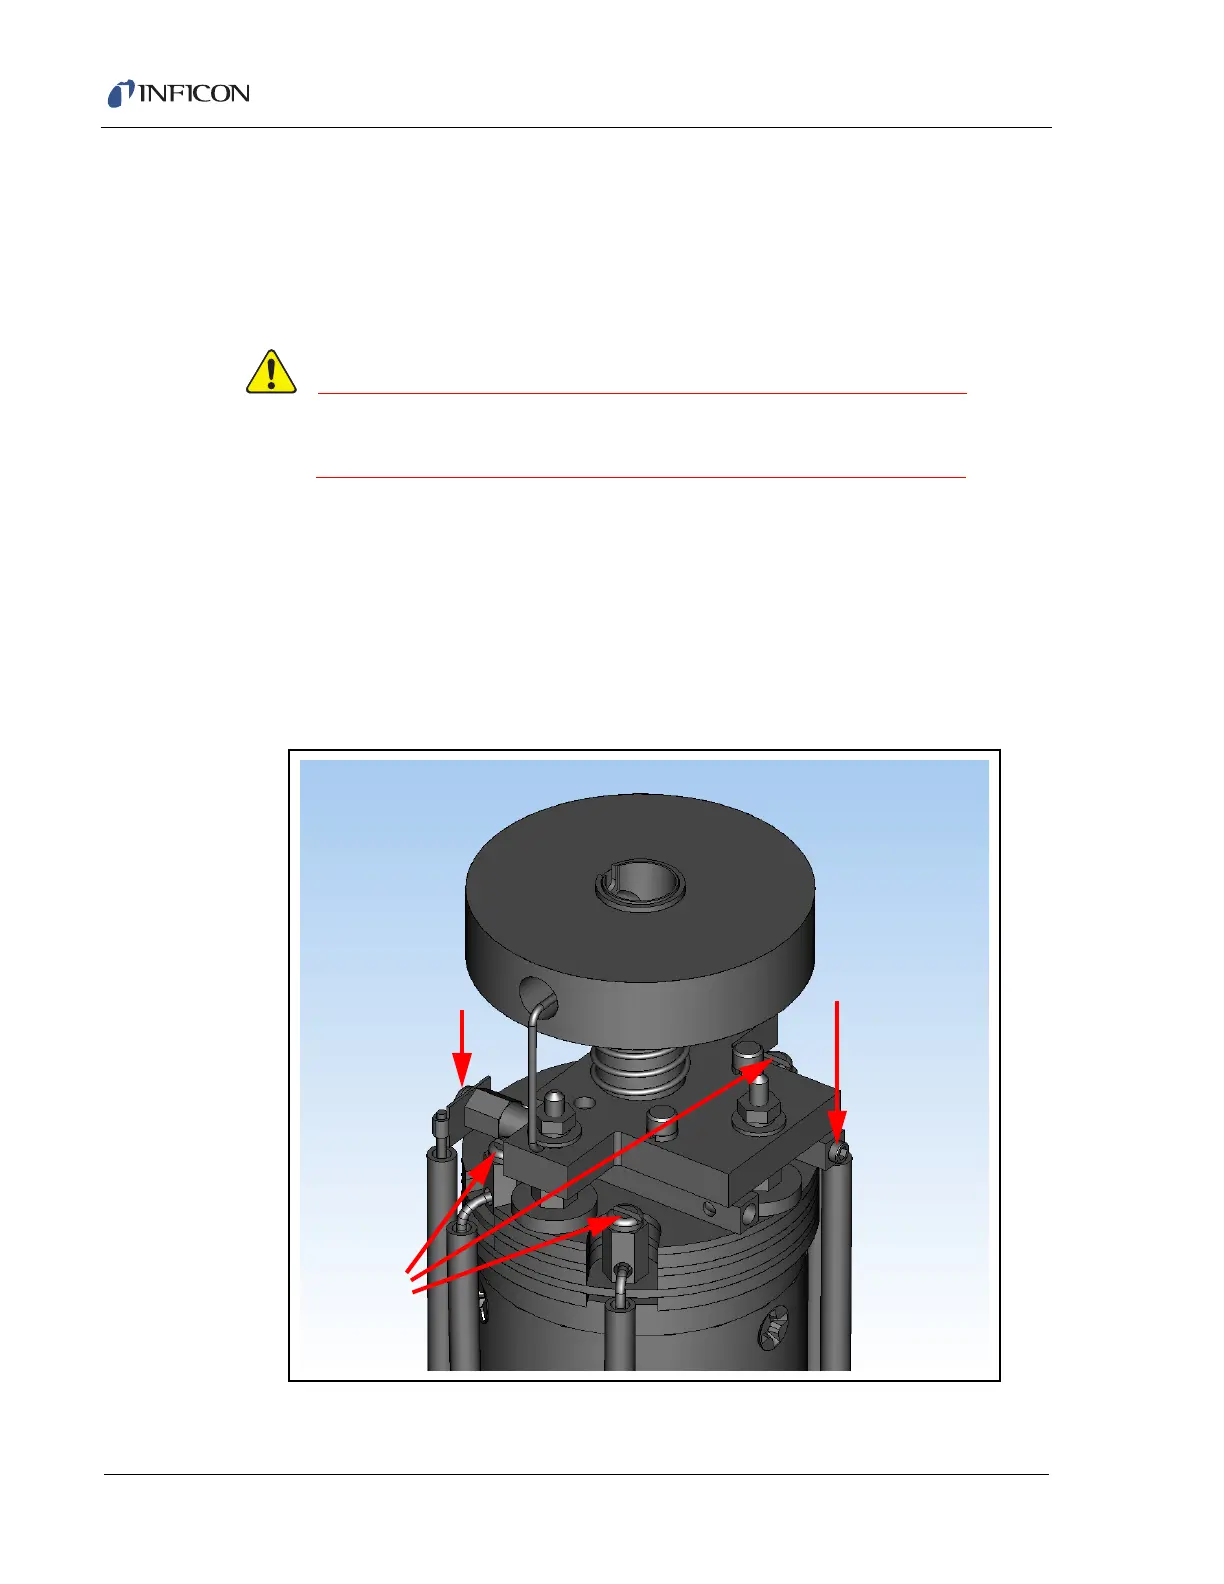
1 Remove filament lead screw (A1), loosen filament lead screw (A2), and loosen
the three screws (B) in the ion source lead connectors. (See Figure 7-20.)
Figure 7-20 Filament lead screws (A1, A2) and ion source lead connectors (B)